Description
Learn how to create your own robust and active sourdough starter from scratch with this simple, beginner-friendly guide. This method focuses on consistency and basic care, making it easy to cultivate a thriving culture for all your sourdough baking needs.
Ingredients
Instructions
1. In a medium-sized glass jar or container (at least 1-quart capacity), combine 1/2 cup (60g) unbleached flour and 1/2 cup (120ml) filtered water. Stir well with a spoon or spatula until there are no dry spots and it forms a thick, paste-like batter. Scrape down the sides of the jar. Cover the jar loosely with a lid, plastic wrap, or a clean kitchen towel. The covering should allow for airflow but prevent the starter from drying out. Place it in a warm spot (ideally 70-75 F / 21-24 C) in your kitchen, away from direct sunlight.
2. On Day 2, simply observe your starter. You might not see much activity yet, and that’s perfectly normal. It might look a bit thicker or have a few tiny bubbles. Do not feed it today. Just let it rest and continue to develop. Maintain its warm location.
3. On Day 3, you might start to see some small bubbles on the surface or along the sides of the jar, and it might smell slightly yeasty or like fermented fruit. Discard about half of the starter (approximately 1/2 cup). To the remaining starter, add 1/2 cup (60g) unbleached flour and 1/2 cup (120ml) filtered water. Stir thoroughly until smooth. Cover loosely and return to its warm spot.
4. From Day 4 onward, feed your starter once every 24 hours. Each day, repeat the Day 3 process: discard about half of the starter, then feed it with 1/2 cup (60g) unbleached flour and 1/2 cup (120ml) filtered water. Stir well, cover loosely, and return to its warm spot. During these days, you should start to see more significant activity, including consistent bubbling, a noticeable rise after feeding, and a pleasant, slightly sour, yeasty smell.
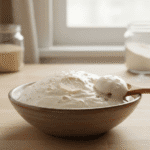
5. Continue the daily feeding routine. By Day 7-14, your starter should be consistently doubling or even tripling in size within 4-8 hours after feeding, showing many bubbles, and having a strong, tangy aroma. It should look light and airy. To test if it’s ready, perform the “float test”: drop a small spoonful of starter into a glass of water. If it floats, it’s active and ready for baking! If it sinks, continue feeding it daily until it consistently floats. Once your starter is consistently active, you can transition to storing it in the refrigerator and feeding it once a week if you’re not baking frequently.
- Prep Time: 10 minutes daily
- Cook Time: 0 minutes
- Category: baking
- Method: fermentation
- Cuisine: american
Nutrition
- Serving Size: 1
Keywords: sourdough, starter, baking, fermentation, homemade, bread, easy, beginner, culture, yeast