Description
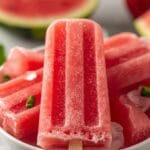
These easy frozen watermelon pops are a refreshing, healthy, and simple treat perfect for summer. Made with just one main ingredient, they are naturally sweet, hydrating, and a fun snack for all ages. They are gluten-free, dairy-free, and vegan, making them suitable for various dietary needs.
Ingredients
Instructions
1. Prepare the Watermelon: Start by washing your seedless watermelon thoroughly. Place it on a sturdy cutting board and carefully cut it into manageable chunks. Aim for pieces that are small enough to fit into your blender without overcrowding it. Remove any rind completely.
2. Blend Until Smooth: Transfer the watermelon chunks to a high-speed blender. If you’re using lime juice, add it now. Blend on high until the watermelon is completely smooth and liquid, with no lumps remaining. You might need to pause and scrape down the sides of the blender a few times to ensure everything is incorporated.
3. Taste and Adjust (Optional): Give the watermelon mixture a quick taste. If you feel it needs a little more tang, you can add a tiny bit more lime juice. If your watermelon isn’t as sweet as you’d like, you could add a very small amount of natural sweetener like a teaspoon of agave nectar or honey, but typically, watermelon is sweet enough on its own.
4. Pour into Molds: Carefully pour the blended watermelon mixture into your popsicle molds. Fill each mold almost to the top, leaving a small amount of space for expansion as the liquid freezes. If you don’t have popsicle molds, small paper cups work wonderfully; just be sure to cover them with foil and insert a stick through the foil.
5. Insert Sticks: Place a popsicle stick into the center of each mold. If using paper cups, the foil will help hold the stick upright. Ensure the sticks are positioned straight so they are easy to hold once frozen.
6. Freeze Until Solid: Transfer the filled popsicle molds to the freezer. Allow them to freeze for at least 3-4 hours, or until they are completely solid. The freezing time can vary depending on the size of your molds and the temperature of your freezer.
7. Release and Serve: Once thoroughly frozen, remove the molds from the freezer. To easily release the pops, run the molds under warm water for a few seconds (be careful not to let water get into the pops themselves). Gently pull on the stick to release the frozen pop. Serve immediately and enjoy your healthy, refreshing treat!
8. Garnish (Optional): For an extra touch, you can garnish each pop with a small fresh mint leaf before serving, especially if you’re presenting them for a special occasion or to guests.
- Prep Time: 10-15 minutes
- Cook Time: 0 minutes
- Category: dessert
- Method: freezing
- Cuisine: american
Nutrition
- Serving Size: 1 pop
Keywords: watermelon, popsicles, frozen treat, healthy snack, summer, fruit, easy, vegan, gluten-free, kid-friendly