Description
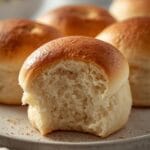
These fluffy gluten-free sourdough rolls are a game-changer for anyone looking for a delicious bread machine recipe that’s also incredibly easy to make. Achieve perfectly tender and airy rolls with minimal hands-on effort, perfect for any meal or gathering.
Ingredients
Instructions
1. Activate the Yeast and Combine Wet Ingredients: In your bread machine pan, combine the warm water, active gluten-free sourdough starter, olive oil, honey (or maple syrup), and apple cider vinegar. Give it a gentle stir to mix everything together.
2. Add Dry Ingredients: Carefully layer the dry ingredients over the wet. First, add the gluten-free all-purpose flour blend, followed by the tapioca flour, psyllium husk powder, active dry yeast, and finally, the salt. Create a small well in the center of the flour for the yeast, ensuring it doesn’t directly touch the salt or starter initially.
3. Start the Bread Machine Dough Cycle: Place the pan into your bread machine and select the “Dough” or “Gluten-Free Dough” cycle. This cycle typically includes mixing, kneading, and a first rise. Let the machine do all the work until the cycle is complete. The dough should be soft and slightly sticky.
4. Shape the Rolls: Once the dough cycle finishes, lightly flour a clean surface with gluten-free flour. Gently remove the dough from the bread machine pan. Divide the dough into 12 equal pieces. Roll each piece into a smooth ball. You can achieve this by gently cupping the dough in your hand and rolling it against the counter.
5. Second Proofing: Arrange the shaped rolls on a parchment-lined baking sheet, leaving some space between each roll. Cover the baking sheet loosely with a clean kitchen towel or plastic wrap. Let the rolls rise in a warm place for 30-45 minutes, or until they have visibly expanded and look puffy. They won’t double in size like traditional gluten dough, but they should look lighter.
6. Bake the Rolls: Preheat your oven to 375 F (190 C) during the last 10-15 minutes of the proofing time. Once preheated and the rolls are proofed, bake for 20-25 minutes, or until they are golden brown on top and sound hollow when tapped on the bottom.
7. Finish and Serve: For an extra touch, you can brush the warm rolls with melted butter or olive oil immediately after they come out of the oven. This adds shine and a little extra flavor. Let them cool slightly on a wire rack before serving warm.
- Prep Time: 15 minutes
- Cook Time: 20-25 minutes
- Category: main dish
- Method: baking
- Cuisine: american
Nutrition
- Serving Size: 1 roll
Keywords: gluten-free, sourdough, rolls, bread machine, easy, fluffy, homemade, baking, tangy, comfort food