Description
This guide focuses on creating stunning, rustic flatlay photographs of your homemade sourdough bread. It emphasizes using natural light, simple backgrounds, and complementary props to highlight the bread’s beauty without needing expensive equipment or professional skills. Perfect for home bakers and food bloggers.
Ingredients
Instructions
1. 1. Choose Your Location and Lighting: Find a spot near a window that offers soft, diffused natural light. Avoid direct sunlight, as it creates harsh shadows. A north-facing window is often ideal. Place your flat surface (e.g., wooden board) directly under or beside the window.
2. 2. Set Your Background: Lay down your chosen background material. This could be a rustic wooden board, a crumpled linen napkin, or a simple parchment paper sheet. Ensure it’s clean and free of distractions.
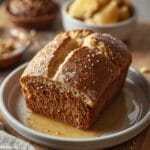
3. 3. Position Your Sourdough Loaf: Place your freshly baked sourdough loaf (whole or sliced) as the central focus of your flatlay. Experiment with different angles – a whole loaf can look majestic, while a few slices can highlight the crumb structure.
4. 4. Introduce Complementary Props: Carefully arrange your chosen props around the sourdough. Think about balance and visual flow. For example, place a small bowl of flour slightly off-center, or lay a bread lame diagonally across a corner. Don’t overcrowd the scene; less is often more.
5. 5. Add Organic Elements: A sprig of fresh herbs like rosemary or thyme can add a touch of color and life. A few scattered whole grains or a light dusting of flour can enhance the rustic feel.
6. 6. Shoot from Above: Position your camera directly overhead, parallel to your flat surface. This is the defining characteristic of a flatlay. Take several shots, slightly adjusting the position of props or the angle of your bread between each one.
7. 7. Check for Shadows and Adjust: Review your photos on your camera or phone. Look for any unwanted shadows or areas that are too dark. If needed, slightly move your setup or use a white foam board as a reflector to bounce light into darker areas.
8. 8. Edit for Perfection: A little post-processing can go a long way. Adjust brightness, contrast, and white balance to make your sourdough truly pop. Enhance the natural colors without making them look artificial.
- Prep Time: 5-10 minutes
- Cook Time: 0 minutes
- Category: photography guide
- Method: flatlay photography
- Cuisine: food photography
Nutrition
- Serving Size: 1 flatlay
Keywords: sourdough, flatlay, photography, food photography, rustic, baking, homemade bread, styling, natural light, props