Description
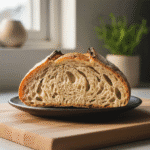
This guide demystifies achieving an open crumb in sourdough bread, focusing on key factors and techniques for a beautifully aerated interior. It covers starter activity, hydration, gluten development, fermentation, shaping, and baking, helping bakers consistently produce light, airy loaves.
Ingredients
Instructions
1. 1. Ensure a Very Active Starter: Your starter should be bubbly, smell pleasantly yeasty, and reliably double or triple in volume within 4-8 hours after feeding. A “float test” (a small dollop floats in water) is a good indicator, but visual activity is key. If your starter isn’t robust, your dough won’t rise effectively.
2. 2. Hydrate Your Dough Properly: A higher hydration dough (more water relative to flour) generally leads to a more open crumb. Start with a hydration level you’re comfortable handling, perhaps 70-75%, and gradually increase as you gain experience. The dough should feel wet and sticky but still manageable.
3. 3. Perform an Autolyse: Mix your flour and water together and let it rest for 30-60 minutes before adding your starter and salt. This allows the flour to fully hydrate and gluten to begin developing without interference, leading to a more extensible dough that can trap gas better.
4. 4. Gentle Mixing and Effective Gluten Development: After autolyse, incorporate your starter and salt. Instead of aggressive kneading, focus on gentle stretch and folds or coil folds during bulk fermentation. These techniques build gluten strength while preserving the gas bubbles forming in the dough. Aim for 3-5 sets of folds over the first 2-3 hours of bulk fermentation.
5. 5. Monitor Bulk Fermentation Carefully: This is arguably the most critical stage. The dough should increase in volume by about 30-50%, feel airy and jiggly, and show signs of gas bubbles on the surface. Learning to read your dough’s cues (temperature, texture, volume) is more important than strict timing. Over-proofing here leads to a dense crumb, while under-proofing results in a tight, uneven crumb.
6. 6. Gentle Pre-Shaping and Final Shaping: Handle the dough gently during shaping to avoid degassing it too much. For pre-shaping, lightly form it into a round or rectangle and let it rest for 20-30 minutes. For final shaping, create tension on the surface of the dough, which helps it hold its shape and rise upwards during baking. Avoid tearing the gluten network.
7. 7. Cold Proofing for Structure and Flavor: After final shaping, place your dough in a banneton or bowl and refrigerate it for 12-24 hours. The cold slows fermentation, allowing flavors to develop and the gluten structure to firm up, making it easier to handle and score, and contributing to a better oven spring.
8. 8. Bake with High Heat and Steam: Preheat your oven with a Dutch oven inside to a very high temperature (450-500 F / 230-260 C). The initial blast of heat and steam (created by baking with the lid on the Dutch oven for the first 20-25 minutes) is essential for maximum oven spring and an open crumb. The steam keeps the crust soft, allowing the dough to expand fully before the crust sets.
- Prep Time: 1 hour
- Cook Time: 50 minutes
- Category: bread
- Method: baking
- Cuisine: european
Nutrition
- Serving Size: 1 slice
Keywords: sourdough, open crumb, baking, bread, fermentation, gluten, starter, homemade, airy, technique