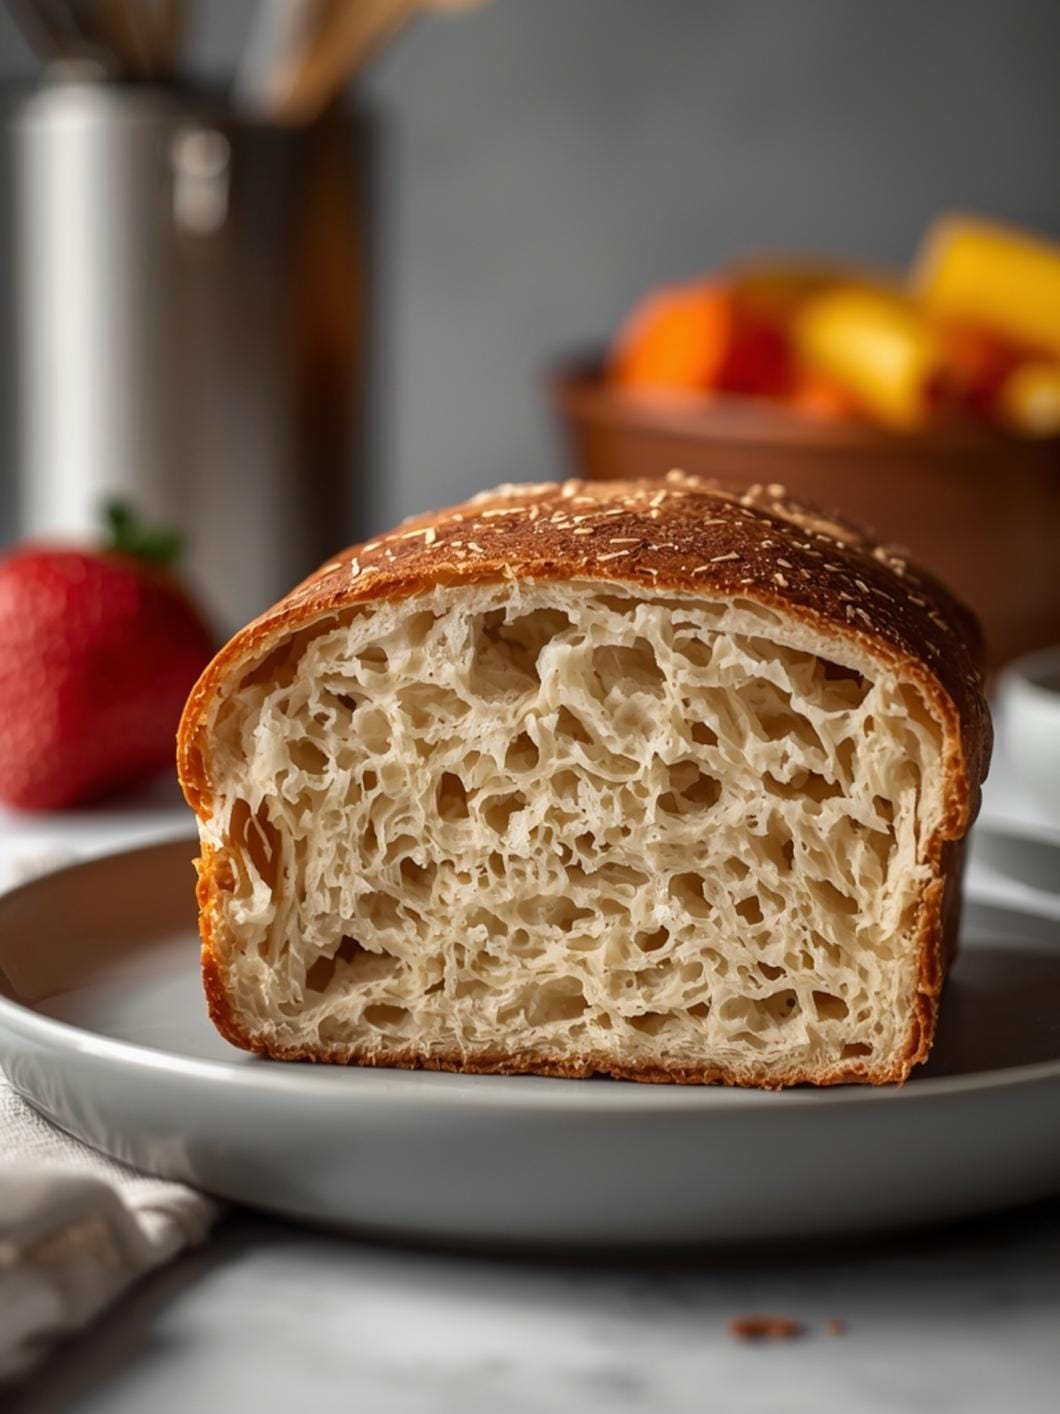
This rich chocolate sourdough loaf is a delightful treat that perfectly marries the tangy depth of sourdough with an intense chocolate flavor.

Imagine a brownie, but in bread form – that’s exactly what you get with this incredible loaf. It’s a truly unique experience that will surprise and delight your taste buds.
Whether you’re a sourdough enthusiast looking for a new way to use your starter or simply a chocolate lover seeking a comforting, decadent baked good, this recipe delivers. It’s surprisingly straightforward to make, yielding a loaf that’s perfect for breakfast, dessert, or a luxurious snack any time of day.
Table of Contents
- What You’ll Love About This Quick And Easy Recipe
- Everything You Need To Make This Recipe Without Stress
- Time Needed From Start To Finish
- How To Make It Step By Step With Visual Cues
- Easy Variations And Serving Ideas That Fit Real Life
- Common Slip-Ups And How To Avoid Them
- How To Store It And Make It Ahead Without Ruining Texture

Chocolate Sourdough Loaf
- Total Time: 7-12 hours
- Yield: 1 loaf 1x
Description
This rich chocolate sourdough loaf combines the tangy depth of sourdough with intense chocolate flavor, creating a decadent bread that’s perfect for breakfast, dessert, or a luxurious snack. It’s surprisingly straightforward to make and offers a unique, balanced taste.
Ingredients
Instructions
1. 1. Combine Starter and Water: In a large mixing bowl, gently whisk together the active sourdough starter and the warm water until the starter is mostly dissolved. The mixture should look milky and slightly frothy.
2. 2. Mix Dry Ingredients: In a separate bowl, combine the bread flour, all-purpose flour, unsweetened cocoa powder, granulated sugar, and fine sea salt. Whisk them together thoroughly to ensure even distribution of the cocoa and sugar.
3. 3. Form the Dough: Add the dry ingredient mixture to the wet starter mixture. Use a sturdy spoon or your hands to mix until all the flour is hydrated and a shaggy dough forms. Cover the bowl with a damp cloth or plastic wrap and let it rest for 30 minutes.
4. 4. Incorporate Chocolate Chips and Begin Folding: After the rest, sprinkle the dark chocolate chips over the dough. Gently fold the dough over itself several times to distribute the chocolate chips. Then, perform your first set of stretch and folds: grab a portion of the dough, stretch it upwards, and fold it over to the center. Rotate the bowl and repeat this process 3-4 times until the dough feels slightly tighter. Cover and let rest for 30 minutes. Repeat this stretch and fold process three more times, with 30-minute rests in between each set.
5. 5. Bulk Fermentation: After the final set of folds, cover the bowl and let the dough bulk ferment at room temperature for 3-5 hours, or until it has visibly increased in volume by about 30-50% and appears bubbly.
6. 6. Shape the Loaf: Gently turn the dough out onto a lightly floured surface. Shape the dough into a round or oval loaf. If using a banneton, place the shaped dough seam-side up in a lightly floured banneton. If not, place it seam-side down on a piece of parchment paper.
7. 7. Proofing: Cover the shaped dough loosely with plastic wrap or a damp towel and let it proof at room temperature for 1-2 hours, or until it feels light and airy. Alternatively, you can cold proof it in the refrigerator overnight (8-12 hours).
8. 8. Bake the Loaf: Preheat your oven to 450 F (230 C) with a Dutch oven inside for at least 30 minutes. Carefully remove the hot Dutch oven. Gently transfer the dough into the Dutch oven. Score the top of the dough with a sharp knife or razor blade. Cover the Dutch oven and bake for 30 minutes. Remove the lid and continue baking for another 10-15 minutes, or until the crust is deeply browned and the internal temperature reaches 200-210 F (93-99 C).
9. 9. Cool Completely: Carefully remove the loaf from the Dutch oven and transfer it to a wire rack. Let it cool completely for at least 1-2 hours before slicing. This step is crucial for the crumb to set properly and for the flavors to fully develop.
- Prep Time: 1 hour
- Cook Time: 40-45 minutes
- Category: bread
- Method: baking
- Cuisine: american
Nutrition
- Serving Size: 1 slice
Keywords: sourdough, chocolate, bread, dessert, baking, homemade, sweet, loaf, comfort food, brunch
What You’ll Love About This Quick And Easy Recipe
This recipe is a true gem for anyone who appreciates the complex flavors of sourdough but craves the indulgence of chocolate. It works beautifully because the subtle tang from the sourdough starter cuts through the richness of the chocolate, creating a perfectly balanced flavor profile that prevents it from being overly sweet. It’s ideal for home bakers who have an active sourdough starter and are looking for a creative, delicious way to incorporate it into their baking beyond traditional loaves. This chocolate sourdough loaf is fantastic for a weekend brunch, a special dessert, or even as a unique gift for friends and family. It’s also a wonderful way to introduce someone to the joys of sourdough baking, as the chocolate makes it incredibly approachable and appealing.
Everything You Need To Make This Recipe Without Stress
Gathering your ingredients before you begin will make the baking process smooth and enjoyable. This recipe uses standard pantry staples along with your active sourdough starter to create a truly magical loaf.
INGREDIENTS:

- 100 grams active sourdough starter (fed and bubbly)
- 300 grams warm water (around 90-95°F or 32-35°C)
- 300 grams bread flour
- 50 grams all-purpose flour
- 50 grams unsweetened cocoa powder
- 100 grams granulated sugar
- 1 teaspoon fine sea salt
- 150 grams dark chocolate chips or chunks (60-70% cocoa)
- 1 tablespoon unsalted butter, softened (for greasing the bowl)
For the flours, using a combination of bread flour and all-purpose flour gives the loaf a nice structure while keeping it tender. If you only have one type, you can use all bread flour for a chewier crumb or all-purpose flour for a slightly softer texture, though bread flour is recommended for the best chew. When choosing cocoa powder, opt for unsweetened natural cocoa powder for a deep chocolate flavor. Dutch-processed cocoa can also be used, but it might result in a slightly less intense chocolate flavor and a darker color. For the chocolate chips, feel free to use your favorite brand of dark chocolate; semi-sweet will also work if you prefer a sweeter loaf.
Time Needed From Start To Finish
This recipe involves several stages, but much of the time is hands-off. Here’s a realistic breakdown:
- Active Prep Time: 20 minutes (mixing, folding)
- Bulk Fermentation: 4-6 hours (depending on ambient temperature and starter activity)
- Shaping & Proofing: 30 minutes active, 1-2 hours proofing (or overnight cold proof)
- Bake Time: 40-45 minutes
- Cooling Time: 1-2 hours (crucial for texture)
- Total Time from Start to Finish (including cooling): Approximately 7-12 hours, with about 1 hour of active work.
How To Make It Step By Step With Visual Cues

Creating this chocolate sourdough loaf is a rewarding process. Follow these steps carefully for a delicious result.
- Combine Starter and Water: In a large mixing bowl, gently whisk together the active sourdough starter and the warm water until the starter is mostly dissolved. The mixture should look milky and slightly frothy.
- Mix Dry Ingredients: In a separate bowl, combine the bread flour, all-purpose flour, unsweetened cocoa powder, granulated sugar, and fine sea salt. Whisk them together thoroughly to ensure even distribution of the cocoa and sugar.
- Form the Dough: Add the dry ingredient mixture to the wet starter mixture. Use a sturdy spoon or your hands to mix until all the flour is hydrated and a shaggy dough forms. There’s no need to knead extensively at this stage. Cover the bowl with a damp cloth or plastic wrap and let it rest for 30 minutes (this is called autolyse, and it helps the flour absorb the water).
- Incorporate Chocolate Chips and Begin Folding: After the rest, sprinkle the dark chocolate chips over the dough. Gently fold the dough over itself several times to distribute the chocolate chips. Then, perform your first set of stretch and folds: grab a portion of the dough, stretch it upwards, and fold it over to the center. Rotate the bowl and repeat this process 3-4 times until the dough feels slightly tighter. Cover and let rest for 30 minutes. Repeat this stretch and fold process three more times, with 30-minute rests in between each set.
- Bulk Fermentation: After the final set of folds, cover the bowl and let the dough bulk ferment at room temperature for 3-5 hours, or until it has visibly increased in volume by about 30-50% and appears bubbly. The exact time will depend on the strength of your starter and your kitchen’s temperature.
- Shape the Loaf: Gently turn the dough out onto a lightly floured surface. Avoid deflating it too much. Shape the dough into a round or oval loaf. If using a banneton, place the shaped dough seam-side up in a lightly floured banneton. If not, place it seam-side down on a piece of parchment paper.
- Proofing: Cover the shaped dough loosely with plastic wrap or a damp towel and let it proof at room temperature for 1-2 hours, or until it feels light and airy. Alternatively, for a deeper flavor and easier scoring, you can cold proof it in the refrigerator overnight (8-12 hours).
- Bake the Loaf: Preheat your oven to 450°F (230°C) with a Dutch oven inside for at least 30 minutes. Carefully remove the hot Dutch oven. Gently transfer the dough into the Dutch oven (if using parchment paper, you can lift it in). Score the top of the dough with a sharp knife or razor blade. Cover the Dutch oven and bake for 30 minutes. Remove the lid and continue baking for another 10-15 minutes, or until the crust is deeply browned and the internal temperature reaches 200-210°F (93-99°C).
- Cool Completely: Carefully remove the loaf from the Dutch oven and transfer it to a wire rack. Let it cool completely for at least 1-2 hours before slicing. This step is crucial for the crumb to set properly and for the flavors to fully develop.
Easy Variations And Serving Ideas That Fit Real Life
This chocolate sourdough loaf is incredibly versatile and can be enjoyed in many ways. For a simple and satisfying treat, slice it thick and serve it with a smear of cream cheese or a dollop of whipped cream. It also makes an amazing base for French toast, adding a rich chocolatey twist to a classic breakfast.
For variations, consider adding a teaspoon of espresso powder to the dry ingredients for an even deeper chocolate flavor, or a pinch of cayenne pepper for a subtle, warming kick. Orange zest grated into the dough can also provide a bright, complementary citrus note. If you’re feeling adventurous, try swapping out some of the dark chocolate chips for white chocolate chips or even chopped nuts like walnuts or pecans for added texture. This loaf is also excellent toasted and served with a sprinkle of sea salt to enhance the chocolate. For a dessert option, a scoop of vanilla bean ice cream next to a warm slice is pure indulgence.
Common Slip-Ups And How To Avoid Them
Even experienced bakers can encounter small challenges, but knowing what to watch for can save your loaf. One common mistake is not having an active enough sourdough starter. If your starter isn’t bubbly and doubling in size after feeding, it won’t have the strength to properly leaven your dough, resulting in a dense loaf. Always ensure your starter is fed and vigorous before beginning.
Another frequent issue is over-handling the dough during shaping. While you want to create tension, too much manipulation can deflate the air pockets you’ve worked hard to build during fermentation. Be gentle and confident with your movements. Also, make sure to allow adequate bulk fermentation time. Under-fermented dough will be dense, while over-fermented dough can be difficult to handle and may collapse in the oven. Pay attention to the visual cues – the dough should be visibly larger and slightly jiggly. Finally, resist the urge to slice the loaf while it’s still warm. Cooling is essential for the internal structure to set and for the flavor to fully develop; slicing too early can lead to a gummy texture.
How To Store It And Make It Ahead Without Ruining Texture
Proper storage is key to enjoying your chocolate sourdough loaf for days. Once completely cooled, store the loaf at room temperature in an airtight container, a bread box, or a sealed

FAQs
- Can I make these ahead? Yes—prep ahead, refrigerate, then serve when ready.
- How long do leftovers last? Store covered in the fridge for 3–4 days for best texture.
- Can I adjust sweetness? Yes—add more or less sweetener to taste.
- Can I change the fruit? Yes—swap strawberries for blueberries, raspberries, or sliced banana.