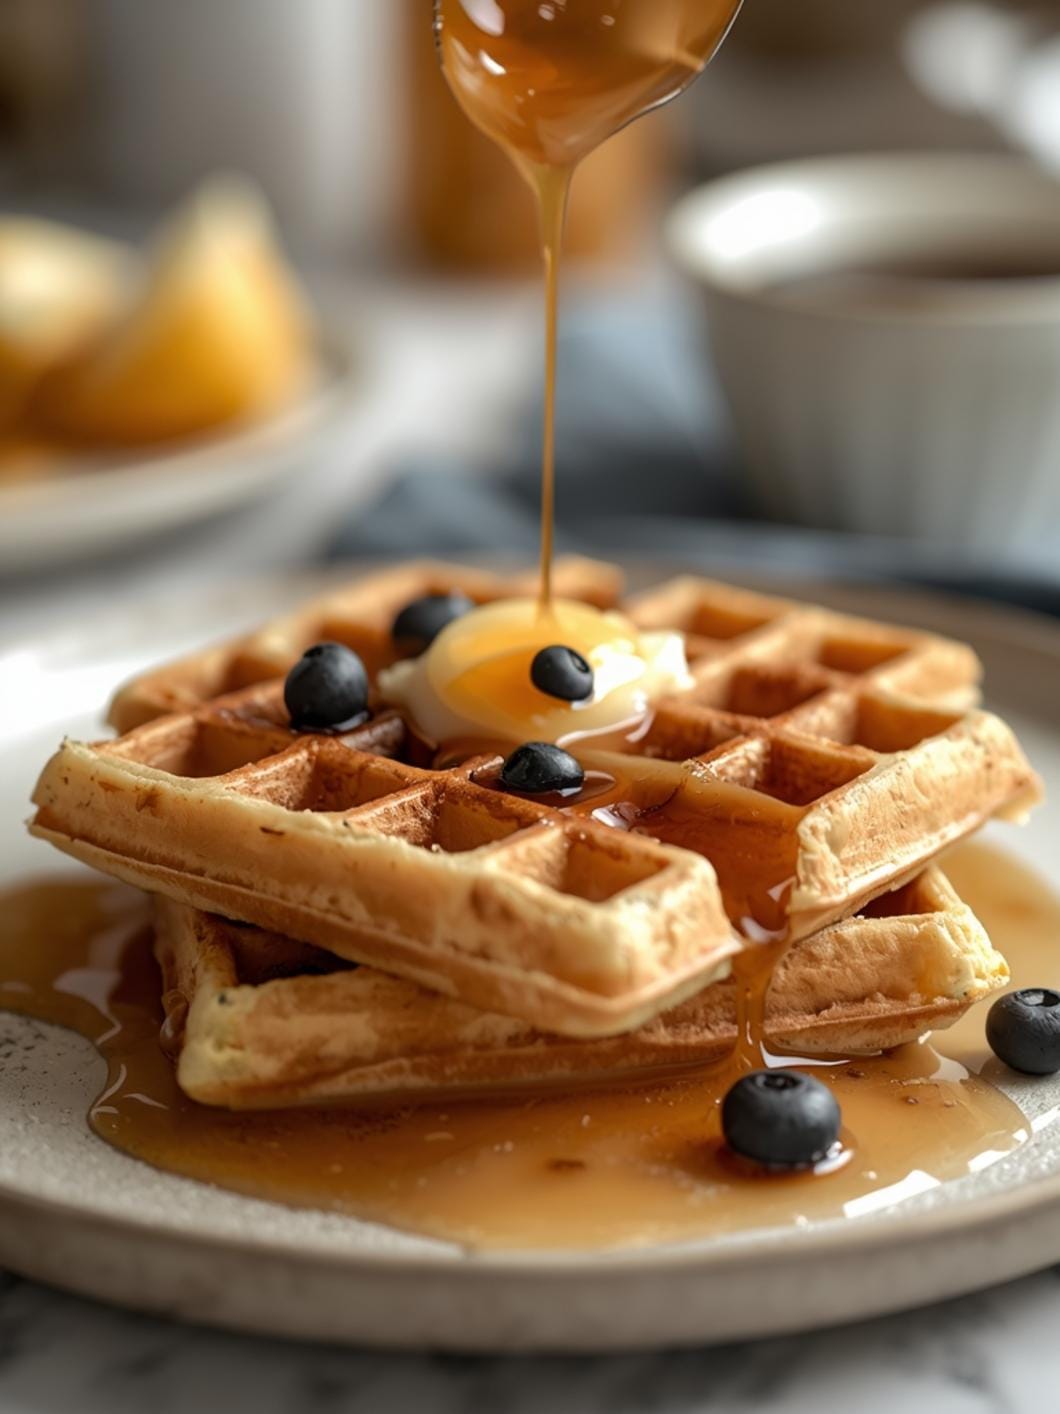
Transform your sourdough discard into these incredibly crispy and delicious homemade waffles, perfect for a delightful breakfast or brunch.

This easy sourdough discard waffle recipe is a fantastic way to use your starter, ensuring no discard goes to waste while creating a truly satisfying meal.
Discover the simple steps to achieve perfectly golden and crisp waffles every time. This recipe is designed for home cooks of all skill levels, making it a go-to for busy mornings or leisurely weekend brunches.
Table of Contents
- What You’ll Love About This Quick And Easy Recipe
- Everything You Need To Make This Recipe Without Stress
- Time Needed From Start To Finish
- How To Make It Step By Step With Visual Cues
- Easy Variations And Serving Ideas That Fit Real Life
- Common Slip-Ups And How To Avoid Them
- How To Store It And Make It Ahead Without Ruining Texture
- Questions People Always Ask Before Making This Recipe

Crispy Sourdough Discard Waffles
- Total Time: 25-30 minutes
- Yield: 4-6 waffles 1x
Description
Transform your sourdough discard into these incredibly crispy and delicious homemade waffles, perfect for a delightful breakfast or brunch. This easy sourdough discard waffle recipe is a fantastic way to use your starter, ensuring no discard goes to waste while creating a truly satisfying meal. Discover the simple steps to achieve perfectly golden and crisp waffles every time. This recipe is designed for home cooks of all skill levels, making it a go-to for busy mornings or leisurely weekend brunches.
Ingredients
Instructions
1. 1. Prepare Your Waffle Iron: Preheat your waffle iron according to the manufacturer’s instructions. Lightly grease it with cooking spray or a brush of oil, even if it’s non-stick, to ensure extra crispiness and prevent sticking.
2. 2. Combine Dry Ingredients: In a large mixing bowl, whisk together the all-purpose flour, granulated sugar, baking powder, baking soda, and salt. Make sure there are no lumps and everything is well combined.
3. 3. Mix Wet Ingredients: In a separate medium bowl, whisk together the sourdough discard, large egg, milk, melted butter (or oil), and vanilla extract until smooth.
4. 4. Combine Wet and Dry: Pour the wet ingredient mixture into the dry ingredient mixture. Stir gently with a spatula or whisk until just combined. It’s okay if there are a few small lumps; overmixing can lead to tough waffles. The batter should be thick but pourable.
5. 5. Cook the Waffles: Ladle about 1/2 to 3/4 cup of batter (or the amount recommended by your waffle iron) onto the hot, greased waffle iron. Close the lid and cook for 4-6 minutes, or until the waffle is golden brown and crispy. Most waffle irons will stop steaming and/or have an indicator light when done.
6. 6. Remove and Serve: Carefully remove the cooked waffle from the iron using a fork or tongs. Place it on a wire rack to prevent it from getting soggy while you cook the remaining batter. Serve immediately with your favorite toppings.
- Prep Time: 10 minutes
- Cook Time: 15-20 minutes
- Category: breakfast
- Method: waffle iron
- Cuisine: american
Nutrition
- Serving Size: 1-2 waffles
Keywords: sourdough, waffles, discard, breakfast, crispy, easy, brunch, homemade, quick, sweet
What You’ll Love About This Quick And Easy Recipe
This recipe is a game-changer for anyone who maintains a sourdough starter. Instead of discarding the excess, you get to turn it into something truly delicious and satisfying. It’s perfect for families looking for a hearty breakfast that feels a little special without requiring a lot of fuss. These waffles are incredibly versatile, making them suitable for a relaxed Sunday brunch, a quick weekday morning meal, or even a fun “breakfast for dinner” night. The magic lies in the sourdough discard, which lends a subtle tang and contributes to an unbelievably crispy exterior while keeping the inside wonderfully tender. It’s a fantastic way to reduce food waste and enjoy a gourmet-level breakfast right in your own kitchen.
Everything You Need To Make This Recipe Without Stress
Gathering your ingredients for these crispy sourdough discard waffles is straightforward, using common pantry staples you likely already have on hand. The star, of course, is your sourdough discard, which should be unfed and at room temperature for the best results.
INGREDIENTS:

- 1 cup sourdough discard (unfed, at room temperature)
- 1 cup all-purpose flour
- 2 tablespoons granulated sugar
- 1 teaspoon baking powder
- 1/2 teaspoon baking soda
- 1/2 teaspoon salt
- 1 large egg
- 1/2 cup milk (any kind)
- 1/4 cup melted unsalted butter or neutral oil
- 1 teaspoon vanilla extract
For the flour, all-purpose works beautifully, but you can also experiment with a 1:1 gluten-free flour blend if you have dietary restrictions. When it comes to milk, whole milk will give you a slightly richer waffle, but skim, almond, or oat milk will also work just fine. If you don’t have unsalted butter, salted butter is okay; just reduce the added salt in the recipe by a pinch. A neutral oil like vegetable or canola oil is a great substitute for butter if you prefer.
Time Needed From Start To Finish
Preparing these crispy sourdough discard waffles is surprisingly quick, making them an ideal choice even on busier days.
- Prep Time: 10 minutes
- Cook Time: 15-20 minutes (depending on your waffle iron and batch size)
- Total Time: 25-30 minutes
This timing assumes your sourdough discard is already at room temperature. The actual cooking time will vary based on how many waffles your iron makes at once and how quickly you work.
How To Make It Step By Step With Visual Cues

Making these waffles is a simple process. Follow these steps for perfectly crispy results every time.
- Prepare Your Waffle Iron: Preheat your waffle iron according to the manufacturer’s instructions. Lightly grease it with cooking spray or a brush of oil, even if it’s non-stick, to ensure extra crispiness and prevent sticking.
- Combine Dry Ingredients: In a large mixing bowl, whisk together the all-purpose flour, granulated sugar, baking powder, baking soda, and salt. Make sure there are no lumps and everything is well combined.
- Mix Wet Ingredients: In a separate medium bowl, whisk together the sourdough discard, large egg, milk, melted butter (or oil), and vanilla extract until smooth.
- Combine Wet and Dry: Pour the wet ingredient mixture into the dry ingredient mixture. Stir gently with a spatula or whisk until just combined. It’s okay if there are a few small lumps; overmixing can lead to tough waffles. The batter should be thick but pourable.
- Cook the Waffles: Ladle about 1/2 to 3/4 cup of batter (or the amount recommended by your waffle iron) onto the hot, greased waffle iron. Close the lid and cook for 4-6 minutes, or until the waffle is golden brown and crispy. Most waffle irons will stop steaming and/or have an indicator light when done.
- Remove and Serve: Carefully remove the cooked waffle from the iron using a fork or tongs. Place it on a wire rack to prevent it from getting soggy while you cook the remaining batter. Serve immediately with your favorite toppings.
Easy Variations And Serving Ideas That Fit Real Life
These crispy sourdough discard waffles are fantastic on their own, but they also serve as a wonderful canvas for creative additions and serving styles.
For a touch of sweetness and texture, you can fold in 1/2 cup of chocolate chips (mini or regular), fresh blueberries, or chopped nuts like pecans or walnuts into the batter just before cooking. If you’re feeling adventurous, a pinch of cinnamon or nutmeg can add a warm, cozy flavor. For a savory twist, try adding a tablespoon of chopped fresh chives and a sprinkle of shredded cheddar cheese to the batter; these are wonderful served with a fried egg on top.
When it comes to serving, the possibilities are endless. Classic maple syrup and a pat of butter are always a hit. For a more decadent treat, consider a dollop of whipped cream and fresh berries, a drizzle of chocolate sauce, or a scoop of vanilla ice cream. For a fun brunch spread, set up a waffle bar with various toppings like fruit compotes, yogurt, granola, and different syrups. Kids especially love customizing their own waffles! These waffles also pair wonderfully with breakfast meats like crispy bacon or sausage links.
Common Slip-Ups And How To Avoid Them
Even with a simple recipe, a few common mistakes can impact your waffle experience. Knowing how to avoid them will ensure perfect results every time.
One frequent issue is overmixing the batter. When you combine the wet and dry ingredients, stir just until the flour streaks disappear. A few lumps are perfectly fine; overmixing develops the gluten in the flour, leading to tough, chewy waffles instead of light and crispy ones.
Another common pitfall is not preheating your waffle iron sufficiently. A properly hot waffle iron is crucial for achieving that desirable crispy exterior. If the iron isn’t hot enough, your waffles will be pale, soft, and might stick. Always let your iron fully preheat, usually indicated by a light, before adding any batter.
Using too much or too little batter can also cause problems. Too much batter will overflow and create a mess, while too little will result in incomplete, uneven waffles. Refer to your waffle iron’s manual for the recommended amount, or start with about 1/2 to 3/4 cup and adjust as needed. You’ll quickly get a feel for the right amount.
Finally, stacking hot waffles can make them lose their crispness. As steam escapes from hot waffles, it gets trapped between them, making them soggy. Always place cooked waffles on a wire rack in a single layer until ready to serve, or transfer them to a warm oven (around 200°F) on a baking sheet lined with a wire rack to keep them warm and crisp while you finish cooking the batch.
How To Store It And Make It Ahead Without Ruining Texture
These crispy sourdough discard waffles are best enjoyed fresh off the iron, but they can certainly be stored and reheated while maintaining much of their delicious texture.
To store leftover waffles, allow them to cool completely on a wire rack. Once cooled, place them in an airtight container or freezer-safe bag. They will keep in the refrigerator for up to 3-4 days. For longer storage, you can freeze them for up to 2-3 months. To prevent sticking, you can place parchment paper between each waffle before freezing.
When you’re ready to enjoy them again, reheating is key to retaining crispness. Avoid the microwave, as it will make them soft and chewy. The best methods for reheating are a toaster, toaster oven, or a conventional oven. For a toaster or toaster oven, simply toast them on a medium setting until heated through and crispy. In a conventional oven, preheat to 350°F (175°C), place the waffles on a baking sheet, and bake for 5-10 minutes, or until warmed through and crisp. This makes them an excellent make-ahead option for busy mornings – just pull them from the freezer and reheat!
Questions People Always Ask Before Making This Recipe
Can I use fed sourdough starter instead of discard? While you can, the results might be slightly different. Discard, being unfed, acts more like a leavening agent when combined with baking soda and powder without adding too much extra sourness or a strong yeasty flavor. Fed starter might make the waffles a bit more airy and potentially more sour.
Do I need to let the batter rest? No, this recipe is designed for immediate cooking. The baking powder and baking soda react quickly, so you don’t need to let the batter sit and rise.
Can I make the batter ahead of time? You can mix the dry ingredients and wet ingredients separately and store them in the fridge, combining them just before cooking. Once fully mixed, the batter is best used

FAQs
- Can I make these ahead? Yes—prep ahead, refrigerate, then serve when ready.
- How long do leftovers last? Store covered in the fridge for 3–4 days for best texture.
- Can I adjust sweetness? Yes—add more or less sweetener to taste.
- Can I change the fruit? Yes—swap strawberries for blueberries, raspberries, or sliced banana.