Baking gluten-free bread can sometimes feel like a daunting task, especially when you’re just starting out.
 11")
Many recipes call for complex steps, unusual ingredients, or a long fermentation process that can intimidate even seasoned bakers. But what if there was a way to enjoy a wonderfully soft, flavorful gluten-free sourdough sandwich bread without all the fuss?
This recipe is designed with the beginner in mind, offering a straightforward path to a delicious loaf that’s perfect for sandwiches, toast, or simply enjoying with a smear of butter. We’re focusing on simplicity and reliable results, ensuring your first foray into gluten-free sourdough is a resounding success.
Table of Contents
- What You’ll Love About This Quick And Easy Recipe
- Everything You Need To Make This Recipe Without Stress
- Time Needed From Start To Finish
- How To Make It Step By Step With Visual Cues
- Easy Variations And Serving Ideas That Fit Real Life
- Common Slip-Ups And How To Avoid Them
- How To Store It And Make It Ahead Without Ruining Texture
- Questions People Always Ask Before Making This Recipe
 12")
Quick and Easy Gluten-Free Sourdough Sandwich Bread
- Total Time: 2 hours 45 minutes to 3 hours 5 minutes
- Yield: 1 loaf 1x
Description
This beginner-friendly recipe offers a straightforward path to a delicious, soft, and flavorful gluten-free sourdough loaf perfect for sandwiches, toast, or enjoying with butter. It eliminates the lengthy fermentation often associated with traditional sourdough, making it ideal for busy schedules and ensuring reliable results for those new to gluten-free baking.
Ingredients
Instructions
1. 1. Activate the Yeast: In a large mixing bowl, combine the warm water, active dry yeast, and granulated sugar. Stir gently and let it sit for 5-10 minutes until the mixture becomes foamy. This foaminess indicates that your yeast is active and ready to work.
2. 2. Combine Wet Ingredients: Add your active gluten-free sourdough starter, olive oil, and apple cider vinegar to the foamy yeast mixture. Whisk everything together until well combined. The mixture will look slightly cloudy.
3. 3. Mix Dry Ingredients: In a separate medium bowl, whisk together the gluten-free all-purpose flour blend, gluten-free oat flour, tapioca starch, and salt. Ensure there are no lumps and the ingredients are evenly distributed.
4. 4. Form the Dough: Gradually add the dry ingredient mixture to the wet ingredients, mixing with a sturdy spoon or a stand mixer with a paddle attachment on low speed. Continue mixing until a thick, sticky dough forms. Gluten-free dough will not be elastic like wheat dough; it will be more like a very thick batter.
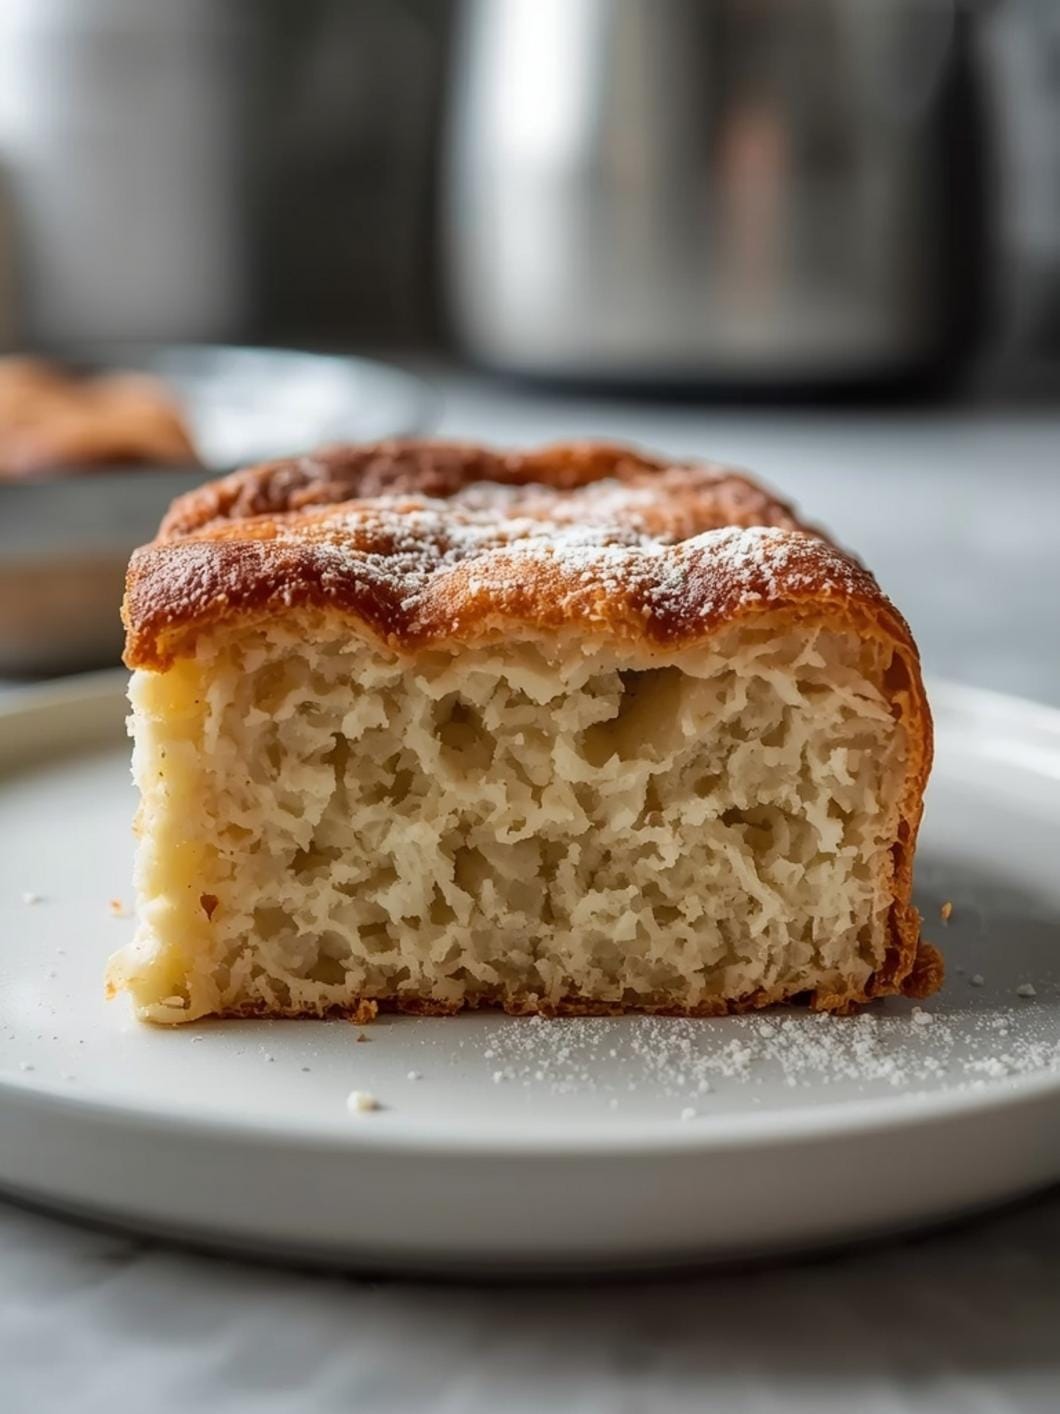
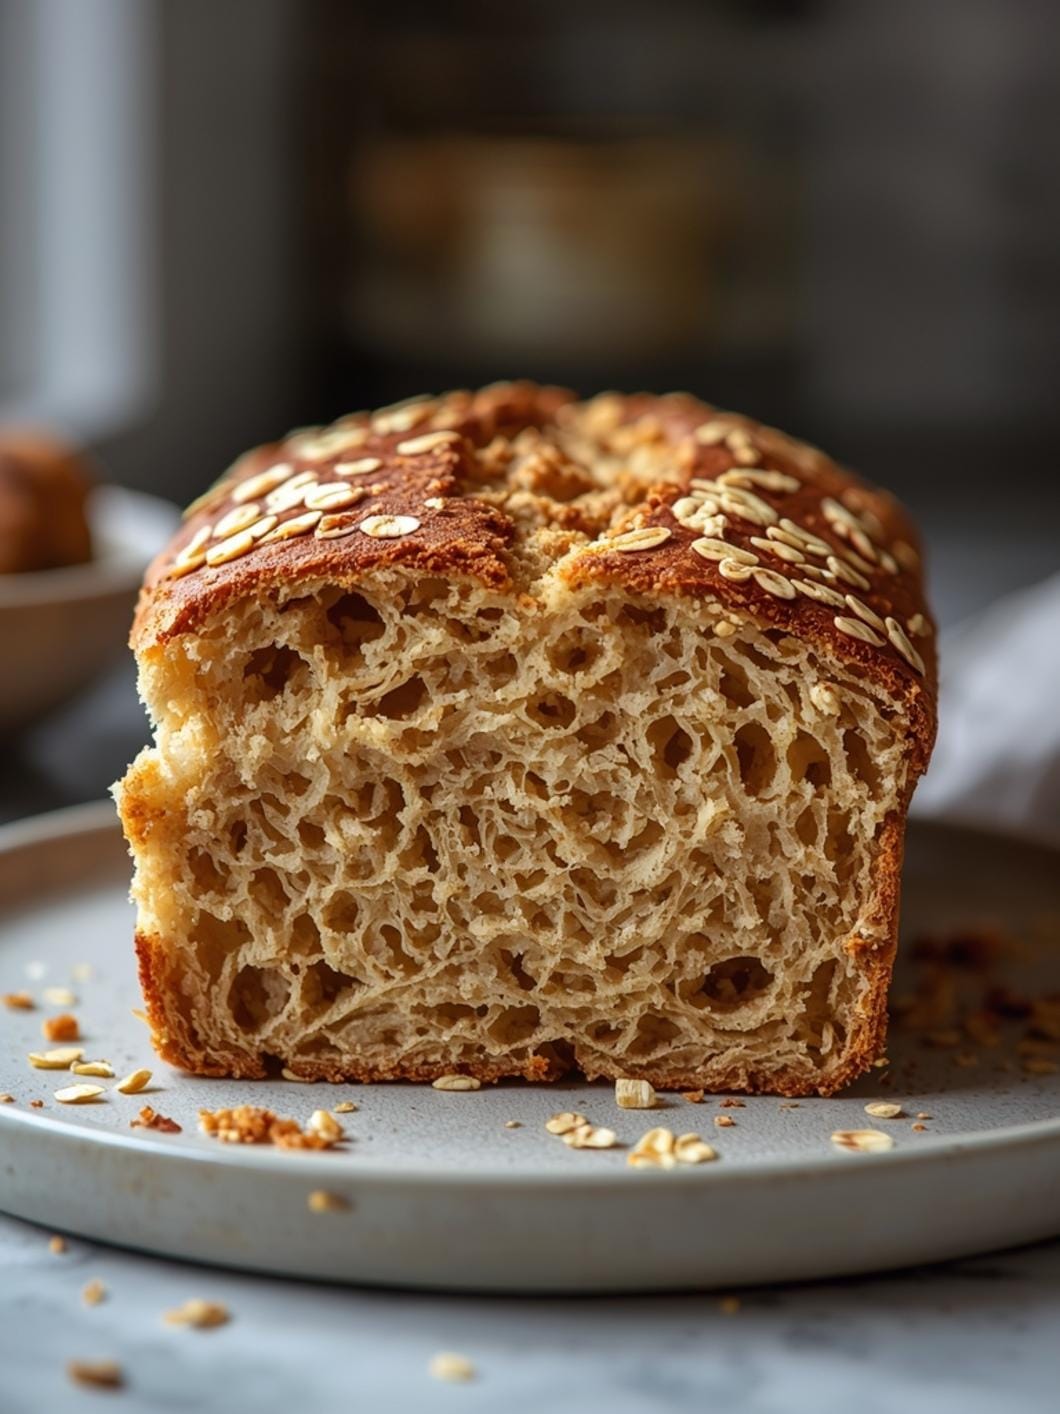
5. 5. First Rise: Lightly grease a 9×5-inch loaf pan with olive oil. Transfer the dough into the prepared loaf pan, smoothing the top with a wet spatula. Cover the pan loosely with plastic wrap or a clean kitchen towel. Place it in a warm, draft-free spot for 60-90 minutes, or until the dough has risen by about 50-75% and looks visibly puffier. It won’t double in size like traditional bread.
6. 6. Preheat and Bake: While the dough is rising, preheat your oven to 375 F (190 C). Once risen, remove the cover from the loaf pan. Bake for 40-50 minutes, or until the crust is golden brown and a wooden skewer inserted into the center comes out clean. The internal temperature should register around 200-210 F (93-99 C) when fully baked.
7. 7. Cool Completely: Once baked, immediately remove the bread from the loaf pan and place it on a wire rack to cool completely. This is a critical step for gluten-free bread; slicing it warm can result in a gummy texture. Allow it to cool for at least 30 minutes, preferably longer, before slicing.
- Prep Time: 15 minutes
- Cook Time: 40-50 minutes
- Category: bread
- Method: baking
- Cuisine: american
Nutrition
- Serving Size: 1 slice
Keywords: gluten-free, sourdough, bread, sandwich, easy, beginner, yeast, homemade, baking, quick
What You’ll Love About This Quick And Easy Recipe
This recipe is a game-changer for anyone seeking an accessible entry point into gluten-free baking, particularly sourdough. It eliminates the lengthy, multi-day commitment often associated with traditional sourdough, making it perfect for busy weeknights or weekend baking when you don’t have endless hours to spare. It’s ideal for families managing gluten sensitivities or anyone looking to incorporate more wholesome, homemade bread into their diet without the stress. You’ll love the soft texture and subtle tang that makes it an excellent base for any sandwich filling, from classic deli meats to fresh avocado and sprouts. Serve it warm out of the oven with soup, as a side to your favorite dinner, or sliced and toasted for a hearty breakfast. It’s a versatile loaf that truly fits into a practical, family-friendly kitchen routine.
Everything You Need To Make This Recipe Without Stress
Gathering your ingredients before you begin makes the baking process smooth and enjoyable. This recipe uses readily available gluten-free flours and a simple approach to sourdough flavor, ensuring you won’t need to hunt down obscure items.
INGREDIENTS:
 13")
- 1 cup warm water (105-115°F)
- 1 teaspoon active dry yeast
- 1 tablespoon granulated sugar
- 1 cup gluten-free sourdough starter, active and fed
- 1 1/2 cups gluten-free all-purpose flour blend (with xanthan gum)
- 1/2 cup gluten-free oat flour
- 1/4 cup tapioca starch
- 1 teaspoon salt
- 2 tablespoons olive oil, plus more for greasing
- 1 teaspoon apple cider vinegar
When selecting your gluten-free all-purpose flour blend, look for one that specifically states it contains xanthan gum. This gum is crucial for providing structure and elasticity in gluten-free baking. If your blend does not include it, you’ll need to add 1/2 teaspoon of xanthan gum separately to the dry ingredients. For the oat flour, ensure it is certified gluten-free to avoid cross-contamination. You can often find gluten-free oat flour in health food stores or the gluten-free section of larger supermarkets. If you don’t have oat flour, an equal amount of additional gluten-free all-purpose flour blend can be used, though it might slightly alter the texture.
Time Needed From Start To Finish
This recipe is designed for efficiency, allowing you to enjoy fresh gluten-free sourdough bread without an all-day commitment.
- Preparation Time: 15 minutes
- Rising Time: 60-90 minutes
- Baking Time: 40-50 minutes
- Cooling Time: 30 minutes (minimum, for best slicing)
- Total Time: Approximately 2 hours 45 minutes to 3 hours 5 minutes
How To Make It Step By Step With Visual Cues
 14")
Follow these simple steps to create a beautiful gluten-free sourdough loaf. Visual cues will help you know what to look for at each stage.
- Activate the Yeast: In a large mixing bowl, combine the warm water, active dry yeast, and granulated sugar. Stir gently and let it sit for 5-10 minutes until the mixture becomes foamy. This foaminess indicates that your yeast is active and ready to work.
- Combine Wet Ingredients: Add your active gluten-free sourdough starter, olive oil, and apple cider vinegar to the foamy yeast mixture. Whisk everything together until well combined. The mixture will look slightly cloudy.
- Mix Dry Ingredients: In a separate medium bowl, whisk together the gluten-free all-purpose flour blend, gluten-free oat flour, tapioca starch, and salt. Ensure there are no lumps and the ingredients are evenly distributed.
- Form the Dough: Gradually add the dry ingredient mixture to the wet ingredients, mixing with a sturdy spoon or a stand mixer with a paddle attachment on low speed. Continue mixing until a thick, sticky dough forms. Gluten-free dough will not be elastic like wheat dough; it will be more like a very thick batter.
- First Rise: Lightly grease a 9×5-inch loaf pan with olive oil. Transfer the dough into the prepared loaf pan, smoothing the top with a wet spatula. Cover the pan loosely with plastic wrap or a clean kitchen towel. Place it in a warm, draft-free spot for 60-90 minutes, or until the dough has risen by about 50-75% and looks visibly puffier. It won’t double in size like traditional bread.
- Preheat and Bake: While the dough is rising, preheat your oven to 375°F (190°C). Once risen, remove the cover from the loaf pan. Bake for 40-50 minutes, or until the crust is golden brown and a wooden skewer inserted into the center comes out clean. The internal temperature should register around 200-210°F (93-99°C) when fully baked.
- Cool Completely: Once baked, immediately remove the bread from the loaf pan and place it on a wire rack to cool completely. This is a critical step for gluten-free bread; slicing it warm can result in a gummy texture. Allow it to cool for at least 30 minutes, preferably longer, before slicing.
Easy Variations And Serving Ideas That Fit Real Life
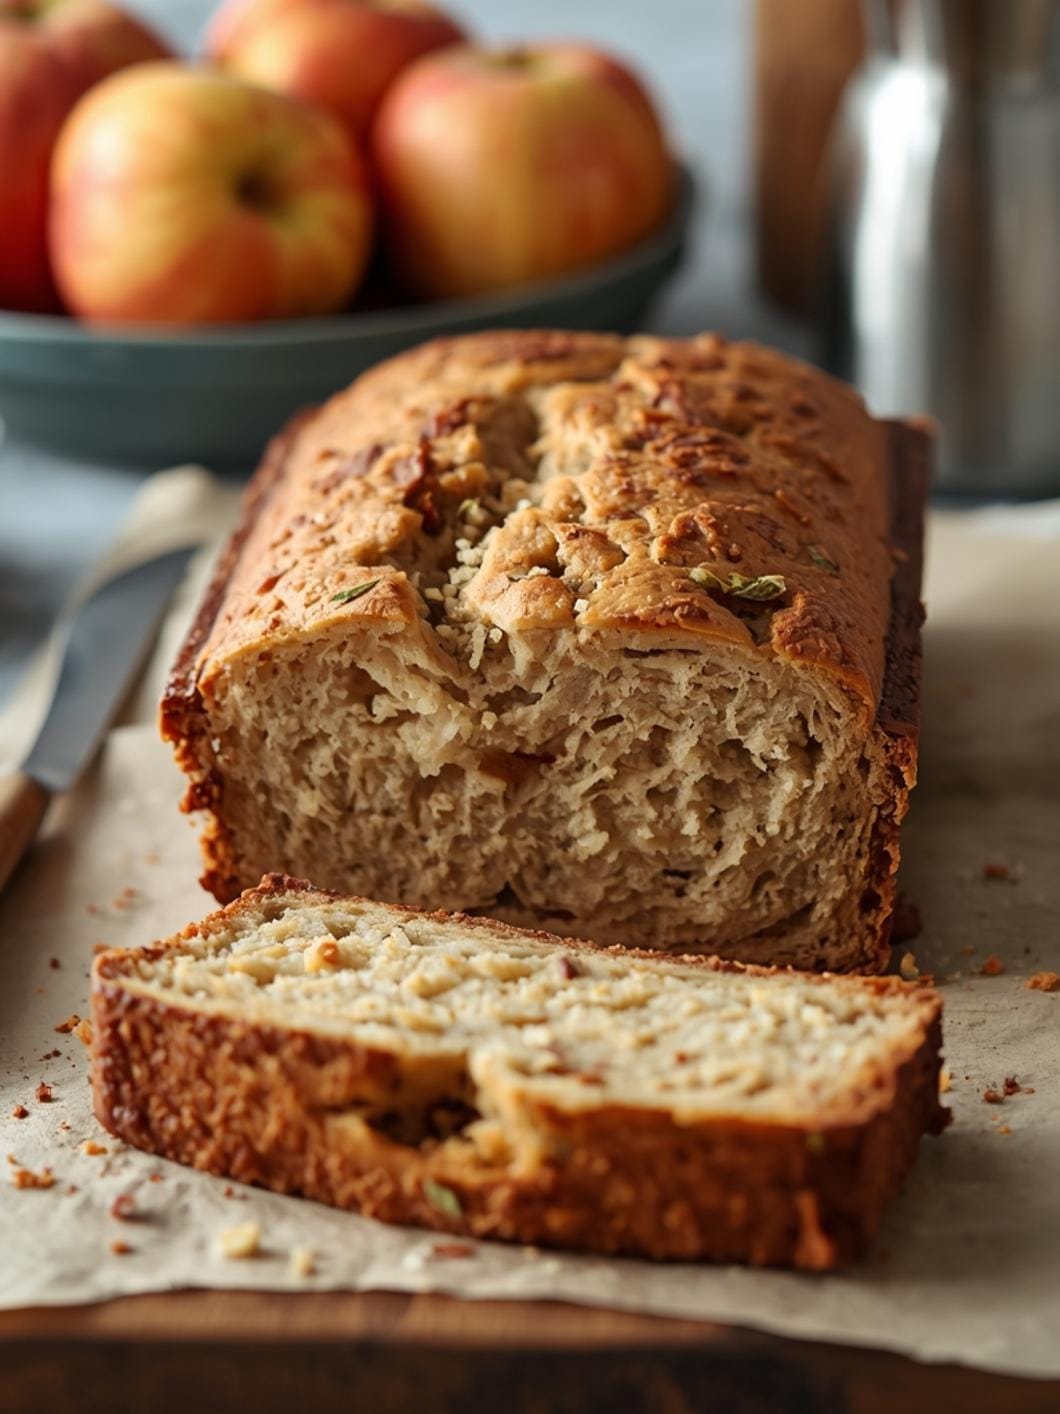
This gluten-free sourdough loaf is incredibly versatile and can be adapted to suit various tastes and occasions. For a savory twist, consider adding 1/2 cup of shredded dairy-free cheese and 1/4 cup of chopped fresh chives or dried herbs like rosemary or thyme to the dough during the mixing stage. If you enjoy a bit of sweetness, a handful of dried cranberries or raisins can be folded in, making it a delightful breakfast bread.
When it comes to serving, this bread shines in many roles. For kids, make mini grilled cheese sandwiches or use cookie cutters to create fun shapes for their lunchboxes. It’s also fantastic toasted with avocado and everything bagel seasoning, or simply with a generous spread of your favorite jam. For a party or buffet, slice the loaf thinly and serve with a platter of hummus, olive tapenade, or a dairy-free spinach dip. It also makes excellent croutons for salads or a base for bruschetta.
Common Slip-Ups And How To Avoid Them
Even with a beginner-friendly recipe, a few common mistakes can occur. Knowing how to avoid them will ensure your baking experience is smooth and successful.
One frequent issue is under-proofing the dough. Gluten-free dough doesn’t rise as dramatically as wheat-based dough, so it can be tempting to cut the rising time short. Always allow the full 60-90 minutes, or until it has visibly puffed up by at least 50%. An under-proofed loaf will be dense and heavy.
Another common mistake is slicing the bread too soon. It’s crucial to let gluten-free bread cool completely on a wire rack. If you slice it while it’s still warm, the steam trapped inside will turn the texture gummy and unpleasant. Patience is key here; resist the urge to cut into it right away.
Finally, ensure your sourdough starter is active and well-fed. A sluggish starter won’t provide enough lift, resulting in a flat loaf. Feed your starter 4-12 hours before you plan to bake, and make sure it’s bubbly and has doubled in size before using it in the recipe.
How To Store It And Make It Ahead Without Ruining Texture
Proper storage is essential to maintain the freshness and texture of your homemade gluten-free sourdough bread. Once completely cooled, the best way to store the loaf is at room temperature in an airtight container or a bread bag for up to 3-4 days. You can also wrap individual slices in plastic wrap or foil and store them in a freezer-safe bag for up to 3 months. This is a fantastic way to make it ahead and have fresh bread whenever you need it.
To reheat frozen slices, simply pop them directly into a toaster or a preheated oven (350°F/175°C) for a few minutes until warmed through and slightly crispy. For a whole loaf that has been frozen, thaw it at room temperature, then warm it in a 350°F (175°C) oven for about 10-15 minutes to refresh the crust. Making it ahead and freezing portions is a practical strategy for busy families, ensuring you always have delicious gluten-free bread on hand without the daily baking effort.
Questions People Always Ask Before Making This Recipe
Can I use a different gluten
 15")
FAQs
- Can I make these ahead? Yes—prep ahead, refrigerate, then serve when ready.
- How long do leftovers last? Store covered in the fridge for 3–4 days for best texture.
- Can I adjust sweetness? Yes—add more or less sweetener to taste.
- Can I change the fruit? Yes—swap strawberries for blueberries, raspberries, or sliced banana.