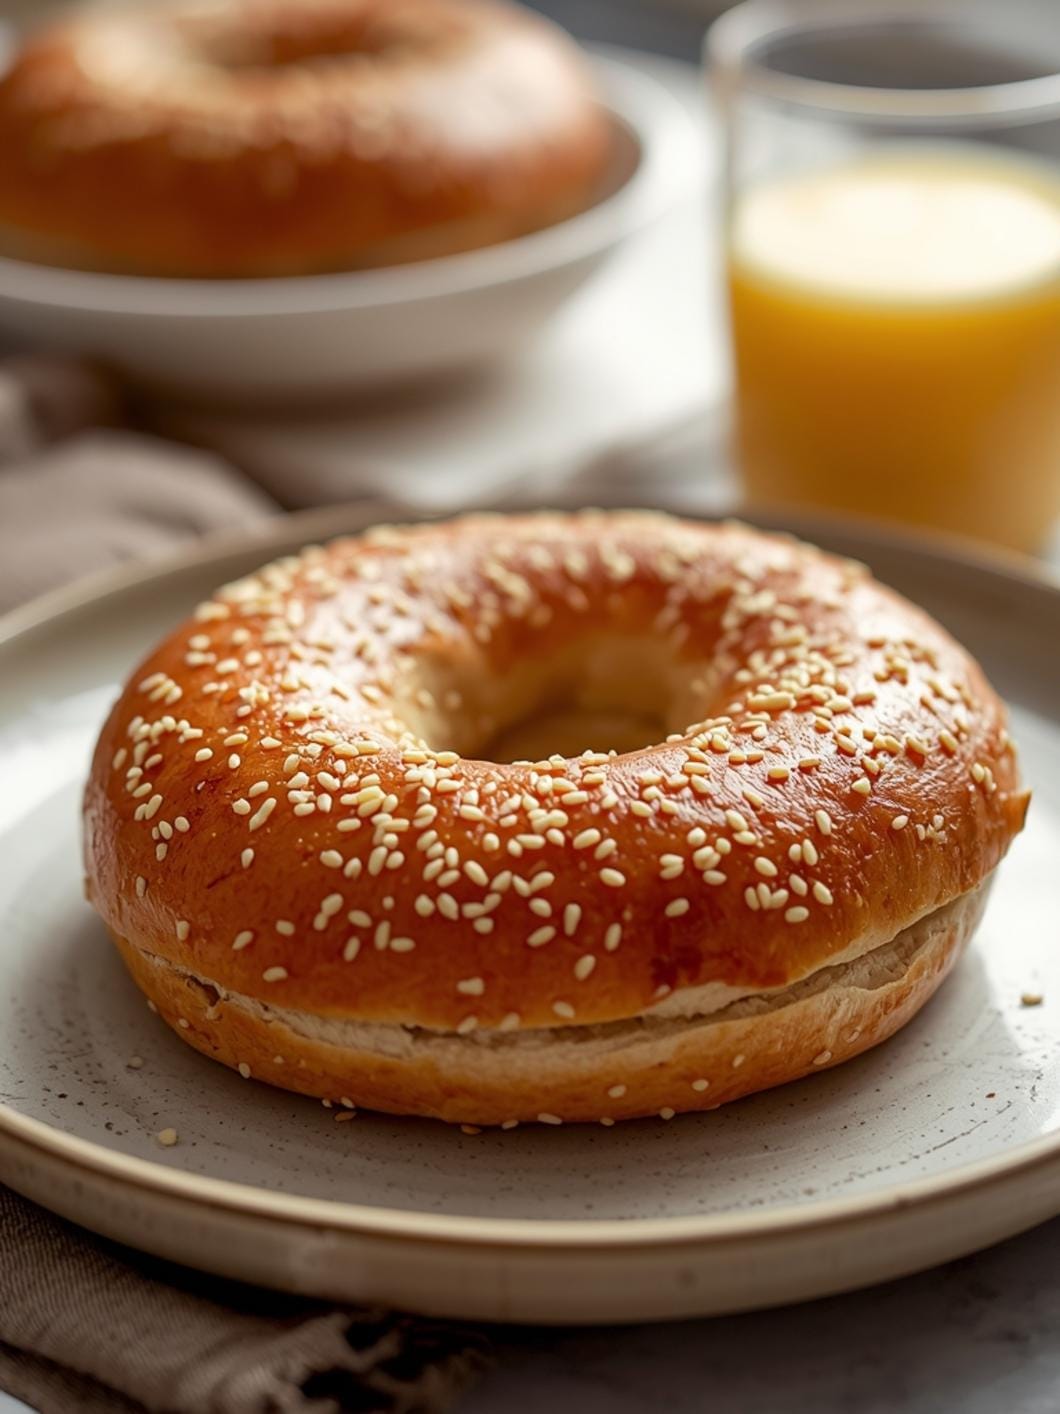
Craving a delicious, wholesome sandwich bread that fits your gluten-free and paleo lifestyle? Look no further! This easy gluten-free sourdough sandwich bread recipe is a game-changer for anyone seeking a simple, no-fuss way to enjoy homemade bread. It’s perfect for beginners and those looking for a paleo bread recipe without eggs.
 11")
This recipe delivers a wonderfully soft and flavorful loaf, ideal for your favorite sandwiches, toast, or simply enjoyed with a smear of butter. Get ready to discover how straightforward and satisfying baking your own gluten-free sourdough can be.
Table of Contents
- What You’ll Love About This Quick And Easy Recipe
- Everything You Need To Make This Recipe Without Stress
- Time Needed From Start To Finish
- How To Make It Step By Step With Visual Cues
- Easy Variations And Serving Ideas That Fit Real Life
- Common Slip-Ups And How To Avoid Them
- How To Store It And Make It Ahead Without Ruining Texture
 12")
Easy Gluten-Free Sourdough Sandwich Bread (Paleo, Egg-Free)
- Total Time: 3 hours 30 minutes to 4 hours
- Yield: 1 loaf 1x
Description
This easy gluten-free sourdough sandwich bread recipe is a game-changer for anyone seeking a simple, no-fuss way to enjoy homemade bread. It’s perfect for beginners and those looking for a paleo bread recipe without eggs. This recipe delivers a wonderfully soft and flavorful loaf, ideal for your favorite sandwiches, toast, or simply enjoyed with a smear of butter.
Ingredients
Instructions
1. Activate the Yeast: In a large mixing bowl, combine the warm water, active dry yeast, and honey (or maple syrup). Stir gently and let it sit for 5-10 minutes until the mixture becomes foamy. This foaminess indicates your yeast is active and ready to work.
2. Combine Wet Ingredients: Add the active gluten-free sourdough starter, olive oil (or melted coconut oil), and apple cider vinegar to the yeast mixture. Whisk everything together until well combined. The mixture will look a bit cloudy.
3. Mix Dry Ingredients: In a separate medium bowl, whisk together the almond flour, tapioca flour, coconut flour, psyllium husk powder, and salt. Make sure there are no lumps and all ingredients are evenly distributed.
4. Combine Wet and Dry: Gradually add the dry ingredient mixture to the wet ingredients, mixing with a sturdy spoon or a stand mixer with a paddle attachment on low speed. Continue mixing until a thick, uniform dough forms. The dough will be sticky, which is normal for gluten-free bread.
5. First Rise: Lightly grease a 9×5-inch loaf pan. Transfer the dough into the prepared loaf pan, smoothing the top with a wet spatula. Cover the pan loosely with plastic wrap or a clean kitchen towel. Place it in a warm, draft-free spot for 1 hour 30 minutes, or until the dough has noticeably risen and looks puffy. It won’t double in size like traditional wheat bread, but it will expand.
6. Preheat Oven and Bake: While the dough is rising, preheat your oven to 375 F (190 C). Once the dough has risen, remove the cover and place the loaf pan in the preheated oven. Bake for 45-50 minutes, or until the crust is golden brown and the internal temperature reaches 200-210 F (93-99 C) when checked with an instant-read thermometer.
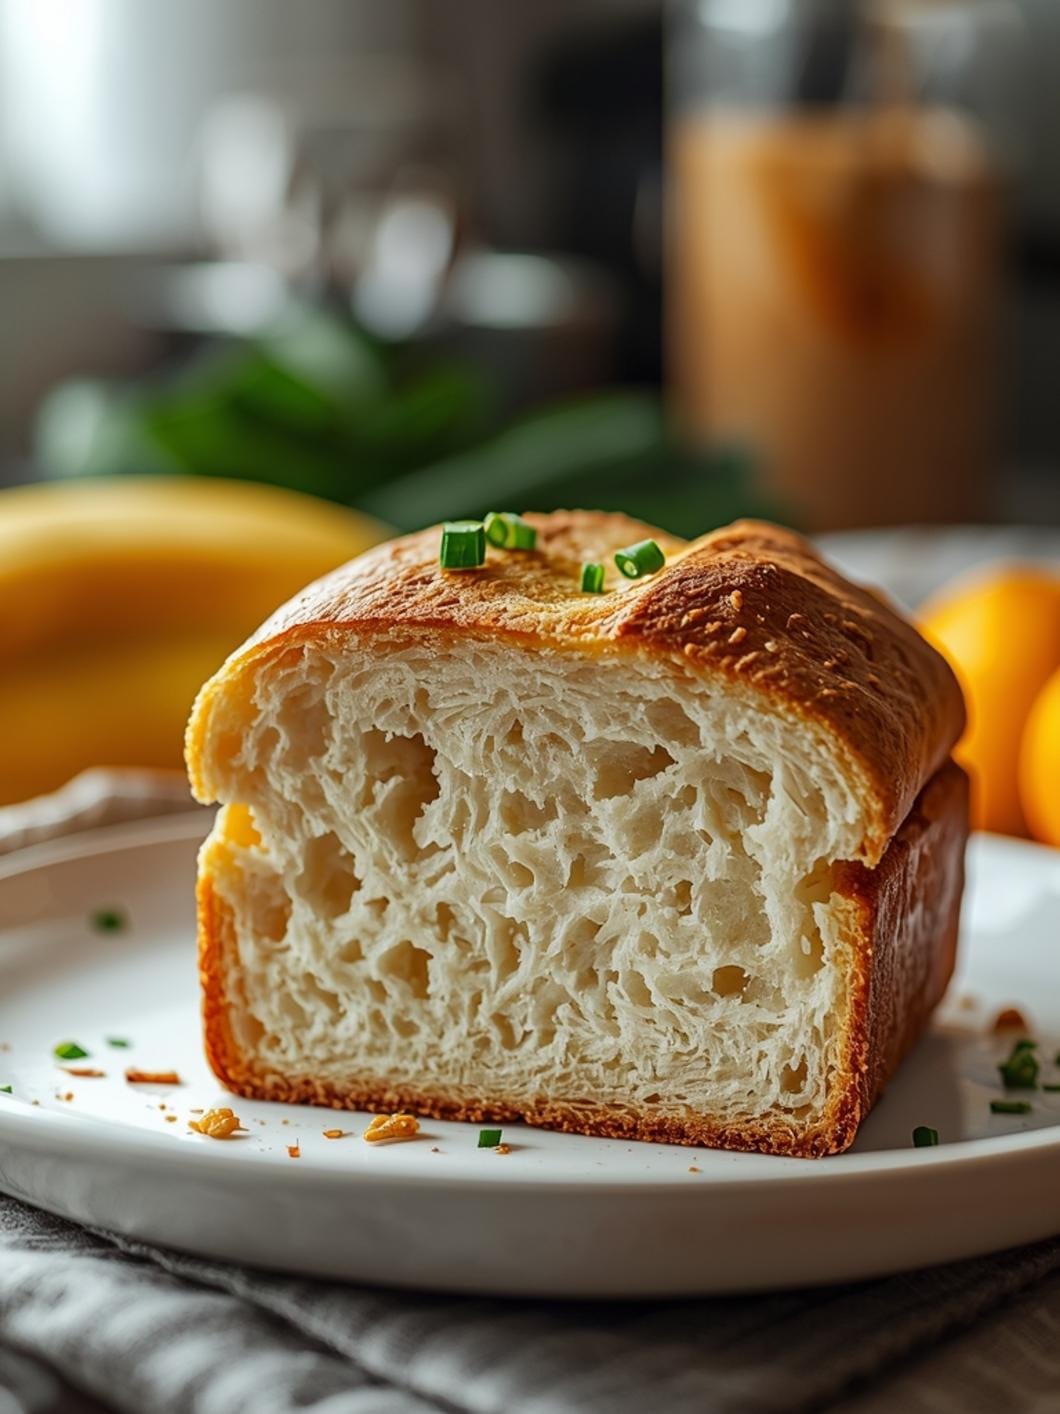
7. Cool Completely: Once baked, remove the loaf from the oven and immediately transfer it to a wire rack. This is a crucial step: let the bread cool completely for at least 1-2 hours before slicing. Slicing too early will result in a gummy texture. The bread will firm up as it cools.
- Prep Time: 15 minutes
- Cook Time: 45-50 minutes
- Category: bread
- Method: baking
- Cuisine: american
Nutrition
- Serving Size: 1 slice
Keywords: gluten-free, sourdough, sandwich bread, paleo, egg-free, homemade, baking, easy, healthy, dairy-free
What You’ll Love About This Quick And Easy Recipe
This recipe is a true kitchen hero for several reasons. First, it’s incredibly beginner-friendly, designed to demystify gluten-free and paleo baking. You don’t need any special sourdough starter expertise or advanced techniques; we’re focusing on simplicity and delicious results. It’s perfect for busy weeknights when you want fresh bread without a huge time commitment, or for relaxed weekend baking. This bread is a fantastic option for families with dietary restrictions, ensuring everyone can enjoy a hearty sandwich. It’s also a wonderful addition to any meal, from breakfast toast to a side for soup or salad, making it versatile for any occasion. The fact that it’s paleo-friendly and entirely egg-free makes it accessible to even more people, addressing common allergen concerns without sacrificing taste or texture.
Everything You Need To Make This Recipe Without Stress
Gathering your ingredients before you start is key to a smooth baking experience. This recipe uses readily available gluten-free and paleo-friendly flours and binders to create a tender, resilient loaf. You won’t find any obscure ingredients here, just simple components that work together beautifully.
INGREDIENTS:
 13")
- 1 cup warm water (105-115°F)
- 1 tablespoon active dry yeast
- 1 teaspoon honey or maple syrup
- 1 cup gluten-free sourdough starter (fed and active)
- 1 1/2 cups almond flour
- 1/2 cup tapioca flour
- 1/4 cup coconut flour
- 1 tablespoon psyllium husk powder
- 1 teaspoon salt
- 1/4 cup olive oil or melted coconut oil
- 1 teaspoon apple cider vinegar
For simple substitutions, if you don’t have honey, maple syrup works perfectly as a sweetener. For the oil, either olive oil or melted coconut oil will provide the necessary moisture and richness. Ensure your gluten-free sourdough starter is active and bubbly for the best rise; if it’s not, feed it a few hours before you plan to bake. Psyllium husk powder is crucial for the structure of gluten-free bread, so it’s best not to omit it. Look for finely ground psyllium husk powder for the smoothest texture.
Time Needed From Start To Finish
Preparing this delightful gluten-free sourdough sandwich bread is surprisingly quick for a homemade loaf, especially considering it’s sourdough!
- Preparation Time: 15 minutes
- Rise Time: 1 hour 30 minutes
- Baking Time: 45-50 minutes
- Cooling Time: 1-2 hours (crucial for texture!)
- Total Time: Approximately 3 hours 30 minutes to 4 hours (including cooling)
While the cooling time might seem long, it’s essential for the bread to set properly and achieve the perfect sliceable texture. Don’t rush this step!
How To Make It Step By Step With Visual Cues
 14")
Follow these straightforward steps to bake your perfect gluten-free sourdough sandwich bread.
- Activate the Yeast: In a large mixing bowl, combine the warm water, active dry yeast, and honey (or maple syrup). Stir gently and let it sit for 5-10 minutes until the mixture becomes foamy. This foaminess indicates your yeast is active and ready to work.
- Combine Wet Ingredients: Add the active gluten-free sourdough starter, olive oil (or melted coconut oil), and apple cider vinegar to the yeast mixture. Whisk everything together until well combined. The mixture will look a bit cloudy.
- Mix Dry Ingredients: In a separate medium bowl, whisk together the almond flour, tapioca flour, coconut flour, psyllium husk powder, and salt. Make sure there are no lumps and all ingredients are evenly distributed.
- Combine Wet and Dry: Gradually add the dry ingredient mixture to the wet ingredients, mixing with a sturdy spoon or a stand mixer with a paddle attachment on low speed. Continue mixing until a thick, uniform dough forms. The dough will be sticky, which is normal for gluten-free bread.
- First Rise: Lightly grease a 9×5-inch loaf pan. Transfer the dough into the prepared loaf pan, smoothing the top with a wet spatula. Cover the pan loosely with plastic wrap or a clean kitchen towel. Place it in a warm, draft-free spot for 1 hour 30 minutes, or until the dough has noticeably risen and looks puffy. It won’t double in size like traditional wheat bread, but it will expand.
- Preheat Oven and Bake: While the dough is rising, preheat your oven to 375°F (190°C). Once the dough has risen, remove the cover and place the loaf pan in the preheated oven. Bake for 45-50 minutes, or until the crust is golden brown and the internal temperature reaches 200-210°F (93-99°C) when checked with an instant-read thermometer.
- Cool Completely: Once baked, remove the loaf from the oven and immediately transfer it to a wire rack. This is a crucial step: let the bread cool completely for at least 1-2 hours before slicing. Slicing too early will result in a gummy texture. The bread will firm up as it cools.
Easy Variations And Serving Ideas That Fit Real Life
This gluten-free sourdough sandwich bread is incredibly versatile and can be adapted to suit various tastes and occasions. For a savory twist, try adding 1/4 cup of chopped fresh rosemary or dried herbs like oregano and basil to the dry ingredients. You could also mix in 1/4 cup of nutritional yeast for a cheesy flavor profile, perfect for grilled cheese sandwiches. For a hint of sweetness, a tablespoon of cinnamon and a handful of raisins can transform it into a delicious breakfast bread.
This bread is fantastic for kid-friendly meals. Think mini sandwiches cut into fun shapes, or toast sticks served with avocado or fruit spread. For a party or buffet, slice the loaf thinly and serve with a variety of dips like hummus, olive tapenade, or a dairy-free cream cheese spread. It makes excellent open-faced sandwiches with your favorite paleo toppings, or even small bruschetta-style bites. Don’t forget it’s the perfect vehicle for a classic BLT or a hearty veggie sandwich.
Common Slip-Ups And How To Avoid Them
Even experienced bakers can encounter small issues, but knowing what to watch out for can save your loaf!
- Not Activating Yeast Properly: If your yeast mixture doesn’t get foamy, your yeast might be old or the water wasn’t the right temperature. Too hot will kill it, too cold won’t activate it. Always check the expiration date and use a thermometer for water temperature.
- Slicing Too Soon: This is perhaps the most common mistake with gluten-free bread. Slicing while warm often leads to a gummy, dense texture. The bread needs ample time to cool and set, allowing the starches to fully gel and create a proper structure. Patience is key here!
- Incorrect Flour Measurements: Gluten-free baking is precise. Using too much or too little of any flour can significantly alter the texture. Always use a kitchen scale for accuracy if possible, or level your measuring cups properly.
- Under-Proofing or Over-Proofing: While gluten-free bread doesn’t rise as dramatically as wheat bread, it still needs its time. Under-proofed bread will be dense, while over-proofed bread might collapse. Watch for a noticeable, but not excessive, puffiness during the rise.
- Forgetting Psyllium Husk Powder: This ingredient is vital for adding elasticity and structure to gluten-free bread, which lacks the gluten network. Omitting it will result in a crumbly loaf.
How To Store It And Make It Ahead Without Ruining Texture
Proper storage is essential to maintain the freshness and texture of your gluten-free sourdough sandwich bread. Once completely cooled, store the loaf in an airtight container or a bread bag at room temperature for up to 3-4 days. You can also wrap individual slices in plastic wrap and then place them in an airtight container to prevent them from drying out.
For longer storage, this bread freezes beautifully. Slice the cooled loaf, then place parchment paper between slices to prevent sticking. Transfer the slices to a freezer-safe bag or container and freeze for up to 2-3 months. When you’re ready to enjoy, simply take out a slice or two and toast directly from frozen, or let them thaw at room temperature for about 30 minutes. Reheating a whole loaf isn’t generally recommended as it can dry out, but individual slices toast up perfectly. Making it
 15")
FAQs
- Can I make these ahead? Yes—prep ahead, refrigerate, then serve when ready.
- How long do leftovers last? Store covered in the fridge for 3–4 days for best texture.
- Can I adjust sweetness? Yes—add more or less sweetener to taste.
- Can I change the fruit? Yes—swap strawberries for blueberries, raspberries, or sliced banana.