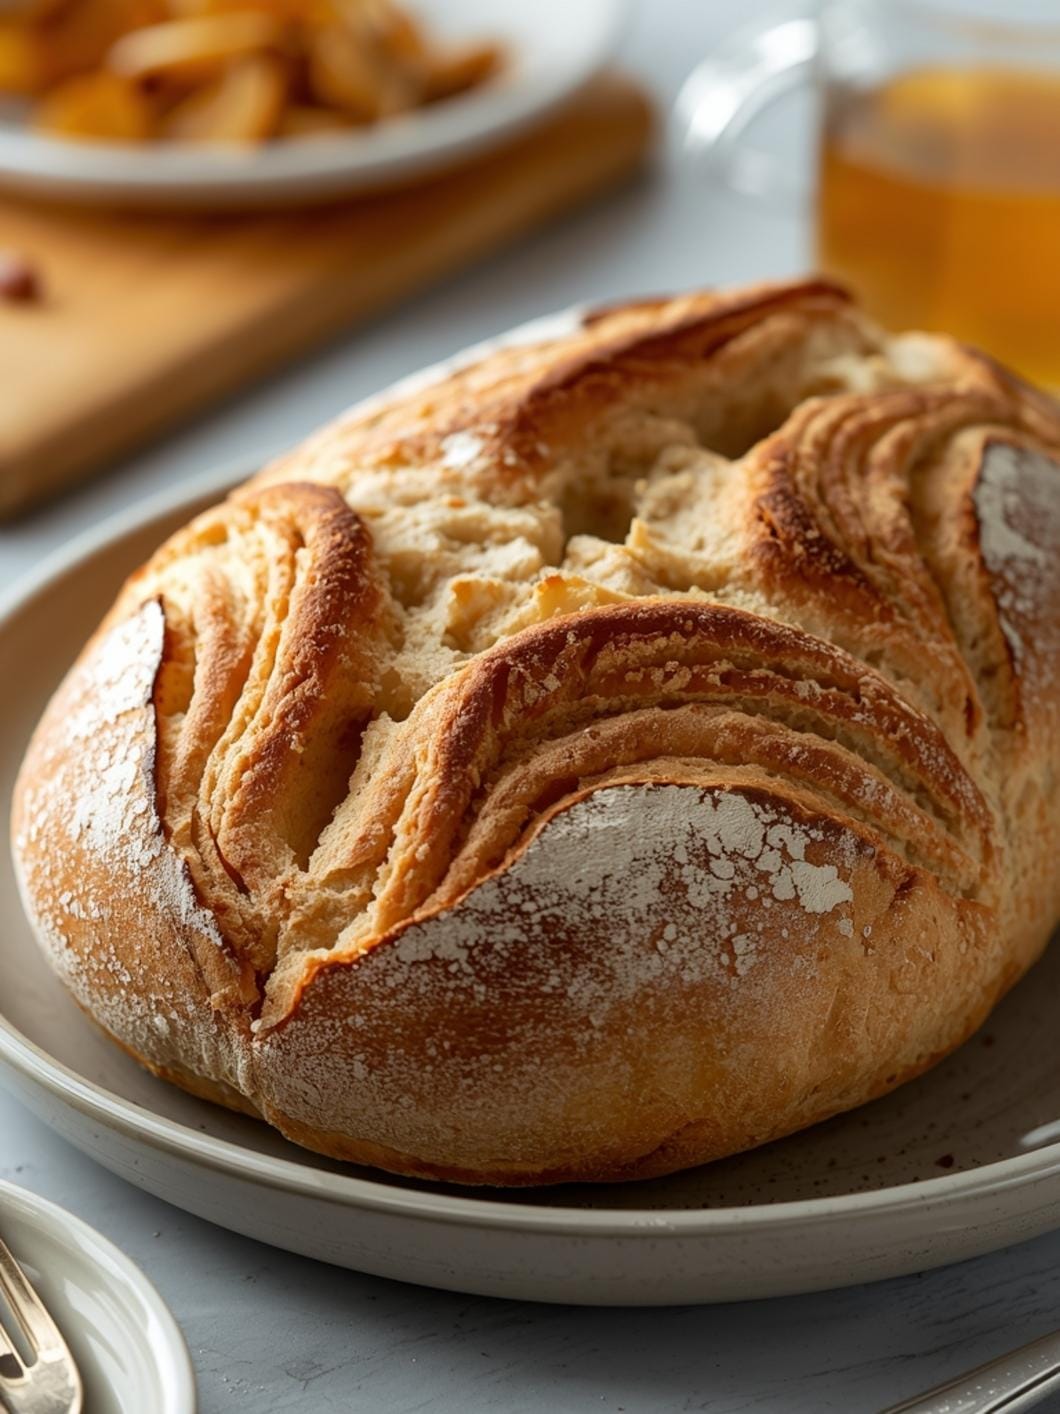
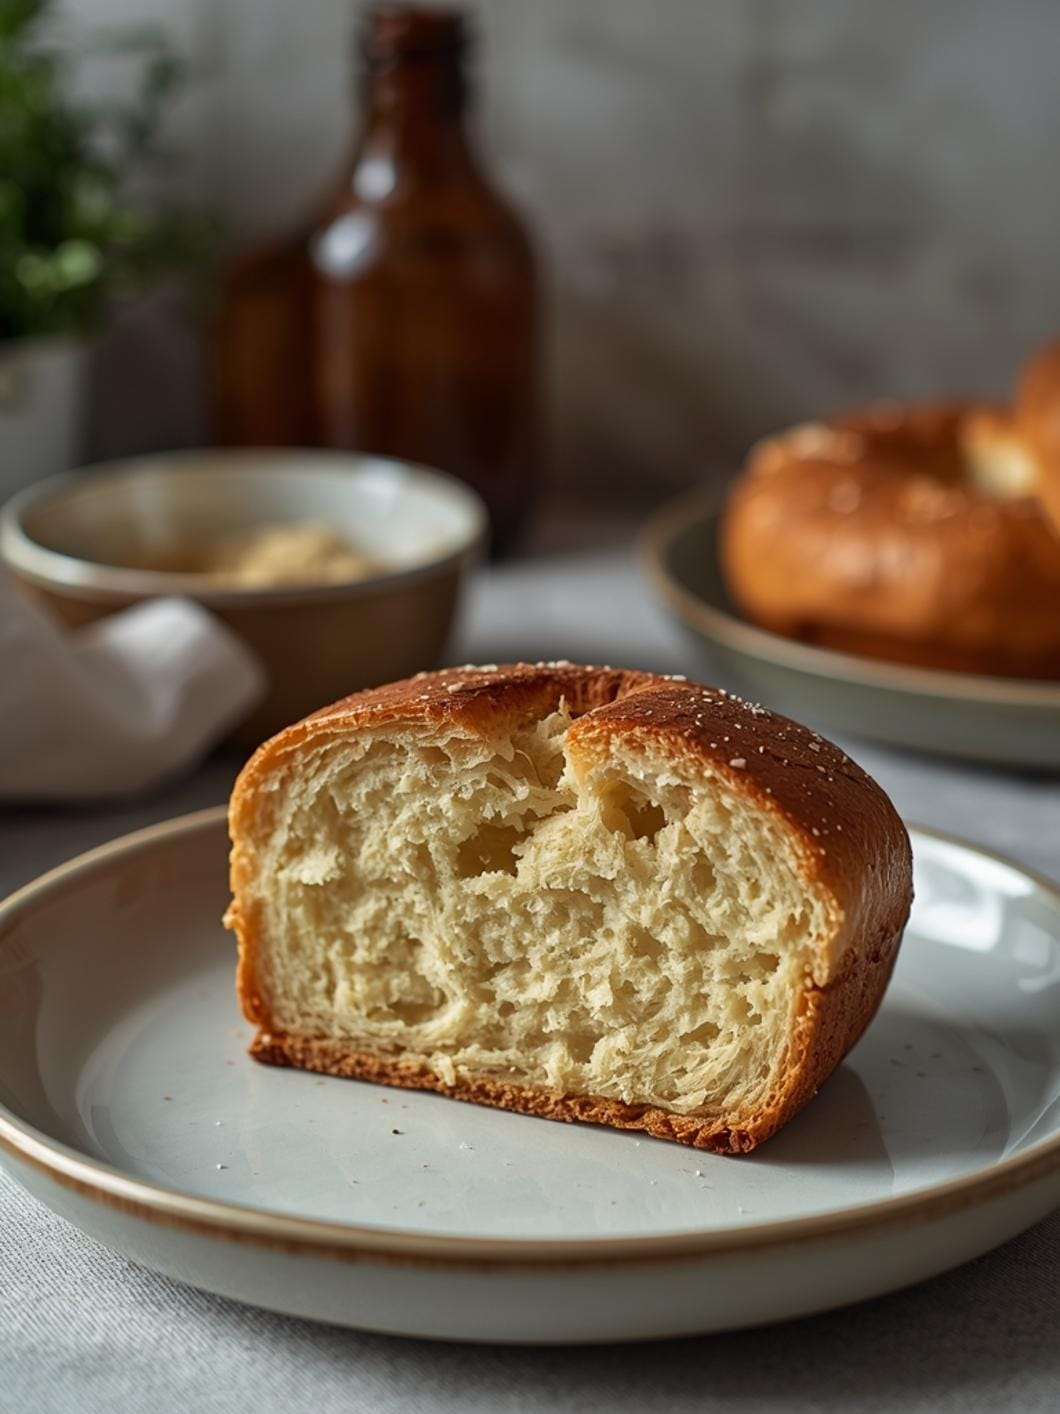
There’s nothing quite like a warm, comforting bowl of soup, especially when that bowl is edible! This recipe for easy homemade sourdough bread bowls makes enjoying your favorite creamy tomato or hearty chili even more delightful. Forget store-bought versions; crafting your own bread bowls from scratch is simpler than you think and adds a wonderful artisanal touch to any meal.
 11")
This guide is designed for every home cook, whether you’re a seasoned baker or just starting your sourdough journey. We’ll walk through each step to ensure you achieve perfectly crusty on the outside, soft on the inside bread bowls, ready to cradle your most beloved soups and stews. Get ready to impress your family and friends with this surprisingly straightforward and incredibly satisfying dish.
 12")
Easy Homemade Sourdough Bread Bowls
- Total Time: 4-5 hours
- Yield: 4-6 bread bowls 1x
Description
Craft your own perfectly crusty and soft sourdough bread bowls at home with this easy-to-follow recipe. Ideal for serving your favorite soups and stews, these edible bowls add an artisanal touch to any meal and are surprisingly simple to make, even for sourdough beginners.
Ingredients
Instructions
1. 1. Activate Your Sourdough Starter and Combine Wet Ingredients: In a large mixing bowl, combine your active sourdough starter with the warm water, granulated sugar, and olive oil. Whisk gently until the starter is mostly dissolved and the mixture is well combined. The mixture should look milky and slightly frothy.
2. 2. Mix in Dry Ingredients to Form a Shaggy Dough: Add the salt and 4 cups of the all-purpose flour to the wet mixture. Use a sturdy spoon or your hands to mix until all the flour is incorporated and a shaggy, sticky dough forms. Avoid overmixing at this stage; just ensure there are no dry pockets of flour.
3. 3. Perform the First Knead and Bulk Fermentation: Turn the dough out onto a lightly floured surface. Knead for about 5-7 minutes until the dough becomes smoother and more elastic. It will still be a bit sticky, but should hold its shape better. Place the dough back into a lightly oiled bowl, cover it with plastic wrap or a damp kitchen towel, and let it rise in a warm place for 3-4 hours, or until it has nearly doubled in size. You’ll see bubbles forming on the surface and along the sides of the bowl.
4. 4. Divide and Shape the Bread Bowls: Gently punch down the risen dough to release the air. Turn it out onto a lightly floured surface and divide it into 4-6 equal portions, depending on your desired bread bowl size. For individual servings, 4-6 portions work well. Gently shape each portion into a smooth, round ball by tucking the edges underneath and rolling it against the counter.
5. 5. Second Rise and Preheat Oven: Lightly dust a baking sheet with cornmeal (if using) or line it with parchment paper. Place the shaped dough balls onto the prepared baking sheet, leaving ample space between them. Cover loosely with plastic wrap or a damp towel and let them rise again for 30-45 minutes, or until visibly puffy. While they are rising, preheat your oven to 400 F (200 C).
6. 6. Score and Bake Your Bread Bowls: Just before baking, use a sharp knife or a lame to make a shallow “X” or a few parallel slashes on the top of each dough ball. This helps control the expansion of the bread. Bake for 25-30 minutes, or until the bread bowls are golden brown and sound hollow when tapped on the bottom.
7. 7. Cool and Prepare for Serving: Once baked, transfer the bread bowls to a wire rack to cool completely. This is crucial for developing a good crust and texture. Once cooled, use a serrated knife to carefully cut a circle from the top of each bread bowl, creating a lid. Scoop out some of the soft interior bread, leaving a sturdy wall and bottom, to create the hollow for your soup. Save the scooped-out bread for dipping!
- Prep Time: 20 minutes
- Cook Time: 25-30 minutes
- Category: main dish
- Method: baking
- Cuisine: american
Nutrition
- Serving Size: 1 bread bowl
Keywords: sourdough, bread, bowls, soup, homemade, baking, easy, comfort food, appetizer, dinner
What You’ll Love About This Quick And Easy Recipe
This recipe for homemade sourdough bread bowls is a game-changer for several reasons. First, it’s incredibly satisfying to pull a fresh, warm loaf from your oven, knowing you’ve created something delicious from simple ingredients. It’s perfect for anyone who appreciates the unique tang and texture of sourdough but wants a practical, family-friendly project that doesn’t require days of effort. This recipe is designed to be approachable, making the magic of sourdough accessible even to beginners. You’ll love the way these bowls elevate a casual weeknight dinner into a special occasion, or how they make a weekend lunch feel extra cozy. They are fantastic for serving a variety of dishes, from classic clam chowder to a rich beef stew, making them versatile for different tastes and dietary preferences. Plus, the sheer joy of eating your “bowl” after finishing your soup is an experience everyone will enjoy, especially kids!
Everything You Need To Make This Recipe Without Stress
Gathering your ingredients before you start is key to a smooth baking process. This recipe uses fundamental sourdough components, so if you already maintain a sourdough starter, you’ll likely have most of what you need on hand. The beauty of sourdough is its simplicity, relying on just a few core items to create something truly spectacular. Don’t feel intimidated by the term “sourdough” – we’re focusing on a straightforward approach that yields fantastic results without unnecessary complexity.
INGREDIENTS:
 13")
- 1 cup active sourdough starter (fed and bubbly)
- 1 ½ cups warm water (around 95-105°F)
- 1 tablespoon granulated sugar
- 1 tablespoon olive oil
- 1 ½ teaspoons salt
- 4 ½ cups all-purpose flour, plus more for dusting
- Cornmeal, for dusting baking sheet (optional)
For the flour, all-purpose works wonderfully here, providing a good balance of structure and tenderness. If you prefer, you can experiment with bread flour for a chewier texture, but it’s not necessary for success. The olive oil adds a touch of richness and helps with the crust’s texture, but a neutral vegetable oil can be used as a substitute if that’s what you have. Ensure your sourdough starter is active and bubbly; this is crucial for good rise and flavor. If your starter isn’t quite ready, give it a feed and allow it to become active before beginning.
Time Needed From Start To Finish
While sourdough often has a reputation for being a lengthy process, this recipe is streamlined to fit into a busy schedule without sacrificing flavor or quality. The hands-on time is surprisingly minimal, with most of the duration dedicated to the natural fermentation and rising of the dough.
Prep Time: 20 minutes Resting/Rising Time: 3-4 hours (first rise), 30-45 minutes (second rise) Bake Time: 25-30 minutes Total Time: Approximately 4-5 hours (mostly inactive)
The bulk of the time is passive, allowing the sourdough to do its work. This makes it a perfect project for a weekend afternoon or even a day when you’re working from home and can check on the dough periodically.
How To Make It Step By Step With Visual Cues
 14")
Creating these sourdough bread bowls is a rewarding process. Follow these steps carefully for the best results, paying attention to the texture of the dough at each stage.
- Activate Your Sourdough Starter and Combine Wet Ingredients: In a large mixing bowl, combine your active sourdough starter with the warm water, granulated sugar, and olive oil. Whisk gently until the starter is mostly dissolved and the mixture is well combined. The mixture should look milky and slightly frothy.
- Mix in Dry Ingredients to Form a Shaggy Dough: Add the salt and 4 cups of the all-purpose flour to the wet mixture. Use a sturdy spoon or your hands to mix until all the flour is incorporated and a shaggy, sticky dough forms. Avoid overmixing at this stage; just ensure there are no dry pockets of flour.
- Perform the First Knead and Bulk Fermentation: Turn the dough out onto a lightly floured surface. Knead for about 5-7 minutes until the dough becomes smoother and more elastic. It will still be a bit sticky, but should hold its shape better. Place the dough back into a lightly oiled bowl, cover it with plastic wrap or a damp kitchen towel, and let it rise in a warm place for 3-4 hours, or until it has nearly doubled in size. You’ll see bubbles forming on the surface and along the sides of the bowl.
- Divide and Shape the Bread Bowls: Gently punch down the risen dough to release the air. Turn it out onto a lightly floured surface and divide it into 4-6 equal portions, depending on your desired bread bowl size. For individual servings, 4-6 portions work well. Gently shape each portion into a smooth, round ball by tucking the edges underneath and rolling it against the counter.
- Second Rise and Preheat Oven: Lightly dust a baking sheet with cornmeal (if using) or line it with parchment paper. Place the shaped dough balls onto the prepared baking sheet, leaving ample space between them. Cover loosely with plastic wrap or a damp towel and let them rise again for 30-45 minutes, or until visibly puffy. While they are rising, preheat your oven to 400°F (200°C).
- Score and Bake Your Bread Bowls: Just before baking, use a sharp knife or a lame to make a shallow “X” or a few parallel slashes on the top of each dough ball. This helps control the expansion of the bread. Bake for 25-30 minutes, or until the bread bowls are golden brown and sound hollow when tapped on the bottom.
- Cool and Prepare for Serving: Once baked, transfer the bread bowls to a wire rack to cool completely. This is crucial for developing a good crust and texture. Once cooled, use a serrated knife to carefully cut a circle from the top of each bread bowl, creating a lid. Scoop out some of the soft interior bread, leaving a sturdy wall and bottom, to create the hollow for your soup. Save the scooped-out bread for dipping!
Easy Variations And Serving Ideas That Fit Real Life
These sourdough bread bowls are incredibly versatile and can be adapted to suit various meals and preferences. For a quick weeknight dinner, fill them with a store-bought creamy tomato soup or a hearty lentil soup. They’re also fantastic for a casual weekend lunch with a classic New England clam chowder or a rich broccoli cheddar soup.
For a kid-friendly twist, try filling smaller bread bowls with mac and cheese or a mild chili. The edible bowl makes mealtime extra fun and reduces dishwashing! You can also brush the tops of the bread bowls with a little melted garlic butter before baking for an extra layer of flavor.
Consider serving these at a party or buffet. You can make mini bread bowls for appetizers, filling them with cheese dip, spinach artichoke dip, or even a hot crab dip. Offer a variety of soups and let guests choose their favorite. Don’t forget to serve the scooped-out bread alongside for dipping! For an extra touch, sprinkle the tops of the baked bowls with a little grated Parmesan cheese or fresh herbs like rosemary or thyme before serving.
Common Slip-Ups And How To Avoid Them
Even experienced bakers can encounter small challenges, but knowing what to look out for can make all the difference in achieving perfect sourdough bread bowls.
- Inactive Sourdough Starter: The most common issue is using a starter that isn’t active enough. If your starter isn’t bubbly and doesn’t pass the “float test” (a small spoonful floats in water), your dough won’t rise properly. Always feed your starter 4-12 hours before you plan to bake and ensure it’s at its peak activity.
- Too Much Flour: Adding too much flour can result in dense, dry bread bowls. Sourdough dough is often stickier than traditional yeast doughs. Resist the urge to add excessive flour during kneading; a lightly floured surface is usually sufficient. The dough should be tacky, not dry.
- Not Enough Rise Time: Rushing the fermentation process will lead to underdeveloped flavor and a poor rise. Sourdough takes time. Ensure your dough has nearly doubled in size during the first rise and is visibly puffy during the second. Temperature plays a role; a warmer environment will speed up the rise, while a cooler one will slow it down.
- Over-Kneading: While kneading is important for gluten development,
 15")
FAQs
- Can I make these ahead? Yes—prep ahead, refrigerate, then serve when ready.
- How long do leftovers last? Store covered in the fridge for 3–4 days for best texture.
- Can I adjust sweetness? Yes—add more or less sweetener to taste.
- Can I change the fruit? Yes—swap strawberries for blueberries, raspberries, or sliced banana.