Transforming sourdough discard into something delicious has never been easier or more satisfying than with this incredible focaccia bread recipe.

It’s the perfect way to use up that extra starter without any fuss, resulting in a light, airy, and flavorful bread that tastes like it came from a bakery.
This recipe is designed for busy home cooks who want to enjoy the rustic charm of homemade focaccia without the long proofing times typically associated with traditional sourdough. Get ready to impress your family and friends with minimal effort and maximum flavor!
Table of Contents
- What You’ll Love About This Quick And Easy Recipe
- Everything You Need To Make This Recipe Without Stress
- Time Needed From Start To Finish
- How To Make It Step By Step With Visual Cues
- Easy Variations And Serving Ideas That Fit Real Life
- Common Slip-Ups And How To Avoid Them
- How To Store It And Make It Ahead Without Ruining Texture

Quick and Easy Sourdough Discard Focaccia
- Total Time: 1 hour 35 minutes to 2 hours 40 minutes
- Yield: 1 (9x13-inch) focaccia 1x
Description
Transforming sourdough discard into something delicious has never been easier or more satisfying than with this incredible focaccia bread recipe. It’s the perfect way to use up that extra starter without any fuss, resulting in a light, airy, and flavorful bread that tastes like it came from a bakery. This recipe is designed for busy home cooks who want to enjoy the rustic charm of homemade focaccia without the long proofing times typically associated with traditional sourdough. Get ready to impress your family and friends with minimal effort and maximum flavor!
Ingredients
Instructions
1. 1. Activate the yeast and combine wet ingredients: In a large mixing bowl, combine the warm water, granulated sugar, and active dry yeast. Stir gently and let it sit for 5-10 minutes until the mixture becomes foamy. This indicates your yeast is active. Then, stir in the sourdough discard until well combined.
2. 2. Mix in the dry ingredients: Add the all-purpose flour and fine sea salt to the wet mixture. Use a wooden spoon or a sturdy spatula to mix until a shaggy dough forms and no dry streaks of flour remain. The dough will be sticky, which is exactly what you want for focaccia. Avoid overmixing.
3. 3. First rise (bulk fermentation): Drizzle 1 tablespoon of olive oil into a clean, large bowl. Transfer the dough to this bowl, turning it once to coat it lightly in the oil. Cover the bowl tightly with plastic wrap or a damp kitchen towel. Let the dough rise in a warm spot for 1 to 2 hours, or until it has visibly increased in size and looks bubbly. The exact time will depend on the warmth of your kitchen.
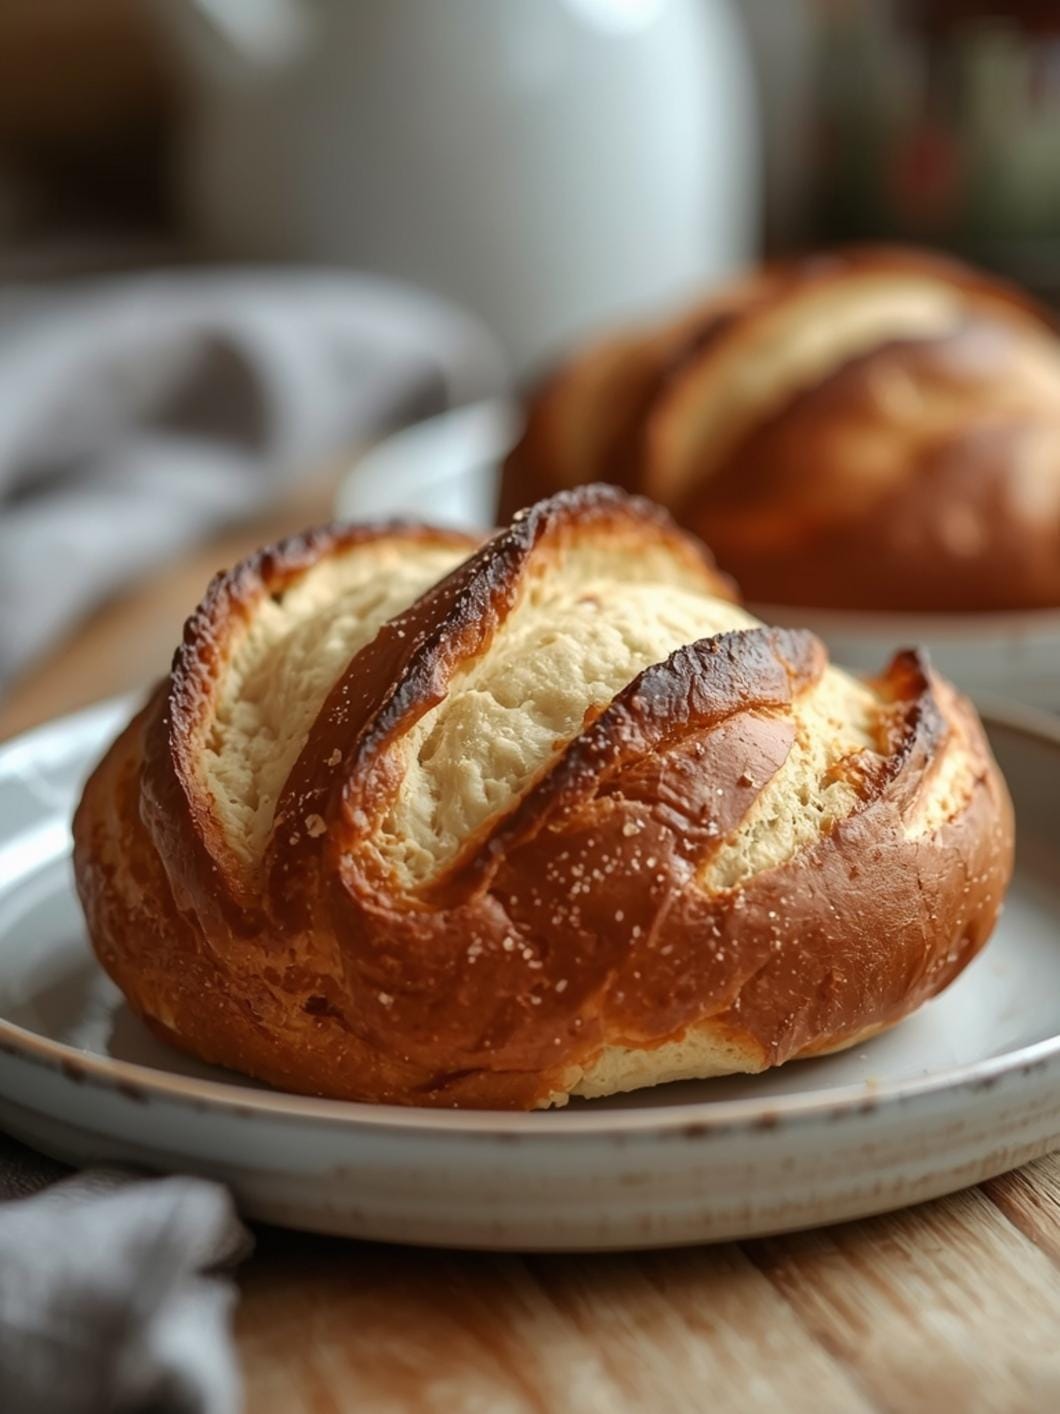
4. 4. Prepare the baking pan and dimple the dough: Drizzle 2-3 tablespoons of olive oil generously into a 9×13-inch baking pan. Gently transfer the risen dough into the oiled pan. Use your oiled fingertips to gently stretch and dimple the dough, pushing it to the edges of the pan. Don’t worry if it springs back a bit; it will relax. Create those characteristic focaccia dimples all over the surface.
5. 5. Second rise and preheat oven: Once the dough is dimpled, cover the pan loosely with plastic wrap or a clean kitchen towel. Let it rest for another 20-30 minutes while you preheat your oven to 400 F (200 C). This short second rise helps the focaccia become extra airy.
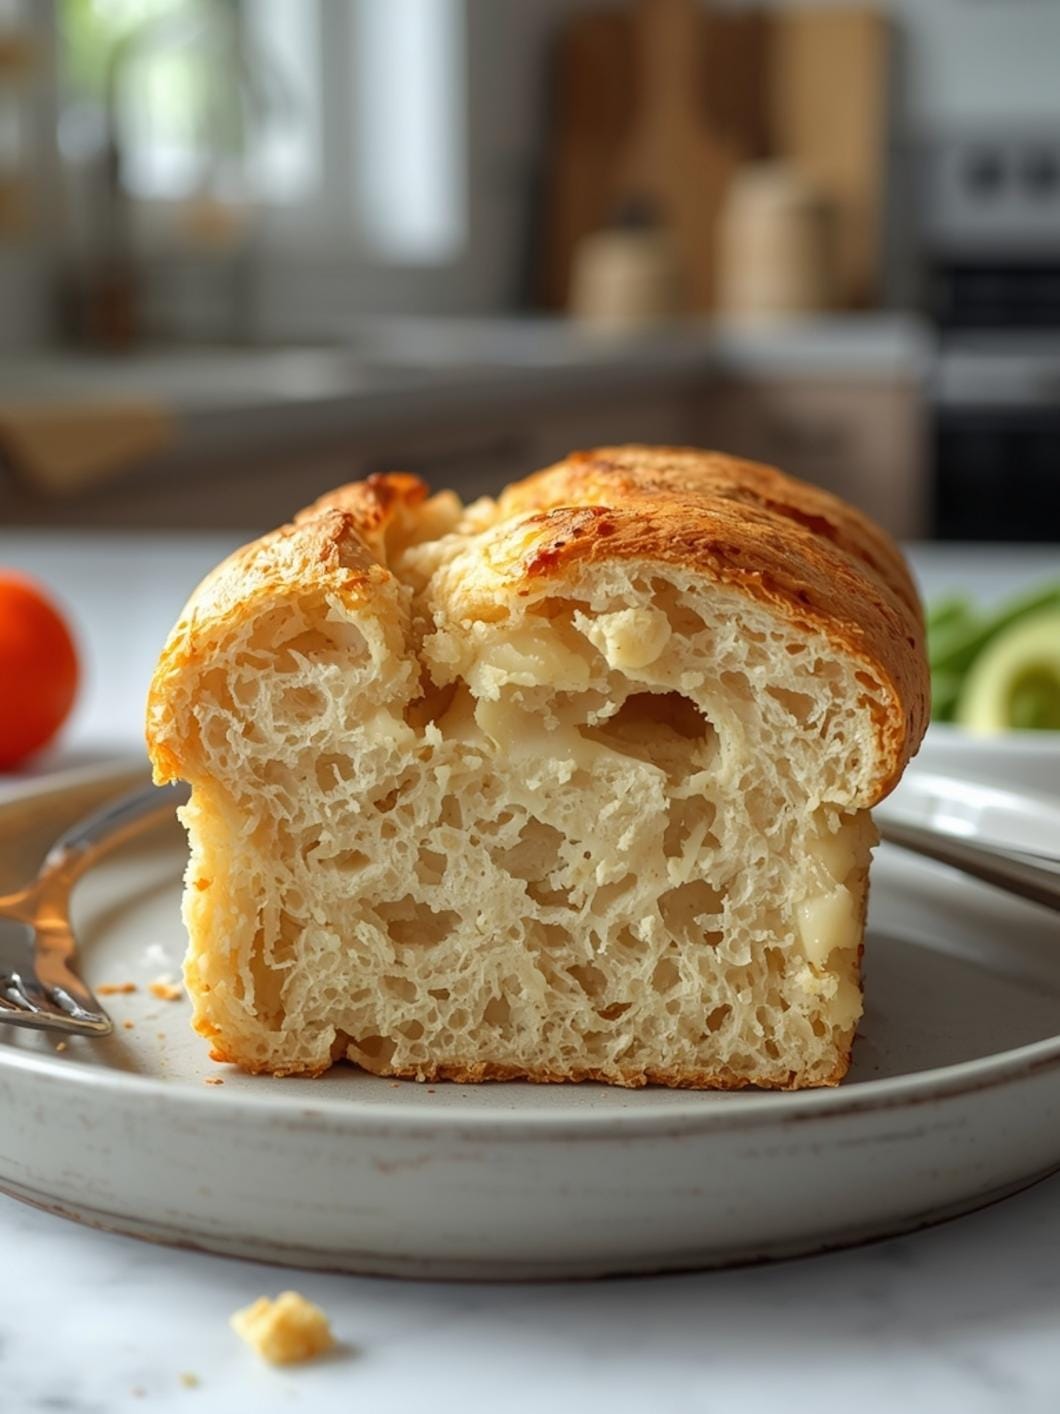
6. 6. Add toppings and bake: Before baking, drizzle a little more olive oil over the top of the dough. Sprinkle with flaky sea salt and any other desired toppings like fresh rosemary or cherry tomatoes. Bake for 20-25 minutes, or until the focaccia is golden brown on top and cooked through. The crust should be crisp and the interior soft.
7. 7. Cool and serve: Once baked, remove the focaccia from the oven and carefully transfer it to a wire rack to cool slightly. This prevents the bottom from becoming soggy. Slice into squares or strips and serve warm.
- Prep Time: 15 minutes
- Cook Time: 20-25 minutes
- Category: bread
- Method: baking
- Cuisine: italian
Nutrition
- Serving Size: 8-12 servings
Keywords: sourdough, focaccia, discard, bread, easy, quick, italian, baking, appetizer, side dish
What You’ll Love About This Quick And Easy Recipe
This recipe is a true game-changer for anyone who keeps a sourdough starter. It’s perfect for those moments when you have a bit of discard accumulating and want to put it to good use, rather than throwing it away. You’ll love how quickly this focaccia comes together, making it an ideal option for a weeknight side dish, a last-minute appetizer for guests, or a simple, satisfying snack. It’s incredibly forgiving, making it suitable for beginner bakers, and the results are consistently delicious—a soft, chewy interior with a perfectly crisp, olive oil-kissed crust. Serve it alongside a hearty soup, with a fresh salad, or simply dipped in your favorite olive oil and balsamic vinegar. It’s a versatile bread that fits seamlessly into any meal.
Everything You Need To Make This Recipe Without Stress
Gathering your ingredients for this focaccia is straightforward, focusing on pantry staples you likely already have on hand. The star, of course, is your sourdough discard, which adds a wonderful depth of flavor without requiring hours of active fermentation.
INGREDIENTS:

- 1 cup active sourdough discard (fed or unfed, but preferably not more than a week old)
- 1 1/2 cups warm water (around 95-105°F / 35-40°C)
- 1 teaspoon active dry yeast
- 1 teaspoon granulated sugar
- 3 1/2 cups all-purpose flour
- 1 1/2 teaspoons fine sea salt, plus more for sprinkling
- 1/4 cup olive oil, plus more for drizzling and the pan
- Optional toppings: fresh rosemary, flaky sea salt, garlic powder, cherry tomatoes, sliced olives
For the flour, all-purpose works beautifully, but you can experiment with bread flour for a chewier texture if you prefer. The sugar helps to activate the yeast and gives the focaccia a lovely golden crust. Don’t skimp on the olive oil; it’s key to the focaccia’s signature flavor and texture. If you don’t have fresh rosemary, dried works too, just use about half the amount. Feel free to get creative with your toppings; almost anything goes!
Time Needed From Start To Finish
One of the best features of this sourdough discard focaccia is how quickly it comes together, especially compared to traditional sourdough recipes. You won’t be waiting around all day for this bread to be ready.
Prep time: 15 minutes Rise time: 1-2 hours (depending on your kitchen temperature) Cook time: 20-25 minutes Total time: Approximately 1 hour 35 minutes to 2 hours 40 minutes
The bulk of the time is hands-off rising, allowing you to multitask while your dough develops its beautiful texture.
How To Make It Step By Step With Visual Cues

Making this focaccia is a simple process that yields impressive results. Follow these steps for a perfect loaf every time.
- Activate the yeast and combine wet ingredients: In a large mixing bowl, combine the warm water, granulated sugar, and active dry yeast. Stir gently and let it sit for 5-10 minutes until the mixture becomes foamy. This indicates your yeast is active. Then, stir in the sourdough discard until well combined.
- Mix in the dry ingredients: Add the all-purpose flour and fine sea salt to the wet mixture. Use a wooden spoon or a sturdy spatula to mix until a shaggy dough forms and no dry streaks of flour remain. The dough will be sticky, which is exactly what you want for focaccia. Avoid overmixing.
- First rise (bulk fermentation): Drizzle 1 tablespoon of olive oil into a clean, large bowl. Transfer the dough to this bowl, turning it once to coat it lightly in the oil. Cover the bowl tightly with plastic wrap or a damp kitchen towel. Let the dough rise in a warm spot for 1 to 2 hours, or until it has visibly increased in size and looks bubbly. The exact time will depend on the warmth of your kitchen.
- Prepare the baking pan and dimple the dough: Drizzle 2-3 tablespoons of olive oil generously into a 9×13-inch baking pan. Gently transfer the risen dough into the oiled pan. Use your oiled fingertips to gently stretch and dimple the dough, pushing it to the edges of the pan. Don’t worry if it springs back a bit; it will relax. Create those characteristic focaccia dimples all over the surface.
- Second rise and preheat oven: Once the dough is dimpled, cover the pan loosely with plastic wrap or a clean kitchen towel. Let it rest for another 20-30 minutes while you preheat your oven to 400°F (200°C). This short second rise helps the focaccia become extra airy.
- Add toppings and bake: Before baking, drizzle a little more olive oil over the top of the dough. Sprinkle with flaky sea salt and any other desired toppings like fresh rosemary or cherry tomatoes. Bake for 20-25 minutes, or until the focaccia is golden brown on top and cooked through. The crust should be crisp and the interior soft.
- Cool and serve: Once baked, remove the focaccia from the oven and carefully transfer it to a wire rack to cool slightly. This prevents the bottom from becoming soggy. Slice into squares or strips and serve warm.
Easy Variations And Serving Ideas That Fit Real Life
This sourdough discard focaccia is wonderfully versatile, making it easy to adapt for different tastes and occasions. For a kid-friendly version, keep the toppings simple with just a sprinkle of flaky sea salt, or perhaps a light dusting of garlic powder. They often love the soft texture and mild flavor.
To elevate your focaccia for a party or buffet, consider adding a variety of toppings. Halved cherry tomatoes pressed into the dough before baking add a burst of color and sweetness. Sliced black olives or Kalamata olives bring a briny, savory note. Caramelized onions or roasted garlic cloves can also be scattered over the top for a more gourmet touch. A sprinkle of dried Italian herbs or a blend of Parmesan cheese and black pepper also works beautifully.
This focaccia is fantastic on its own, but it also makes an excellent base for sandwiches, especially for packed lunches. Slice it horizontally and fill with your favorite deli meats, cheeses, and fresh veggies. It’s also perfect for dipping into olive oil, balsamic vinegar, or a flavorful marinara sauce. Serve it alongside a hearty minestrone soup, a crisp Caesar salad, or as an accompaniment to grilled chicken or fish. For a simple appetizer, cut it into small squares and serve with a bowl of hummus or a creamy whipped feta dip.
Common Slip-Ups And How To Avoid Them
Even with a straightforward recipe like this, a few common mistakes can impact your focaccia. Knowing how to avoid them will ensure a perfect bake every time.
One frequent issue is not letting the yeast activate properly. If your warm water isn’t warm enough (or too hot), the yeast won’t foam, meaning it’s not active. Always check the temperature with a thermometer if unsure, aiming for 95-105°F (35-40°C). If your yeast mixture doesn’t foam after 10 minutes, discard it and start again with fresh yeast.
Another common mistake is not using enough olive oil in the pan. Focaccia is meant to be rich and crispy on the bottom. A generous layer of olive oil not only prevents sticking but also contributes significantly to the flavor and texture of the crust. Don’t be shy with the oil!
Overworking the dough can lead to a tough focaccia. This dough is meant to be soft and sticky. Mix it just until the ingredients are combined, and then handle it gently when transferring and dimpling. The less you work it, the more tender your focaccia will be.
Finally, undercooking the focaccia can result in a pale, doughy center. Ensure your oven is fully preheated to the correct temperature. Bake until the top is deeply golden brown and the bottom sounds hollow when tapped. If the top is browning too quickly, you can loosely tent it with foil for the last few minutes of baking.
How To Store It And Make It Ahead Without Ruining Texture
This sourdough discard focaccia is best enjoyed fresh, ideally on the same day it’s baked. However, if you have leftovers, they can be stored and enjoyed later without a significant loss in quality.
To store leftover focaccia, allow it to cool completely to room temperature. Then, place it in an airtight container or wrap it tightly in plastic wrap. It will keep at room temperature for up to 2 days. For longer storage,

FAQs
- Can I make these ahead? Yes—prep ahead, refrigerate, then serve when ready.
- How long do leftovers last? Store covered in the fridge for 3–4 days for best texture.
- Can I adjust sweetness? Yes—add more or less sweetener to taste.
- Can I change the fruit? Yes—swap strawberries for blueberries, raspberries, or sliced banana.