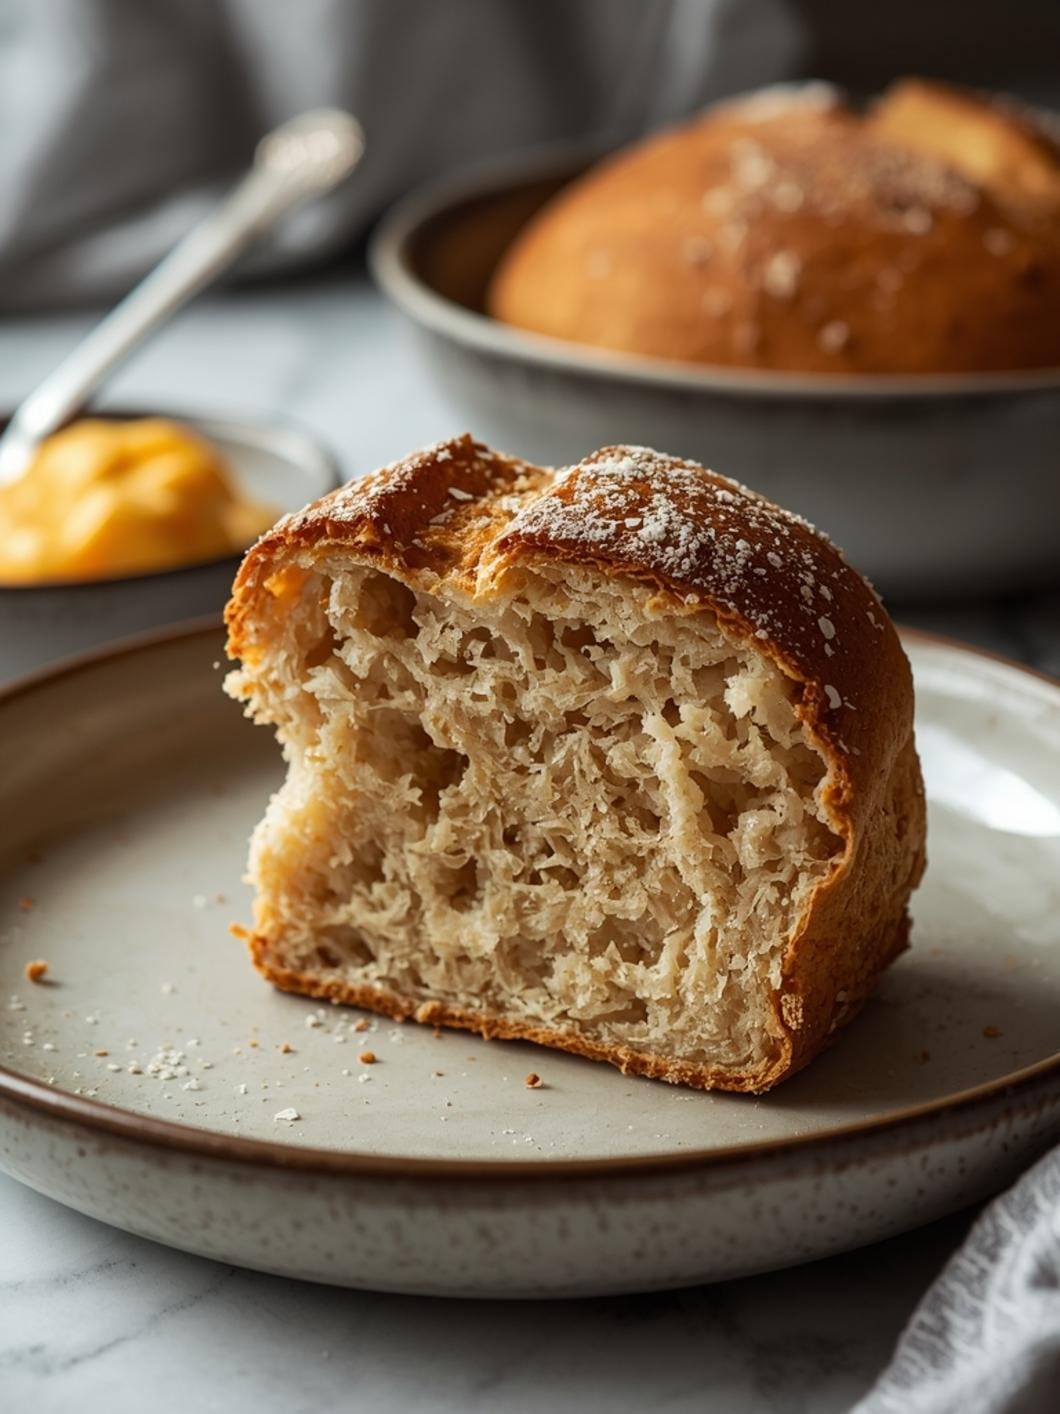
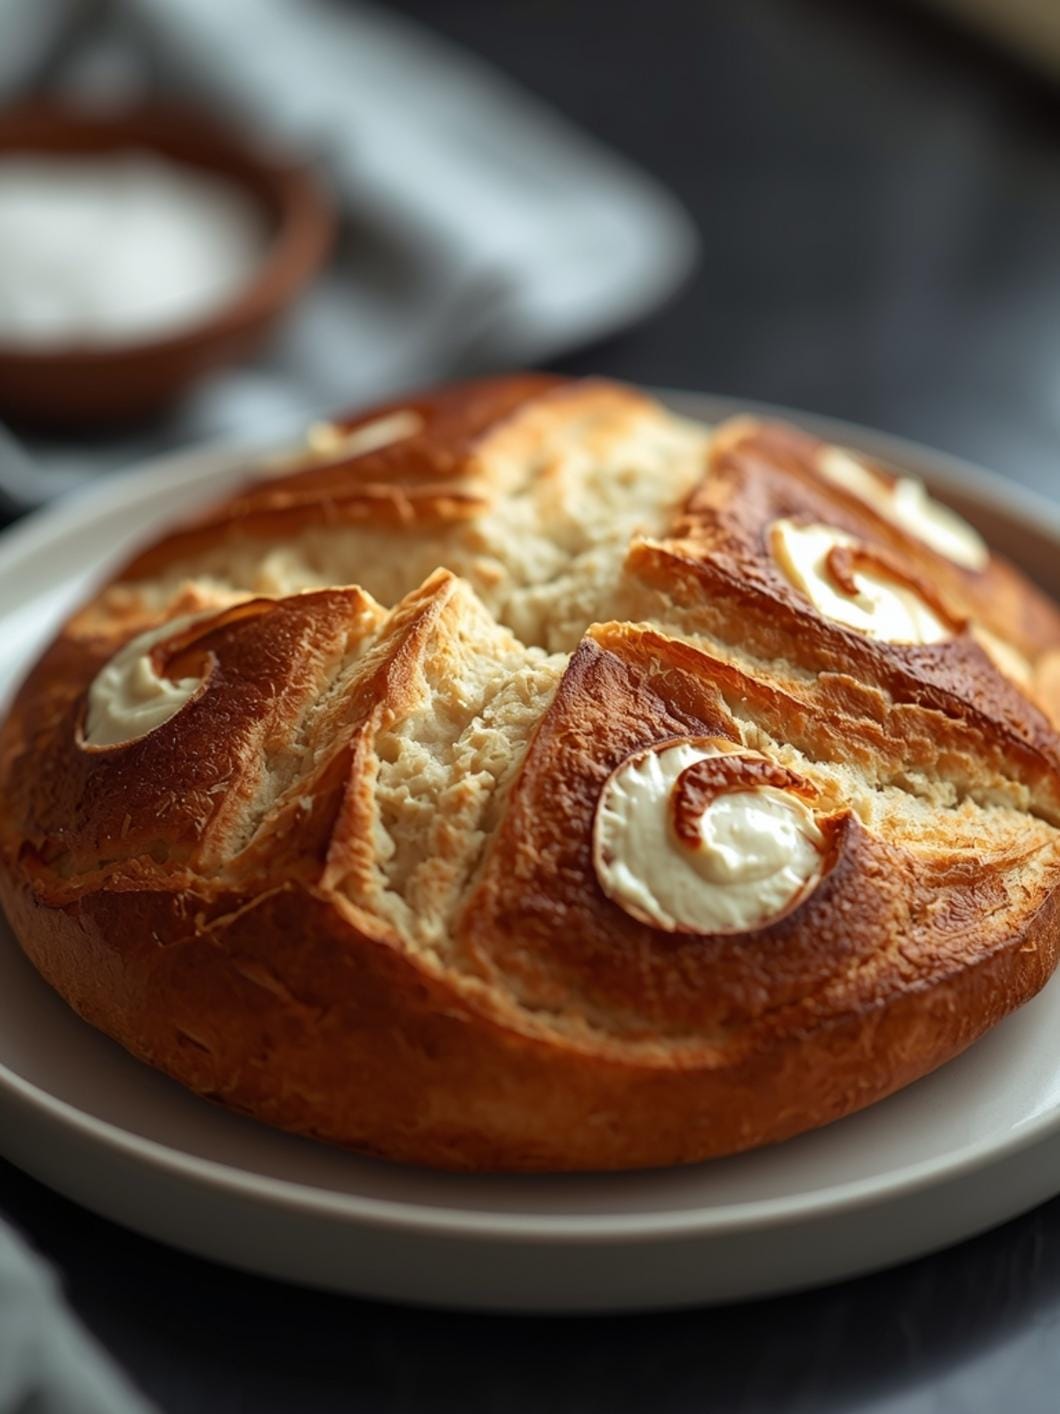
These fluffy gluten-free sourdough rolls are a game-changer for anyone looking for a delicious bread machine recipe that’s also incredibly easy to make.

Whether you’re new to gluten-free baking or a seasoned pro, you’ll appreciate how simple it is to achieve perfectly tender and airy rolls that are sure to impress.
Forget complicated techniques or endless hours in the kitchen. This recipe focuses on practicality and delivers a satisfying result every time, making it a perfect addition to any family meal or gathering.
Table of Contents
- What You’ll Love About This Quick And Easy Recipe
- Everything You Need To Make This Recipe Without Stress
- Time Needed From Start To Finish
- How To Make It Step By Step With Visual Cues
- Easy Variations And Serving Ideas That Fit Real Life
- Common Slip-Ups And How To Avoid Them
- How To Store It And Make It Ahead Without Ruining Texture

Fluffy Gluten-Free Sourdough Rolls (Bread Machine)
- Total Time: 2 hours 45 minutes to 3 hours 5 minutes
- Yield: 12 rolls 1x
Description
These fluffy gluten-free sourdough rolls are a game-changer for anyone looking for a delicious bread machine recipe that’s also incredibly easy to make. Achieve perfectly tender and airy rolls with minimal hands-on effort, perfect for any meal or gathering.
Ingredients
Instructions
1. Activate the Yeast and Combine Wet Ingredients: In your bread machine pan, combine the warm water, active gluten-free sourdough starter, olive oil, honey (or maple syrup), and apple cider vinegar. Give it a gentle stir to mix everything together.
2. Add Dry Ingredients: Carefully layer the dry ingredients over the wet. First, add the gluten-free all-purpose flour blend, followed by the tapioca flour, psyllium husk powder, active dry yeast, and finally, the salt. Create a small well in the center of the flour for the yeast, ensuring it doesn’t directly touch the salt or starter initially.
3. Start the Bread Machine Dough Cycle: Place the pan into your bread machine and select the “Dough” or “Gluten-Free Dough” cycle. This cycle typically includes mixing, kneading, and a first rise. Let the machine do all the work until the cycle is complete. The dough should be soft and slightly sticky.
4. Shape the Rolls: Once the dough cycle finishes, lightly flour a clean surface with gluten-free flour. Gently remove the dough from the bread machine pan. Divide the dough into 12 equal pieces. Roll each piece into a smooth ball. You can achieve this by gently cupping the dough in your hand and rolling it against the counter.
5. Second Proofing: Arrange the shaped rolls on a parchment-lined baking sheet, leaving some space between each roll. Cover the baking sheet loosely with a clean kitchen towel or plastic wrap. Let the rolls rise in a warm place for 30-45 minutes, or until they have visibly expanded and look puffy. They won’t double in size like traditional gluten dough, but they should look lighter.
6. Bake the Rolls: Preheat your oven to 375 F (190 C) during the last 10-15 minutes of the proofing time. Once preheated and the rolls are proofed, bake for 20-25 minutes, or until they are golden brown on top and sound hollow when tapped on the bottom.
7. Finish and Serve: For an extra touch, you can brush the warm rolls with melted butter or olive oil immediately after they come out of the oven. This adds shine and a little extra flavor. Let them cool slightly on a wire rack before serving warm.
- Prep Time: 15 minutes
- Cook Time: 20-25 minutes
- Category: main dish
- Method: baking
- Cuisine: american
Nutrition
- Serving Size: 1 roll
Keywords: gluten-free, sourdough, rolls, bread machine, easy, fluffy, homemade, baking, tangy, comfort food
What You’ll Love About This Quick And Easy Recipe
This recipe is a true winner because it takes the often-intimidating world of sourdough and makes it accessible for gluten-free bakers, especially when using a bread machine. It’s designed for busy home cooks who want to enjoy the wholesome goodness of homemade bread without all the fuss. You’ll love the light, airy texture and the subtle tangy flavor that sourdough brings, all achieved with minimal hands-on effort. These rolls are perfect for serving alongside soups, stews, salads, or as a delightful accompaniment to any main course. They’re also fantastic for breakfast with some butter and jam, or as a base for mini sandwiches. This recipe is ideal for weeknight dinners, weekend brunches, or even special occasions when you want to offer a delicious gluten-free option that everyone will enjoy.
Everything You Need To Make This Recipe Without Stress
Gathering your ingredients is the first step to making these delightful gluten-free sourdough rolls. The beauty of this recipe lies in its straightforward component list, making it easy to find everything you need at your local grocery store.
INGREDIENTS:

- 1 cup warm water (105-115°F)
- 1/2 cup active gluten-free sourdough starter
- 2 tablespoons olive oil
- 2 tablespoons honey or maple syrup
- 1 teaspoon apple cider vinegar
- 2 1/4 cups gluten-free all-purpose flour blend (with xanthan gum)
- 1/4 cup tapioca flour or arrowroot powder
- 1 tablespoon psyllium husk powder
- 1 1/2 teaspoons active dry yeast
- 1 teaspoon salt
- Optional: 1 tablespoon melted butter or olive oil for brushing
For the gluten-free flour blend, ensure it contains xanthan gum, as this is crucial for the structure of gluten-free baked goods. If your blend doesn’t include it, add 1/2 teaspoon per cup of flour. Tapioca flour or arrowroot powder helps create that desired fluffy texture. Psyllium husk powder acts as a binder and provides elasticity, mimicking gluten. For the honey or maple syrup, either works well; choose based on your preference or what you have on hand. Any good quality olive oil will do, but a light-tasting one is often preferred for baking.
Time Needed From Start To Finish
This recipe is designed to be efficient, especially with the help of a bread machine. While the sourdough aspect adds a little extra time for the starter to work its magic, the hands-on effort is minimal.
- Prep Time: 15 minutes
- Bread Machine Cycle Time: 1 hour 30 minutes (for dough cycle)
- Proofing Time: 30-45 minutes
- Bake Time: 20-25 minutes
- Total Time: Approximately 2 hours 45 minutes to 3 hours 5 minutes
How To Make It Step By Step With Visual Cues

Making these fluffy gluten-free sourdough rolls is a simple process, especially when using a bread machine for the dough. Follow these steps for perfect results every time.
- Activate the Yeast and Combine Wet Ingredients: In your bread machine pan, combine the warm water, active gluten-free sourdough starter, olive oil, honey (or maple syrup), and apple cider vinegar. Give it a gentle stir to mix everything together.
- Add Dry Ingredients: Carefully layer the dry ingredients over the wet. First, add the gluten-free all-purpose flour blend, followed by the tapioca flour, psyllium husk powder, active dry yeast, and finally, the salt. Create a small well in the center of the flour for the yeast, ensuring it doesn’t directly touch the salt or starter initially.
- Start the Bread Machine Dough Cycle: Place the pan into your bread machine and select the “Dough” or “Gluten-Free Dough” cycle. This cycle typically includes mixing, kneading, and a first rise. Let the machine do all the work until the cycle is complete. The dough should be soft and slightly sticky.
- Shape the Rolls: Once the dough cycle finishes, lightly flour a clean surface with gluten-free flour. Gently remove the dough from the bread machine pan. Divide the dough into 12 equal pieces. Roll each piece into a smooth ball. You can achieve this by gently cupping the dough in your hand and rolling it against the counter.
- Second Proofing: Arrange the shaped rolls on a parchment-lined baking sheet, leaving some space between each roll. Cover the baking sheet loosely with a clean kitchen towel or plastic wrap. Let the rolls rise in a warm place for 30-45 minutes, or until they have visibly expanded and look puffy. They won’t double in size like traditional gluten dough, but they should look lighter.
- Bake the Rolls: Preheat your oven to 375°F (190°C) during the last 10-15 minutes of the proofing time. Once preheated and the rolls are proofed, bake for 20-25 minutes, or until they are golden brown on top and sound hollow when tapped on the bottom.
- Finish and Serve: For an extra touch, you can brush the warm rolls with melted butter or olive oil immediately after they come out of the oven. This adds shine and a little extra flavor. Let them cool slightly on a wire rack before serving warm.
Easy Variations And Serving Ideas That Fit Real Life
These gluten-free sourdough rolls are incredibly versatile and can be adapted to suit various tastes and occasions. They are fantastic on their own, but a few simple additions can elevate them even further.
For a savory twist, consider adding 1/2 cup of shredded cheddar cheese and 2 tablespoons of finely chopped chives or dried rosemary to the dough during the mixing stage in the bread machine. This makes them perfect alongside a hearty soup or chili. If you prefer a slightly sweeter roll, a sprinkle of cinnamon sugar on top before baking can turn them into a delightful breakfast treat. For a richer flavor, you can swap out some of the olive oil for melted unsalted butter in the dough.
These rolls are excellent for kid-friendly meals. Serve them with mini sliders, alongside chicken nuggets, or simply with a side of fruit and cheese. For parties or buffets, arrange them in a basket with a variety of spreads like herb butter, olive tapenade, or a simple fruit jam. They also make wonderful mini sandwiches for lunchboxes or picnics. Don’t forget a dipping oil with balsamic vinegar for an elegant appetizer.
Common Slip-Ups And How To Avoid Them
Even with a straightforward recipe, a few common mistakes can occur when baking gluten-free sourdough rolls. Knowing what to watch out for can help ensure your success.
One frequent issue is using an inactive sourdough starter. If your starter isn’t bubbly and active, your rolls won’t rise properly. Always feed your starter 4-12 hours before you plan to bake and ensure it’s at its peak activity. Another common slip-up is over-flouring your work surface when shaping. Too much extra flour can make the rolls dry and dense. Use just enough gluten-free flour to prevent sticking.
Not allowing enough proofing time is another pitfall. Gluten-free doughs don’t always double in size like traditional doughs, but they do need time to rise and become airy. If your rolls are dense, they likely needed more time to proof in a warm spot. Conversely, over-proofing can cause them to collapse. Watch for a visibly puffy appearance, not necessarily a huge increase in size. Finally, opening the oven door too early during baking can cause the rolls to deflate. Resist the urge to peek until at least two-thirds of the baking time has passed.
How To Store It And Make It Ahead Without Ruining Texture
Proper storage is key to keeping your gluten-free sourdough rolls fresh and delicious. Because they are gluten-free, they tend to dry out more quickly than traditional bread.
Once completely cooled, store the rolls in an airtight container or a resealable plastic bag at room temperature for up to 2-3 days. For longer storage, these rolls freeze beautifully. Place the cooled rolls in a freezer-safe bag, removing as much air as possible, and freeze for up to 2-3 months.
To reheat, thaw frozen rolls at room temperature or gently warm them in a preheated oven at 300°F (150°C) for 5-10 minutes, or until soft and warmed through. You can also quickly microwave them for 15-30 seconds, though this can sometimes alter the texture slightly.
To make them ahead for an event, bake the rolls as directed, let them cool completely, and

FAQs
- Can I make these ahead? Yes—prep ahead, refrigerate, then serve when ready.
- How long do leftovers last? Store covered in the fridge for 3–4 days for best texture.
- Can I adjust sweetness? Yes—add more or less sweetener to taste.
- Can I change the fruit? Yes—swap strawberries for blueberries, raspberries, or sliced banana.