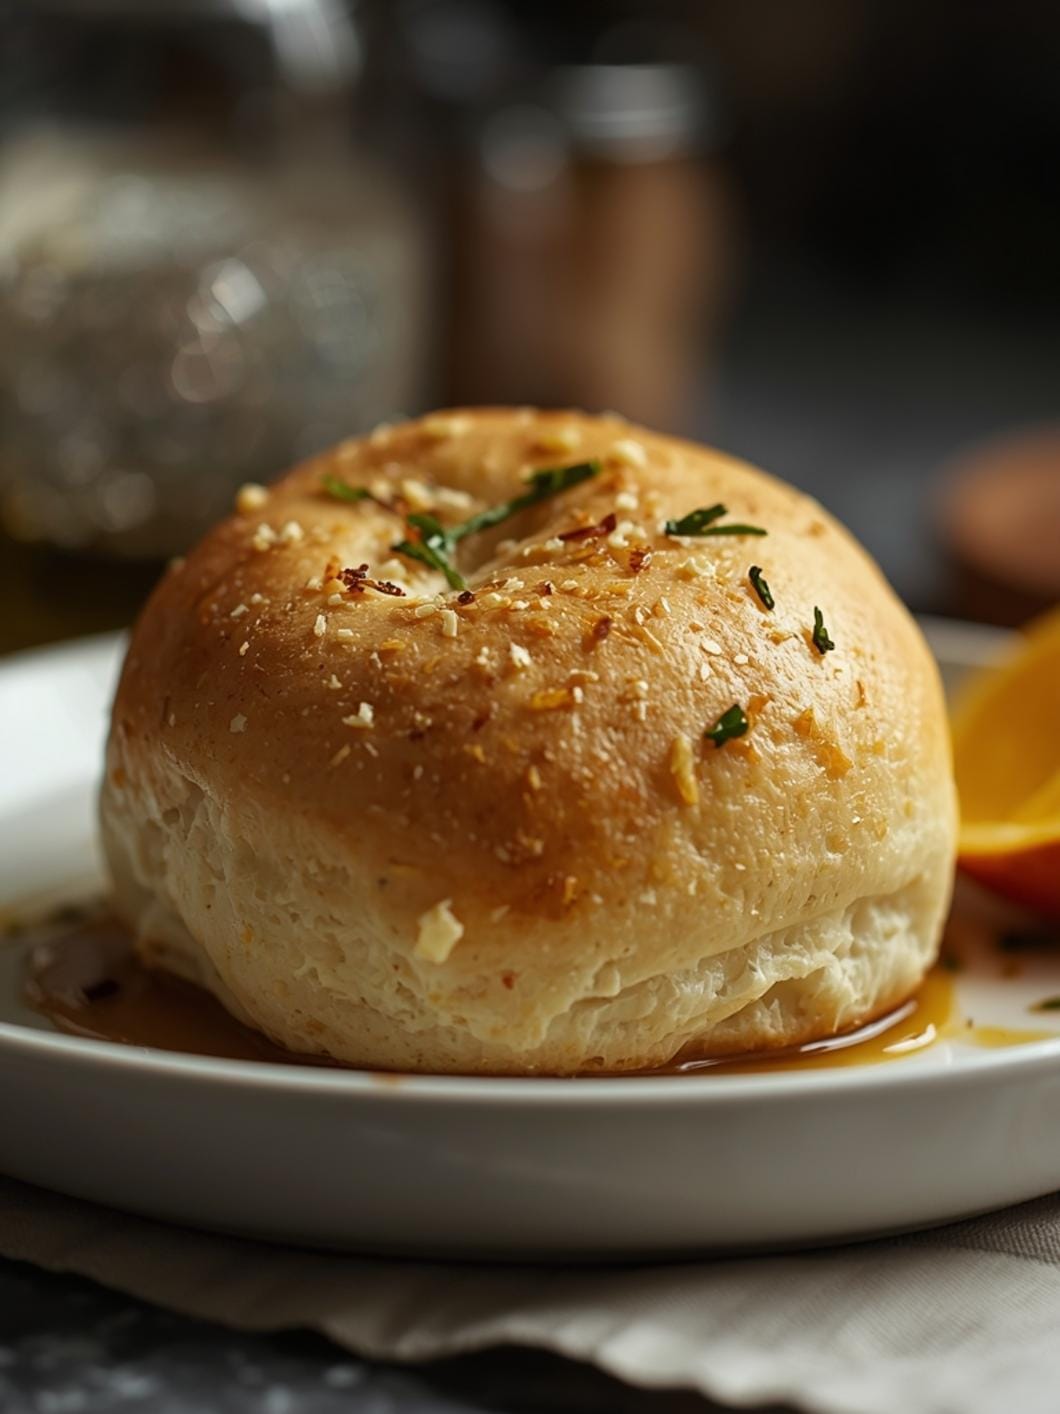
These soft sourdough milk buns are a delightful treat, perfect for any time of day and a unique sourdough discard recipe.

If you’ve been looking for a way to use up your sourdough discard that results in something truly special, you’ve found it. These buns are incredibly fluffy and have just a hint of that wonderful sourdough tang, making them a standout addition to any meal or snack time.
Get ready to discover the details of creating these irresistible buns. They’re surprisingly simple to make, even for those new to sourdough baking, and the end result is a batch of tender, pillowy buns that everyone will adore.

Soft Sourdough Milk Buns
- Total Time: 3 hours 30 minutes to 4 hours 15 minutes
- Yield: 12 buns 1x
Description
These soft sourdough milk buns are a delightful treat, perfect for any time of day and a unique sourdough discard recipe. If you’ve been looking for a way to use up your sourdough discard that results in something truly special, you’ve found it. These buns are incredibly fluffy and have just a hint of that wonderful sourdough tang, making them a standout addition to any meal or snack time.
Ingredients
Instructions
1. 1. Activate the Yeast and Combine Wet Ingredients: In a large mixing bowl, combine the warm milk and granulated sugar. Sprinkle the active dry yeast over the top and let it sit for 5-10 minutes until it becomes foamy. This foam indicates your yeast is active. Once foamy, stir in the sourdough discard, beaten egg, and melted butter until well combined. The mixture will look slightly cloudy.
2. 2. Mix the Dough: In a separate bowl, whisk together the all-purpose flour and salt. Gradually add the dry ingredients to the wet ingredients, mixing with a wooden spoon or a stand mixer with a dough hook on low speed until a shaggy dough forms. Continue to mix for about 5-7 minutes until the dough comes together, is smooth, and pulls away from the sides of the bowl. It should be soft and slightly tacky, but not sticky.
3. 3. First Rise: Lightly grease a clean bowl with a little oil. Transfer the dough to the greased bowl, turning it once to coat the entire surface. Cover the bowl tightly with plastic wrap or a clean kitchen towel. Let the dough rise in a warm place for 1 hour 30 minutes to 2 hours, or until it has doubled in size. You’ll know it’s ready when it looks significantly larger and feels airy.
4. 4. Shape the Buns: Gently punch down the risen dough to release the air. Turn it out onto a lightly floured surface. Divide the dough into 12 equal pieces. For each piece, gently pull the edges underneath and pinch them together to form a smooth ball. Place the shaped buns into a greased 9×13-inch baking dish, leaving a little space between each bun. They will expand during the second rise.
5. 5. Second Rise: Cover the baking dish loosely with plastic wrap or a kitchen towel. Let the buns rise in a warm place for another 45 minutes to 1 hour, or until they look noticeably puffy and have nearly doubled in size. They should be touching each other slightly.
6. 6. Bake the Buns: Preheat your oven to 375 F (190 C) during the last 15 minutes of the second rise. If desired, gently brush the tops of the risen buns with 1 tablespoon of milk for a golden finish. Bake for 18-22 minutes, or until the tops are golden brown and the buns sound hollow when tapped on the bottom.
7. 7. Cool and Serve: Once baked, remove the buns from the oven and let them cool in the baking dish for 5-10 minutes before transferring them to a wire rack to cool completely. This helps them set up and prevents them from becoming soggy on the bottom.
- Prep Time: 20 minutes
- Cook Time: 18-22 minutes
- Category: bread
- Method: baking
- Cuisine: american
Nutrition
- Serving Size: 1 bun
Keywords: sourdough, milk buns, discard recipe, fluffy, bread
What You’ll Love About This Quick And Easy Recipe
This recipe is a true winner for so many reasons. First, it’s an excellent way to utilize sourdough discard, transforming what might otherwise go to waste into something truly delicious. For anyone maintaining a sourdough starter, finding creative discard recipes is always a bonus, and these milk buns fit the bill perfectly. They’re incredibly versatile, making them ideal for breakfast alongside jam, as a side with dinner, or even as a base for mini sandwiches. Families will appreciate how kid-friendly these buns are; their soft texture and slightly sweet flavor appeal to even the pickiest eaters. They’re also fantastic for meal prepping, as they store well and can be reheated for a quick bite throughout the week. This recipe works because it combines the unique flavor profile of sourdough with a classic milk bun technique, resulting in a consistently fluffy and satisfying baked good.
Everything You Need To Make This Recipe Without Stress
Gathering your ingredients before you begin ensures a smooth and enjoyable baking process. You’ll find that most of these items are likely already in your pantry, especially if you’re a regular baker or sourdough enthusiast. The key to these fluffy buns lies in the combination of simple, fresh ingredients.
INGREDIENTS:

- 1 cup warm milk (around 105-115°F)
- 1/4 cup granulated sugar
- 2 teaspoons active dry yeast
- 1 cup sourdough discard (unfed, at room temperature)
- 1 large egg, lightly beaten
- 1/4 cup unsalted butter, melted and cooled
- 4 cups all-purpose flour, plus more for dusting
- 1 teaspoon salt
- 1 tablespoon milk, for brushing (optional)
When it comes to substitutions, you have a few options. If you don’t have active dry yeast, instant yeast can be used in the same quantity, and you can mix it directly with the flour. For the milk, whole milk will give you the richest flavor and most tender crumb, but 2% milk works well too. If you prefer, you can use a plant-based milk like almond or soy, though the texture might be slightly different. Unsalted butter is recommended so you can control the salt content, but if you only have salted butter, simply reduce the added salt by about a quarter teaspoon. All-purpose flour is standard here, but a bread flour could be used for an even chewier bun, though it might require a touch more liquid.
Time Needed From Start To Finish
Preparing these delightful sourdough milk buns is a process that requires a little patience for rising times, but the hands-on work is quite manageable.
- Prep time: 20 minutes
- First rise: 1 hour 30 minutes to 2 hours
- Shaping time: 15 minutes
- Second rise: 45 minutes to 1 hour
- Bake time: 18-22 minutes
- Total estimated time: Approximately 3 hours 30 minutes to 4 hours 15 minutes
While the total time might seem long, much of it is inactive waiting for the dough to rise. This makes it a perfect recipe for a weekend project or a day when you’re home and can check on the dough periodically.
How To Make It Step By Step With Visual Cues

Creating these fluffy sourdough milk buns is a rewarding process. Follow these steps for the best results, paying attention to the dough’s texture and appearance at each stage.
- Activate the Yeast and Combine Wet Ingredients: In a large mixing bowl, combine the warm milk and granulated sugar. Sprinkle the active dry yeast over the top and let it sit for 5-10 minutes until it becomes foamy. This foam indicates your yeast is active. Once foamy, stir in the sourdough discard, beaten egg, and melted butter until well combined. The mixture will look slightly cloudy.
- Mix the Dough: In a separate bowl, whisk together the all-purpose flour and salt. Gradually add the dry ingredients to the wet ingredients, mixing with a wooden spoon or a stand mixer with a dough hook on low speed until a shaggy dough forms. Continue to mix for about 5-7 minutes until the dough comes together, is smooth, and pulls away from the sides of the bowl. It should be soft and slightly tacky, but not sticky.
- First Rise: Lightly grease a clean bowl with a little oil. Transfer the dough to the greased bowl, turning it once to coat the entire surface. Cover the bowl tightly with plastic wrap or a clean kitchen towel. Let the dough rise in a warm place for 1 hour 30 minutes to 2 hours, or until it has doubled in size. You’ll know it’s ready when it looks significantly larger and feels airy.
- Shape the Buns: Gently punch down the risen dough to release the air. Turn it out onto a lightly floured surface. Divide the dough into 12 equal pieces. For each piece, gently pull the edges underneath and pinch them together to form a smooth ball. Place the shaped buns into a greased 9×13-inch baking dish, leaving a little space between each bun. They will expand during the second rise.
- Second Rise: Cover the baking dish loosely with plastic wrap or a kitchen towel. Let the buns rise in a warm place for another 45 minutes to 1 hour, or until they look noticeably puffy and have nearly doubled in size. They should be touching each other slightly.
- Bake the Buns: Preheat your oven to 375°F (190°C) during the last 15 minutes of the second rise. If desired, gently brush the tops of the risen buns with 1 tablespoon of milk for a golden finish. Bake for 18-22 minutes, or until the tops are golden brown and the buns sound hollow when tapped on the bottom.
- Cool and Serve: Once baked, remove the buns from the oven and let them cool in the baking dish for 5-10 minutes before transferring them to a wire rack to cool completely. This helps them set up and prevents them from becoming soggy on the bottom.
Easy Variations And Serving Ideas That Fit Real Life
These sourdough milk buns are incredibly versatile and can be adapted to suit various tastes and occasions. For a sweeter treat, you could add a teaspoon of vanilla extract to the dough or a sprinkle of cinnamon sugar on top before baking. If you’re looking for a savory option, mix in some dried herbs like rosemary or thyme, or even a handful of grated Parmesan cheese into the dough during the mixing stage.
Kids often love these buns plain, but you can also make them extra special by serving them with a side of fruit jam, honey butter, or a chocolate hazelnut spread for breakfast or a snack. For a more substantial meal, these buns make fantastic sliders. Simply slice them horizontally and fill them with mini burger patties, pulled pork, or even egg salad. They’re also a wonderful accompaniment to soups and stews, perfect for soaking up every last drop. For a party or buffet, arrange them on a platter with various spreads and fillings, allowing guests to customize their own mini sandwiches.
Common Slip-Ups And How To Avoid Them
Even experienced bakers can encounter small challenges, but knowing what to watch out for can make all the difference in achieving perfect sourdough milk buns.
One common mistake is using milk that’s too hot or too cold for activating the yeast. If the milk is too hot, it can kill the yeast, preventing your dough from rising. If it’s too cold, the yeast won’t activate properly, leading to a slow or non-existent rise. Aim for a temperature between 105-115°F (40-46°C), which feels comfortably warm to the touch but not scalding.
Another potential issue is over-flouring the dough. While you need enough flour for the dough to come together and be manageable, adding too much can result in dry, dense buns. The dough should still be soft and slightly tacky after kneading, not stiff. If it feels too sticky, add flour one tablespoon at a time until it reaches the right consistency.
Not allowing enough time for the rises is another frequent error. Rushing the bulk fermentation or the proofing stage will lead to less airy and fluffy buns. The dough needs to double in size during the first rise and become visibly puffy during the second. Be patient and let the yeast do its work. If your kitchen is cool, finding a warmer spot (like near a sunny window or in a slightly warmed, turned-off oven) can help speed things along.
Finally, underbaking can result in doughy centers. Ensure the buns are golden brown

FAQs
- Can I make these ahead? Yes—prep ahead, refrigerate, then serve when ready.
- How long do leftovers last? Store covered in the fridge for 3–4 days for best texture.
- Can I adjust sweetness? Yes—add more or less sweetener to taste.
- Can I change the fruit? Yes—swap strawberries for blueberries, raspberries, or sliced banana.