Achieving the perfect high hydration sourdough can feel like a baking Everest, but with the right approach, it’s entirely within your reach.

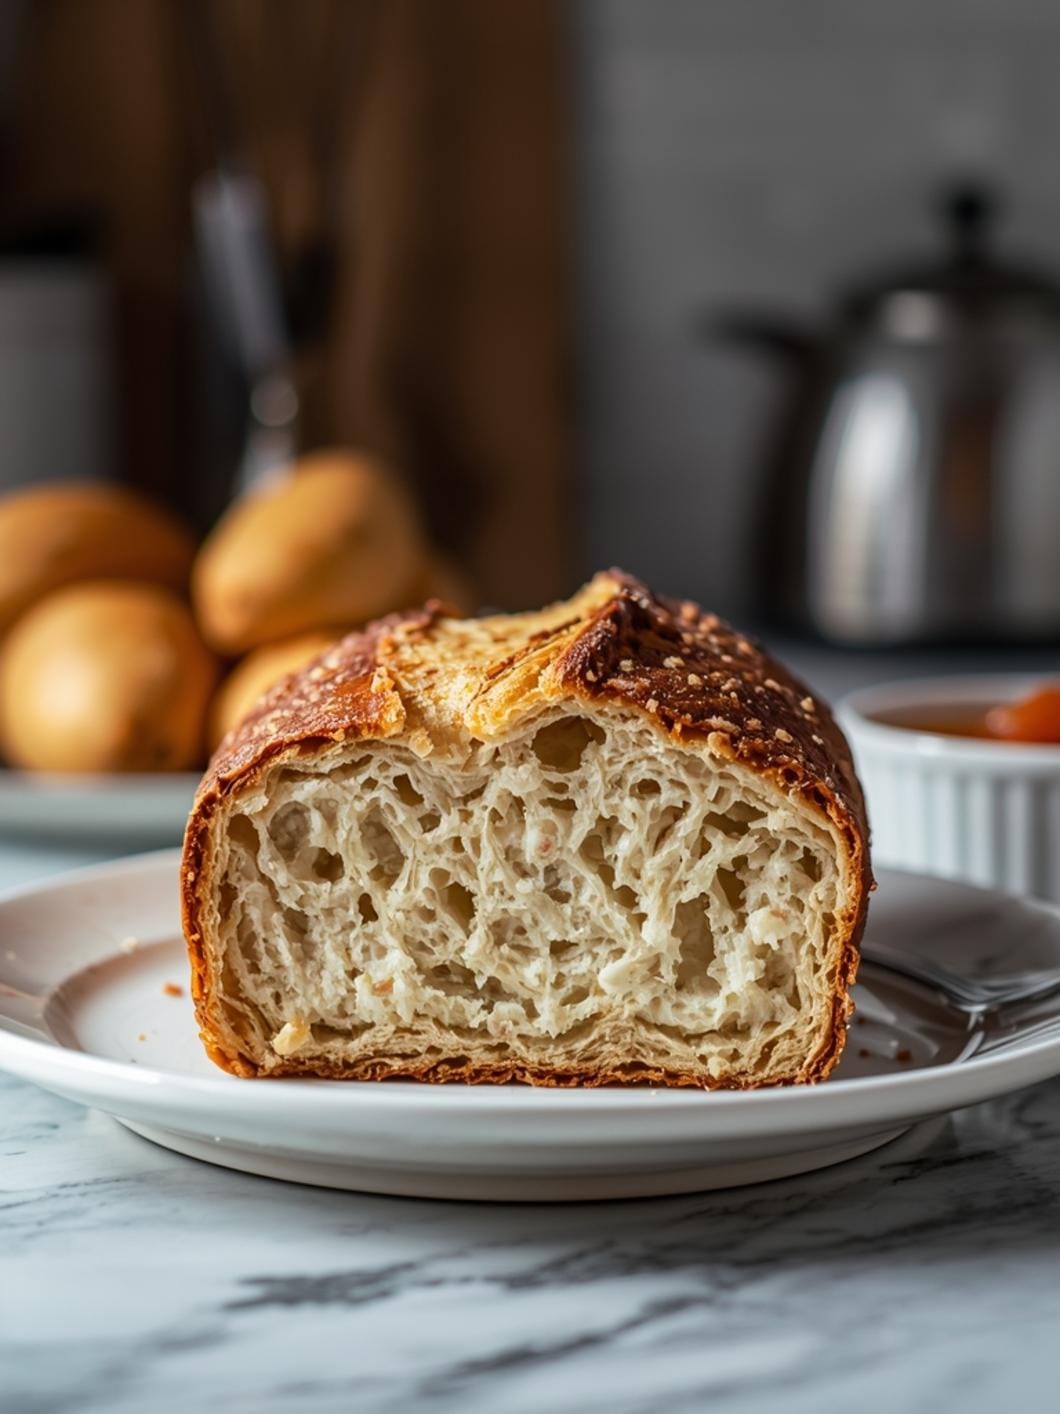
This guide is designed to demystify the process, helping you understand the science behind dough hydration and how to manipulate it for a superior loaf. Say goodbye to dense, heavy bread and hello to an airy, open crumb.
We’ll tackle common questions that plague sourdough bakers, from why your bread might be turning out dense to how to adjust your technique for optimal results. Get ready to transform your sourdough baking and finally achieve that coveted light and chewy texture.

High Hydration Sourdough Bread
- Total Time: 13-20 hours
- Yield: 1 loaf 1x
Description
This guide demystifies high hydration sourdough baking, helping you achieve an airy, open crumb. It covers the science behind dough hydration and provides a step-by-step process to transform your sourdough baking, making it accessible for both beginners and experienced bakers.
Ingredients
Instructions
1. Autolyse (Initial Hydration): In a large bowl, combine the strong bread flour and 350 grams of the filtered water. Mix until no dry flour remains. The mixture will be shaggy. Cover the bowl and let it rest for 30-60 minutes. This step allows the flour to fully hydrate and gluten development to begin without the presence of salt or starter.
2. Incorporate Starter and Salt: After the autolyse, add your active sourdough starter and the fine sea salt to the dough. Using wet hands, gently incorporate them into the dough. It might feel a bit messy at first, but keep mixing until everything is well combined. If your dough feels too stiff, you can gradually add the remaining 25-50 grams of water, a tablespoon at a time, until the dough feels more pliable and sticky.
3. First Set of Stretch and Folds: After mixing, let the dough rest for 30 minutes. Then, perform your first set of stretch and folds. With wet hands, grab a portion of the dough from one side, stretch it upwards, and fold it over itself towards the center. Rotate the bowl a quarter turn and repeat this process 3-4 times until you’ve worked your way around the dough. This builds strength.
4. Repeat Stretch and Folds: Repeat the stretch and fold process every 30-45 minutes for a total of 3-4 sets during the bulk fermentation. As you perform each set, you’ll notice the dough becoming smoother, more elastic, and holding its shape better. It will start to develop a windowpane effect, meaning you can gently stretch a small piece of dough thin enough to see light through it without it tearing.
5. Bulk Fermentation (First Rise): After the final set of stretch and folds, cover the bowl and let the dough continue to ferment at room temperature until it has increased in volume by about 30-50%. This can take 2-4 hours after the last fold, depending on your room temperature and starter activity. Look for small bubbles on the surface and a jiggly, aerated texture.
6. Pre-Shaping and Bench Rest: Gently turn the dough out onto a lightly floured surface. Using a dough scraper, gently shape it into a loose round or rectangle. Avoid deflating the dough too much. Cover it with a clean kitchen towel and let it rest for 20-30 minutes. This allows the gluten to relax, making the final shaping easier.
7. Final Shaping: Lightly flour your hands and the dough. Gently shape the dough into your desired final shape (round or oval) with tension. The goal is to create a tight skin on the outside of the dough.
8. Cold Proofing: Carefully transfer the shaped dough into a floured banneton or a bowl lined with a floured kitchen towel, seam-side up. Cover it tightly with plastic wrap or a shower cap and refrigerate for 8-12 hours, or up to 24 hours. Cold proofing slows down fermentation, develops flavor, and makes the dough easier to handle.
9. Baking: Preheat your oven with a Dutch oven inside to 475 F (245 C) for at least 30 minutes. Carefully remove the hot Dutch oven, invert the cold dough into it, and score the top with a sharp blade. Cover and bake for 20 minutes. Remove the lid, reduce the oven temperature to 450 F (230 C), and bake for another 20-30 minutes, or until the crust is deep golden brown. Let it cool completely on a wire rack before slicing.
- Prep Time: 20-30 minutes
- Cook Time: 40-50 minutes
- Category: bread
- Method: baking
- Cuisine: european
Nutrition
- Serving Size: 1 slice
Keywords: sourdough, bread, high hydration, baking, artisan, homemade, yeast-free, fermented, crusty, open crumb
What You’ll Love About This Quick And Easy Recipe
This comprehensive guide to high hydration sourdough isn’t just a recipe; it’s a deep dive into understanding your dough. You’ll love how it breaks down complex baking concepts into easy-to-digest information, making high hydration baking accessible to everyone, from curious beginners to seasoned sourdough enthusiasts looking to refine their technique. This approach is perfect for anyone who has struggled with dense sourdough or wants to achieve a more open crumb structure. It’s ideal for weekend baking projects when you have a bit more time to dedicate to the process, but the foundational knowledge gained here will elevate all your sourdough endeavors. Serving a beautifully open-crumbed loaf of sourdough, fresh from your oven, is a truly rewarding experience that will impress family and friends alike.
Everything You Need To Make This Recipe Without Stress
To truly understand and master high hydration sourdough, you’ll need a few basic ingredients and some essential tools. The beauty of sourdough is its simplicity, relying on just a few core components to create something truly magical. The key is understanding how these ingredients interact, especially water and flour.
INGREDIENTS:

- 500 grams strong bread flour
- 375-400 grams filtered water (75-80% hydration)
- 100 grams active sourdough starter
- 10 grams fine sea salt
For the strong bread flour, look for one with a protein content of 12% or higher. This higher protein content is crucial for developing the strong gluten network needed to support a high hydration dough. While all-purpose flour can work, you’ll find much better results with bread flour. Filtered water is recommended as chlorine in tap water can sometimes inhibit the activity of your sourdough starter. As for salt, fine sea salt dissolves easily and distributes evenly throughout the dough.
Time Needed From Start To Finish
While the active hands-on time for high hydration sourdough isn’t extensive, the entire process, including bulk fermentation and proofing, does require patience.
- Active Prep Time: 20-30 minutes (mixing, stretching and folding)
- Bulk Fermentation Time: 4-6 hours (at room temperature, depending on ambient temperature and starter activity)
- Cold Proofing Time: 8-12 hours (or up to 24 hours)
- Baking Time: 40-50 minutes
- Total Time (including inactive periods): Approximately 13-20 hours
Remember, these times are estimates, and sourdough baking is more about observing your dough than strictly adhering to a clock.
How To Make It Step By Step With Visual Cues

Mastering high hydration sourdough involves a series of gentle techniques that build strength and structure in your dough. Follow these steps for a beautiful loaf.
- Autolyse (Initial Hydration): In a large bowl, combine the strong bread flour and 350 grams of the filtered water. Mix until no dry flour remains. The mixture will be shaggy. Cover the bowl and let it rest for 30-60 minutes. This step allows the flour to fully hydrate and gluten development to begin without the presence of salt or starter.
- Incorporate Starter and Salt: After the autolyse, add your active sourdough starter and the fine sea salt to the dough. Using wet hands, gently incorporate them into the dough. It might feel a bit messy at first, but keep mixing until everything is well combined. If your dough feels too stiff, you can gradually add the remaining 25-50 grams of water, a tablespoon at a time, until the dough feels more pliable and sticky.
- First Set of Stretch and Folds: After mixing, let the dough rest for 30 minutes. Then, perform your first set of stretch and folds. With wet hands, grab a portion of the dough from one side, stretch it upwards, and fold it over itself towards the center. Rotate the bowl a quarter turn and repeat this process 3-4 times until you’ve worked your way around the dough. This builds strength.
- Repeat Stretch and Folds: Repeat the stretch and fold process every 30-45 minutes for a total of 3-4 sets during the bulk fermentation. As you perform each set, you’ll notice the dough becoming smoother, more elastic, and holding its shape better. It will start to develop a windowpane effect, meaning you can gently stretch a small piece of dough thin enough to see light through it without it tearing.
- Bulk Fermentation (First Rise): After the final set of stretch and folds, cover the bowl and let the dough continue to ferment at room temperature until it has increased in volume by about 30-50%. This can take 2-4 hours after the last fold, depending on your room temperature and starter activity. Look for small bubbles on the surface and a jiggly, aerated texture.
- Pre-Shaping and Bench Rest: Gently turn the dough out onto a lightly floured surface. Using a dough scraper, gently shape it into a loose round or rectangle. Avoid deflating the dough too much. Cover it with a clean kitchen towel and let it rest for 20-30 minutes. This allows the gluten to relax, making the final shaping easier.
- Final Shaping: Lightly flour your hands and the dough. Gently shape the dough into your desired final shape (round or oval) with tension. The goal is to create a tight skin on the outside of the dough.
- Cold Proofing: Carefully transfer the shaped dough into a floured banneton or a bowl lined with a floured kitchen towel, seam-side up. Cover it tightly with plastic wrap or a shower cap and refrigerate for 8-12 hours, or up to 24 hours. Cold proofing slows down fermentation, develops flavor, and makes the dough easier to handle.
- Baking: Preheat your oven with a Dutch oven inside to 475°F (245°C) for at least 30 minutes. Carefully remove the hot Dutch oven, invert the cold dough into it, and score the top with a sharp blade. Cover and bake for 20 minutes. Remove the lid, reduce the oven temperature to 450°F (230°C), and bake for another 20-30 minutes, or until the crust is deep golden brown. Let it cool completely on a wire rack before slicing.
Easy Variations And Serving Ideas That Fit Real Life
Once you master the basic high hydration sourdough, the possibilities are endless! This versatile bread is fantastic on its own, but here are some ideas to elevate your experience:
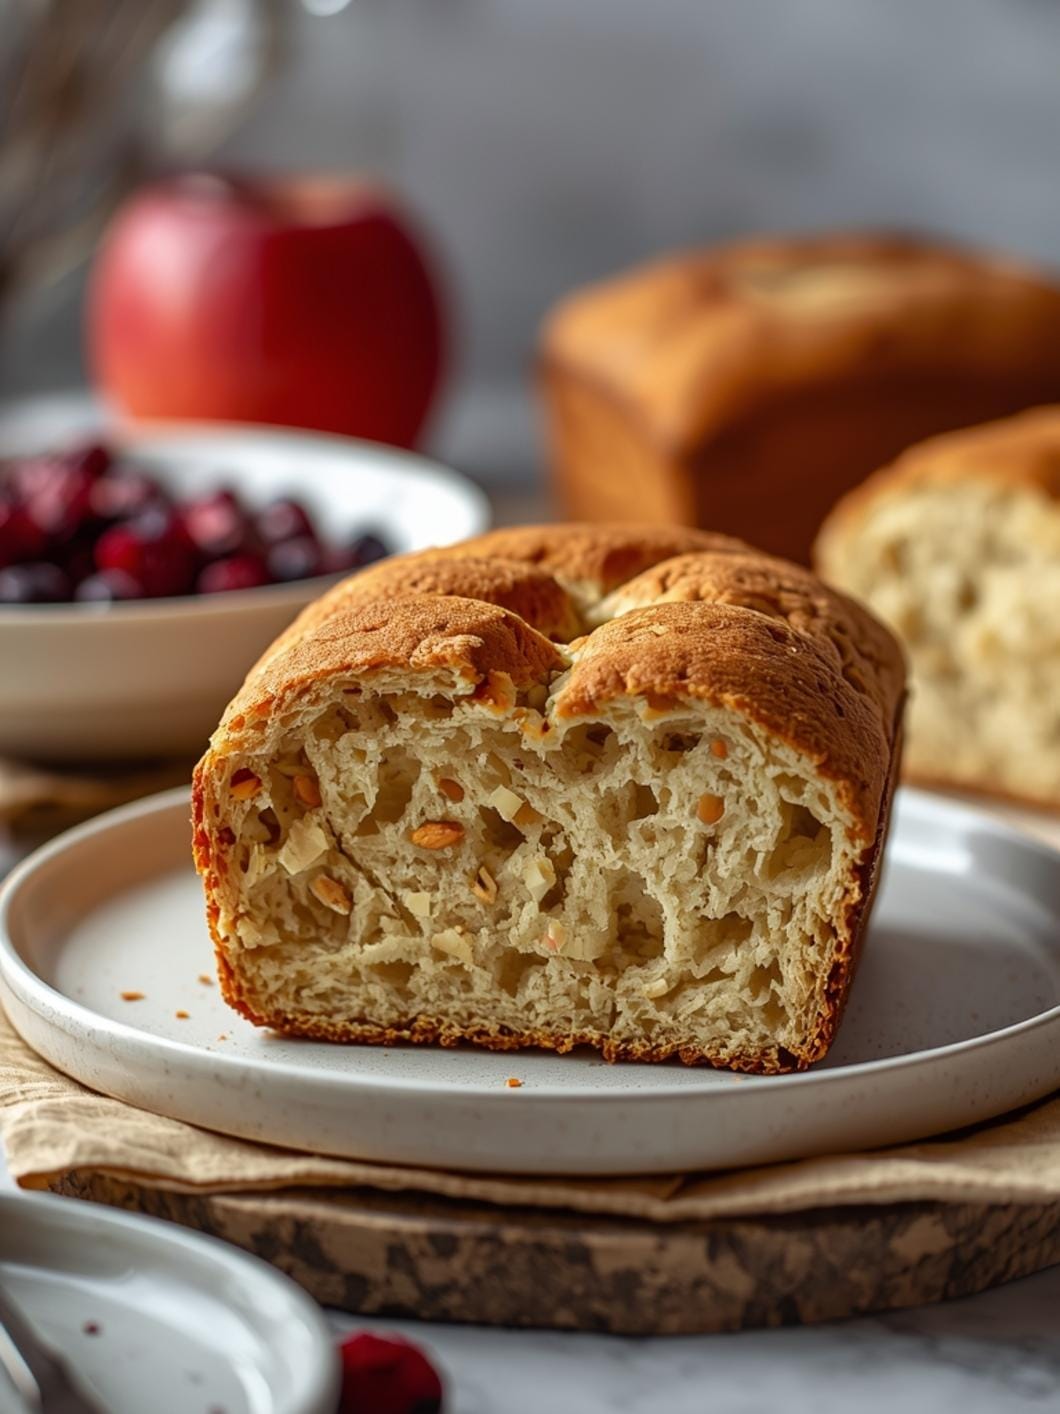
- Seed Inclusion: During the initial mixing or the first set of stretch and folds, incorporate 2-3 tablespoons of toasted sesame seeds, poppy seeds, flax seeds, or a mix of your favorite seeds. They add a delightful crunch and nutty flavor.
- Herb Infusion: For a savory twist, knead in 1-2 tablespoons of finely chopped fresh rosemary, thyme, or dried Italian herbs during the second set of stretch and folds. This is wonderful with olive oil.
- Cheese Delight: Add 1/2 cup of shredded sharp cheddar or Gruyere cheese during the final shaping for a cheesy, savory loaf perfect with soups or salads.
- Garlic Bread Base: Slice your cooled sourdough, spread with garlic butter, and broil for a homemade garlic bread that far surpasses store-bought versions.
- Avocado Toast Perfection: The open crumb of high hydration sourdough is the ideal canvas for creamy avocado toast, topped with everything from a sprinkle of chili flakes to a fried egg.
- Soup Dipper: There’s nothing quite like a thick slice of crusty sourdough for dipping into hearty stews or creamy tomato soup.
- Sandwich Upgrade: Elevate your everyday sandwiches. The sturdy yet airy texture holds up beautifully to fillings without becoming soggy.
- Bruschetta Base: Toast slices and top with fresh diced tomatoes, basil, garlic, and a drizzle of balsamic glaze for an elegant appetizer.
Common Slip-Ups And How To Avoid Them
High hydration sourdough can present a few challenges, especially for beginners. Knowing what to watch out for can save you from common frustrations.
- Dough is Too Sticky to Handle: This is the most common issue with high hydration doughs. The key is to use wet hands when handling the dough and to rely on stretch and folds rather than traditional kneading. Don’t be afraid to use a little extra water on your hands. Also, ensure your work surface is lightly floured, not heavily, to prevent sticking without drying out the dough.
- **Dense Bread

FAQs
- Can I make these ahead? Yes—prep ahead, refrigerate, then serve when ready.
- How long do leftovers last? Store covered in the fridge for 3–4 days for best texture.
- Can I adjust sweetness? Yes—add more or less sweetener to taste.
- Can I change the fruit? Yes—swap strawberries for blueberries, raspberries, or sliced banana.