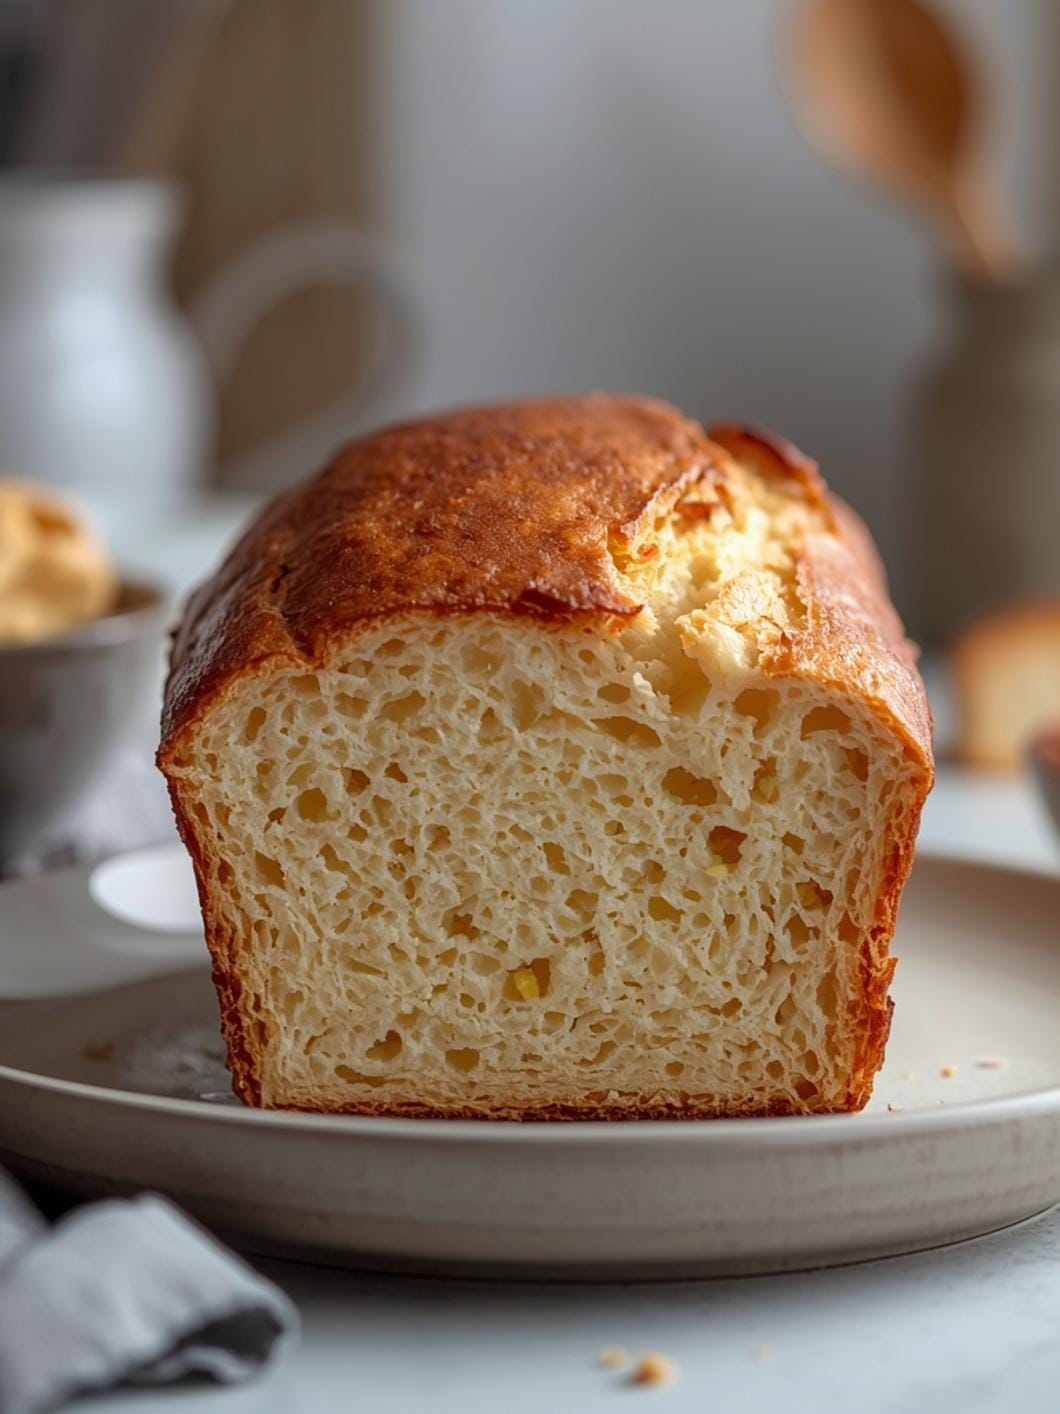
Baking a fresh loaf of bread at home can feel incredibly rewarding, especially when it fills your kitchen with a warm, inviting aroma.

This honey oat bread loaf recipe is designed to be straightforward and accessible, even if you’re new to bread making. It offers a delightful balance of wholesome oats and the subtle sweetness of honey, creating a loaf that’s both nutritious and incredibly satisfying.
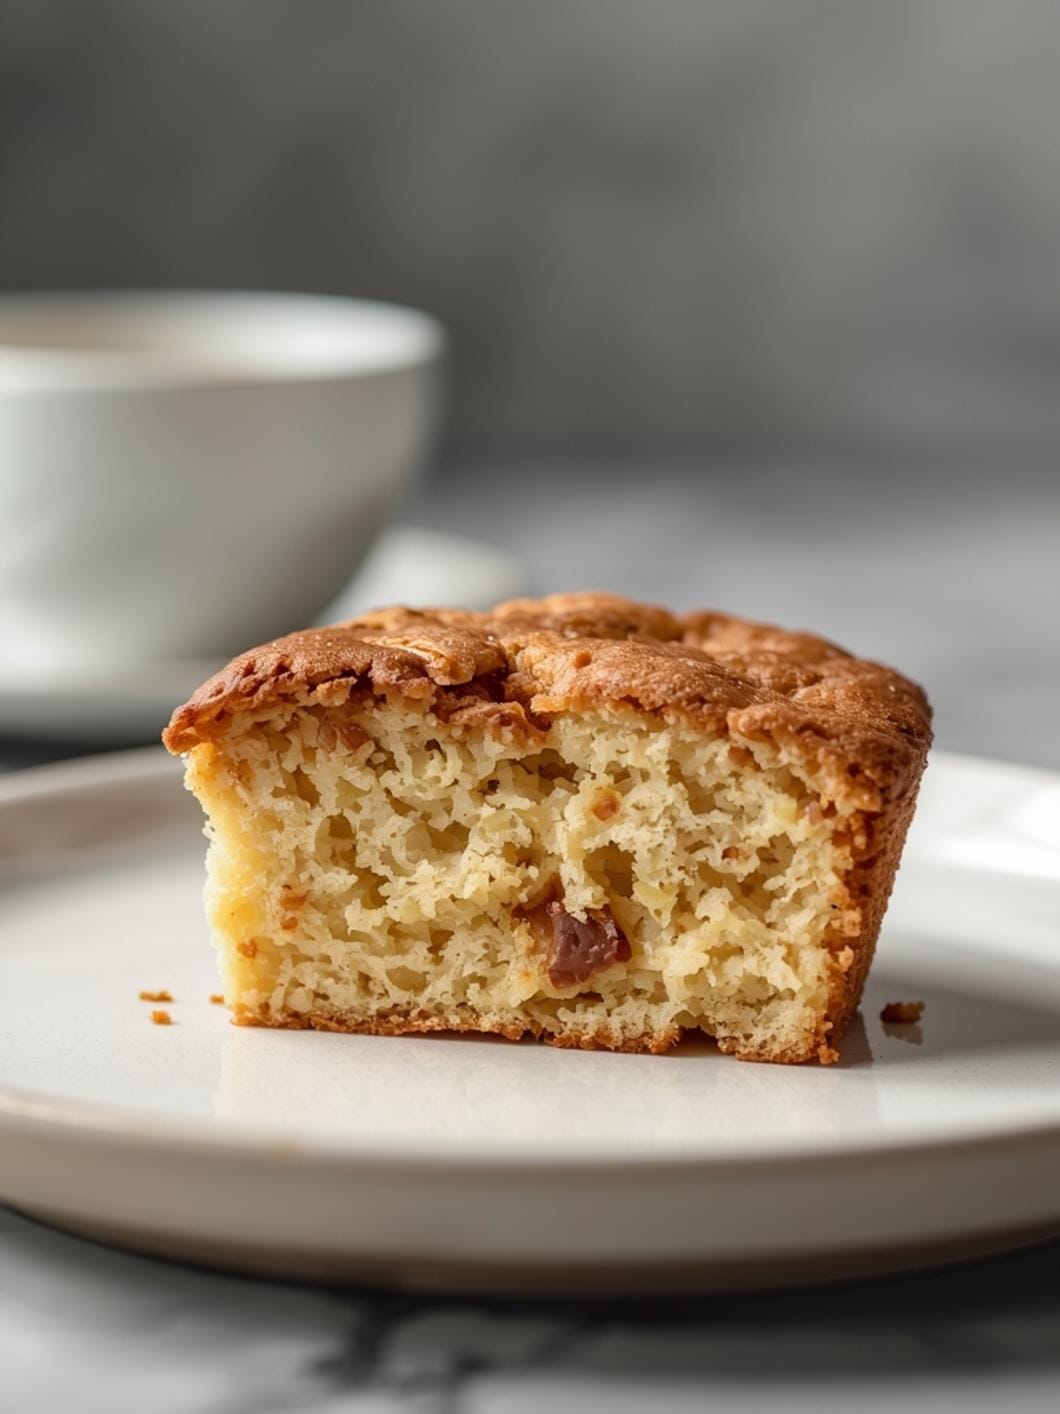
Perfect for busy weeknights or a relaxed weekend morning, this recipe delivers a tender crumb and a lightly golden crust. Whether you’re looking for a hearty base for your favorite sandwich fillings or a comforting slice to enjoy with your morning coffee, this homemade honey oat bread is sure to become a staple in your kitchen.

Homemade Honey Oat Bread Loaf
- Total Time: 2 hours 45 minutes to 3 hours 15 minutes
- Yield: 1 loaf 1x
Description
This honey oat bread loaf recipe is designed to be straightforward and accessible, even if you’re new to bread making. It offers a delightful balance of wholesome oats and the subtle sweetness of honey, creating a loaf that’s both nutritious and incredibly satisfying. Perfect for busy weeknights or a relaxed weekend morning, this recipe delivers a tender crumb and a lightly golden crust. Whether you’re looking for a hearty base for your favorite sandwich fillings or a comforting slice to enjoy with your morning coffee, this homemade honey oat bread is sure to become a staple in your kitchen.
Ingredients
Instructions
1. 1. Activate the Yeast: In a large mixing bowl, combine the warm water (ensure it’s not too hot, or it will kill the yeast, nor too cold, or it won’t activate), yeast, and honey. Stir gently and let it sit for 5-10 minutes until the mixture becomes foamy. This foaminess is your visual cue that the yeast is active and ready to work.
2. 2. Combine Wet Ingredients: Once the yeast is foamy, stir in the melted butter and salt until well combined. The mixture should smell subtly sweet and yeasty.
3. 3. Add Oats and Flour: Gradually add the 1 cup of old-fashioned rolled oats to the wet ingredients, stirring them in. Then, add 3 cups of the all-purpose flour, one cup at a time, mixing until just combined after each addition. The dough will start to come together but will still be shaggy.
4. 4. Knead the Dough: Turn the shaggy dough out onto a lightly floured surface. Begin kneading, gradually adding the remaining 1/2 to 1 cup of flour as needed, until the dough is smooth, elastic, and no longer sticky. This usually takes about 8-10 minutes of continuous kneading. You’ll know it’s ready when it springs back slightly when poked.
5. 5. First Rise: Lightly grease a clean large bowl with a little oil. Place the dough in the bowl, turning it once to coat the top. Cover the bowl with plastic wrap or a clean kitchen towel and let it rise in a warm place for 60-75 minutes, or until it has doubled in size. This is a crucial step for a light, airy texture.
6. 6. Shape and Second Rise: Gently punch down the risen dough to release the air. Turn it out onto a lightly floured surface and shape it into a loaf. Place the shaped dough into a lightly greased 9×5-inch loaf pan. Sprinkle the top with a few extra oats if desired. Cover the loaf pan loosely with plastic wrap or a kitchen towel and let it rise again in a warm place for 30-45 minutes, or until it has nearly doubled in size and looks puffy.
7. 7. Bake the Loaf: Preheat your oven to 375 F (190 C) during the last 15 minutes of the second rise. Bake the bread for 30-35 minutes, or until the crust is golden brown and the internal temperature reaches 200-210 F (93-99 C) when checked with an instant-read thermometer. If the top browns too quickly, you can loosely tent it with aluminum foil.
8. 8. Cool Completely: Once baked, immediately remove the loaf from the pan and place it on a wire rack to cool completely before slicing. Slicing warm bread can make it gummy and difficult to cut cleanly.
- Prep Time: 15-20 minutes
- Cook Time: 30-35 minutes
- Category: bread
- Method: baking
- Cuisine: american
Nutrition
- Serving Size: 1 slice
Keywords: honey oat bread, homemade bread, oat bread, honey bread, easy bread recipe, baking, comfort food, sandwich bread, breakfast bread, whole grain
What You’ll Love About This Quick And Easy Recipe
This honey oat bread loaf is a true family favorite for so many reasons. First, it’s incredibly versatile; its mild, slightly sweet flavor makes it a fantastic canvas for both savory and sweet toppings. Kids love it toasted with a smear of jam, and adults appreciate its wholesome goodness in a turkey and avocado sandwich. This recipe is specifically designed to be beginner-friendly, meaning you won’t encounter any complicated techniques or obscure ingredients. It’s perfect for anyone who wants to enjoy the taste of homemade bread without spending hours in the kitchen. You can serve it at breakfast, lunch, or even as a side with dinner. It’s a comforting, practical addition to any meal, bringing that homemade touch everyone appreciates.
Everything You Need To Make This Recipe Without Stress
Gathering your ingredients before you start baking makes the whole process smoother and more enjoyable. This recipe uses common pantry staples, ensuring you can whip up a delicious loaf without a special trip to the store.
INGREDIENTS:

- 1 ½ cups warm water (105-115°F)
- 2 ¼ teaspoons active dry yeast (one standard packet)
- ¼ cup honey
- 2 tablespoons unsalted butter, melted
- 1 ½ teaspoons salt
- 1 cup old-fashioned rolled oats, plus more for topping
- 3 ½ to 4 cups all-purpose flour
When it comes to substitutions, you have a few easy options. If you don’t have active dry yeast, instant yeast can be used in the same amount, and you can mix it directly with the dry ingredients without proofing. For the honey, maple syrup can be a good alternative if you prefer, though it will slightly alter the flavor profile. If you’re out of unsalted butter, salted butter works too; just reduce the added salt in the recipe by about ¼ teaspoon. As for the oats, old-fashioned rolled oats are best for texture, but quick oats can be used in a pinch, though they might result in a slightly less chewy crumb. Avoid steel-cut oats as they require much longer cooking times. For flour, bread flour can be used instead of all-purpose for a chewier loaf, but all-purpose works perfectly well for a tender crumb.
Time Needed From Start To Finish
- Preparation Time: 15-20 minutes
- Proofing Time: 60-75 minutes (first rise) + 30-45 minutes (second rise)
- Baking Time: 30-35 minutes
- Total Active Time: Approximately 25-30 minutes
- Total Recipe Time (including proofing and baking): Approximately 2 hours 45 minutes to 3 hours 15 minutes
While the total time includes proofing, much of that is hands-off, allowing you to attend to other tasks while the dough does its magic.
How To Make It Step By Step With Visual Cues

Follow these clear steps to bake your perfect honey oat bread loaf. Paying attention to the dough’s feel and appearance will guide you to success.
- Activate the Yeast: In a large mixing bowl, combine the warm water (ensure it’s not too hot, or it will kill the yeast, nor too cold, or it won’t activate), yeast, and honey. Stir gently and let it sit for 5-10 minutes until the mixture becomes foamy. This foaminess is your visual cue that the yeast is active and ready to work.
- Combine Wet Ingredients: Once the yeast is foamy, stir in the melted butter and salt until well combined. The mixture should smell subtly sweet and yeasty.
- Add Oats and Flour: Gradually add the 1 cup of old-fashioned rolled oats to the wet ingredients, stirring them in. Then, add 3 cups of the all-purpose flour, one cup at a time, mixing until just combined after each addition. The dough will start to come together but will still be shaggy.
- Knead the Dough: Turn the shaggy dough out onto a lightly floured surface. Begin kneading, gradually adding the remaining ½ to 1 cup of flour as needed, until the dough is smooth, elastic, and no longer sticky. This usually takes about 8-10 minutes of continuous kneading. You’ll know it’s ready when it springs back slightly when poked.
- First Rise: Lightly grease a clean large bowl with a little oil. Place the dough in the bowl, turning it once to coat the top. Cover the bowl with plastic wrap or a clean kitchen towel and let it rise in a warm place for 60-75 minutes, or until it has doubled in size. This is a crucial step for a light, airy texture.
- Shape and Second Rise: Gently punch down the risen dough to release the air. Turn it out onto a lightly floured surface and shape it into a loaf. Place the shaped dough into a lightly greased 9×5-inch loaf pan. Sprinkle the top with a few extra oats if desired. Cover the loaf pan loosely with plastic wrap or a kitchen towel and let it rise again in a warm place for 30-45 minutes, or until it has nearly doubled in size and looks puffy.
- Bake the Loaf: Preheat your oven to 375°F (190°C) during the last 15 minutes of the second rise. Bake the bread for 30-35 minutes, or until the crust is golden brown and the internal temperature reaches 200-210°F (93-99°C) when checked with an instant-read thermometer. If the top browns too quickly, you can loosely tent it with aluminum foil.
- Cool Completely: Once baked, immediately remove the loaf from the pan and place it on a wire rack to cool completely before slicing. Slicing warm bread can make it gummy and difficult to cut cleanly.
Easy Variations And Serving Ideas That Fit Real Life
This honey oat bread is wonderfully adaptable. For a touch of sweetness and texture, consider adding ½ cup of raisins or dried cranberries to the dough during the last few minutes of kneading. If you want a more savory loaf, you could incorporate 2 tablespoons of fresh chopped rosemary or thyme. For a nutty flavor, a ¼ cup of chopped walnuts or pecans can be folded in.
When it comes to serving, the possibilities are endless. For breakfast, it’s fantastic toasted with butter, cream cheese, or your favorite fruit spread. It makes a sturdy and delicious base for school lunch sandwiches, holding up well to various fillings. At dinner, serve thick slices alongside a hearty soup or stew, or as a simple side with a green salad. For a fun snack, try making mini open-faced sandwiches with cream cheese and cucumber for the kids, or a sophisticated avocado toast for yourself. It’s also lovely paired with a cheese board for a casual gathering.
Common Slip-Ups And How To Avoid Them
Even experienced bakers can make mistakes, but knowing what to watch out for can save your loaf. One common issue is using water that’s too hot or too cold for the yeast. Water that’s too hot will kill the yeast, preventing the dough from rising, while water that’s too cold won’t activate it properly. Aim for water that feels warm to the touch, like a baby’s bath, between 105-115°F (40-46°C).
Another frequent mistake is adding too much flour during kneading. While it’s tempting to keep adding flour to make the dough less sticky, too much flour will result in a dense, dry loaf. Add flour gradually, just until the dough is no longer excessively sticky and feels smooth and elastic. It’s better to have a slightly tacky dough than an overly stiff one.
Not letting the dough proof long enough is another common pitfall. Rushing the rising process will lead to a dense, heavy bread. Allow the dough to double in size for both rises. The exact time can vary based on your kitchen’s temperature, so rely on visual cues rather than just the clock. If your kitchen is cool, place the dough in a slightly warmer spot, like a turned-off oven with the light on, to encourage rising.
Finally, slicing the bread before it has cooled completely can lead to a gummy texture. The internal structure of the bread is still setting as it cools. Patience is key here; let it cool on a wire rack for

FAQs
- Can I make these ahead? Yes—prep ahead, refrigerate, then serve when ready.
- How long do leftovers last? Store covered in the fridge for 3–4 days for best texture.
- Can I adjust sweetness? Yes—add more or less sweetener to taste.
- Can I change the fruit? Yes—swap strawberries for blueberries, raspberries, or sliced banana.