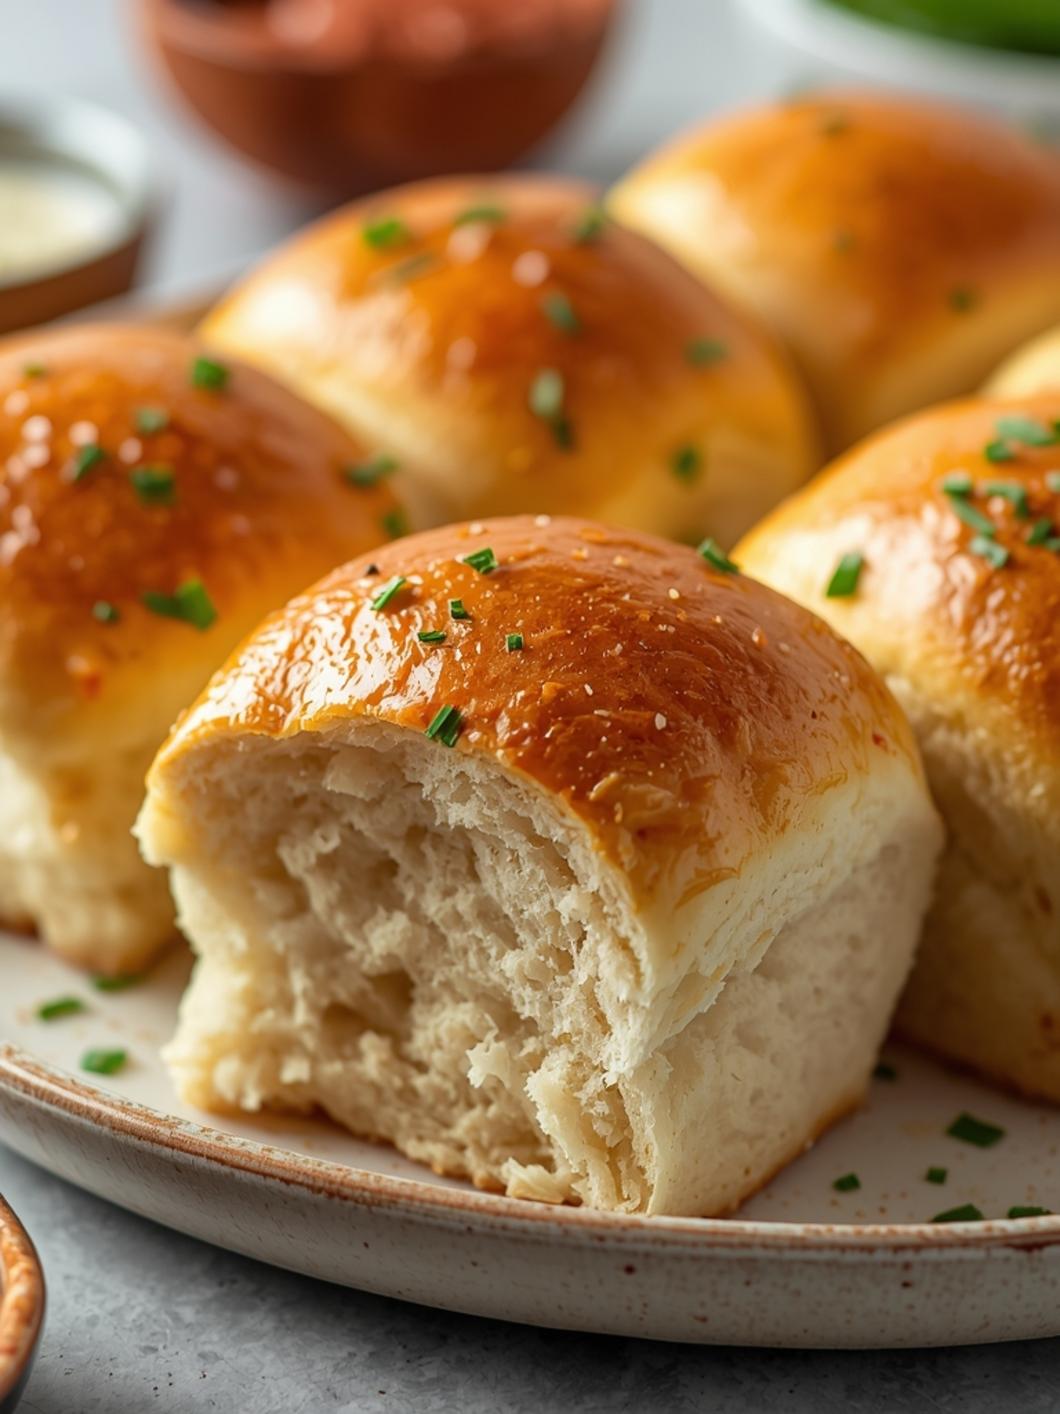
Bake the best sourdough dinner rolls with this easy recipe, perfect for any meal or holiday gathering.

These homemade sourdough dinner rolls are soft, fluffy, and made with your active sourdough starter. Discover the details in this straightforward guide designed for home cooks looking to elevate their bread game without a lot of fuss.
This recipe delivers tender, flavorful rolls that are sure to impress, whether you’re serving them alongside a weeknight dinner or as part of a special occasion spread. Get ready to enjoy the satisfying taste of homemade sourdough in a convenient and delicious form.
Table of Contents
- What You’ll Love About This Quick And Easy Recipe
- Everything You Need To Make This Recipe Without Stress
- Time Needed From Start To Finish
- How To Make It Step By Step With Visual Cues
- Easy Variations And Serving Ideas That Fit Real Life
- Common Slip-Ups And How To Avoid Them
- How To Store It And Make It Ahead Without Ruining Texture

Easy Sourdough Dinner Rolls
- Total Time: 7-10 hours
- Yield: 12 rolls 1x
Description
Bake the best sourdough dinner rolls with this easy recipe, perfect for any meal or holiday gathering. These homemade sourdough dinner rolls are soft, fluffy, and made with your active sourdough starter. Discover the details in this straightforward guide designed for home cooks looking to elevate their bread game without a lot of fuss. This recipe delivers tender, flavorful rolls that are sure to impress, whether you’re serving them alongside a weeknight dinner or as part of a special occasion spread. Get ready to enjoy the satisfying taste of homemade sourdough in a convenient and delicious form.
Ingredients
Instructions
1. Combine Wet Ingredients: In a large mixing bowl, whisk together your active sourdough starter, warm water, granulated sugar, melted butter, and egg until well combined. The mixture should look slightly milky and uniform.
2. Add Dry Ingredients: Gradually add the salt and 3 1/2 cups of all-purpose flour to the wet ingredients. Mix with a wooden spoon or a stand mixer with a dough hook until a shaggy dough forms. It will be sticky at this stage.
3. Knead the Dough: Turn the dough out onto a lightly floured surface and knead for 8-10 minutes, or use a stand mixer with a dough hook on medium speed for 5-7 minutes. The dough should become smooth, elastic, and less sticky. If it’s too sticky to handle, add a tiny bit more flour, one tablespoon at a time, but avoid adding too much.
4. First Rise (Bulk Fermentation): Lightly grease a clean bowl with a little oil. Place the dough in the bowl, turning it once to coat. Cover the bowl with plastic wrap or a clean kitchen towel and let it rise in a warm spot for 4-6 hours, or until doubled in size. Alternatively, for a slower rise and deeper flavor, you can refrigerate the dough overnight (8-12 hours).
5. Shape the Rolls: Once the dough has risen, gently punch it down to release the air. Turn the dough out onto a lightly floured surface. Divide the dough into 12 equal pieces. For each piece, gently form it into a smooth, round ball by pulling the edges underneath and pinching them together at the bottom.
6. Second Rise (Proofing): Arrange the shaped rolls in a lightly greased 9×13-inch baking dish, leaving a little space between each roll. Cover the dish loosely with plastic wrap or a clean towel and let the rolls rise in a warm spot for another 1-2 hours, or until they look puffy and have nearly doubled in size.
7. Bake the Rolls: Preheat your oven to 375 F (190 C) during the last 15 minutes of the second rise. Bake the rolls for 20-25 minutes, or until they are golden brown on top and sound hollow when tapped on the bottom.
8. Finish and Serve: As soon as the rolls come out of the oven, brush them generously with the remaining 2 tablespoons of melted butter. This adds shine and a lovely buttery flavor. Let them cool slightly before serving warm.
- Prep Time: 20 minutes
- Cook Time: 20-25 minutes
- Category: bread
- Method: baking
- Cuisine: american
Nutrition
- Serving Size: 1 roll
Keywords: sourdough, dinner rolls, bread, baking, homemade, fluffy, soft, easy, holiday, comfort food
What You’ll Love About This Quick And Easy Recipe
This recipe is a game-changer for anyone who loves the tangy depth of sourdough but wants a more approachable baking project than a full loaf. It’s perfect for busy families because it breaks down the process into manageable steps, resulting in incredibly soft and fluffy dinner rolls that disappear quickly. You’ll appreciate how the active sourdough starter contributes a unique flavor profile and a wonderful texture without requiring commercial yeast. These rolls are fantastic served warm with butter at any meal, from a casual Sunday brunch to a festive holiday dinner. They also make excellent sliders or sandwich bases for packed lunches, making them a versatile addition to your culinary repertoire.
Everything You Need To Make This Recipe Without Stress
Gathering your ingredients before you begin ensures a smooth baking process. This recipe relies on common pantry staples, with the star being your active sourdough starter. Make sure your starter has been fed and is bubbly and active, as this is crucial for the rolls to rise properly and develop their signature flavor.
INGREDIENTS:

- 1 cup active sourdough starter (fed and bubbly)
- 1 cup warm water (about 95-105°F)
- 1/4 cup granulated sugar
- 1/4 cup unsalted butter, melted
- 1 large egg
- 1 teaspoon salt
- 3 1/2 cups all-purpose flour, plus more for dusting
- 2 tablespoons unsalted butter, melted (for brushing after baking)
For the flour, all-purpose works wonderfully here, providing a tender crumb. If you prefer, you can experiment with a small portion of bread flour for a slightly chewier texture, but stick to mostly all-purpose for the classic soft dinner roll feel. When it comes to butter, unsalted is generally preferred in baking as it gives you more control over the overall saltiness of the dish. However, if you only have salted butter on hand, you can reduce the added salt in the recipe by about a quarter teaspoon.
Time Needed From Start To Finish
While sourdough baking often implies long waiting times, these dinner rolls are designed to be relatively efficient for a sourdough recipe. The bulk of the time is hands-off, allowing the starter to work its magic.
- Prep Time: 20 minutes
- First Rise (Bulk Fermentation): 4-6 hours (or overnight in the refrigerator for convenience)
- Shaping Time: 15 minutes
- Second Rise (Proofing): 1-2 hours
- Bake Time: 20-25 minutes
- Total Active Time: Approximately 35 minutes
- Total Overall Time (including rises): 7-10 hours (or longer if refrigerating overnight)
How To Make It Step By Step With Visual Cues

Creating these delightful sourdough dinner rolls is a rewarding process. Follow these steps for a perfect batch every time.
- Combine Wet Ingredients: In a large mixing bowl, whisk together your active sourdough starter, warm water, granulated sugar, melted butter, and egg until well combined. The mixture should look slightly milky and uniform.
- Add Dry Ingredients: Gradually add the salt and 3 1/2 cups of all-purpose flour to the wet ingredients. Mix with a wooden spoon or a stand mixer with a dough hook until a shaggy dough forms. It will be sticky at this stage.
- Knead the Dough: Turn the dough out onto a lightly floured surface and knead for 8-10 minutes, or use a stand mixer with a dough hook on medium speed for 5-7 minutes. The dough should become smooth, elastic, and less sticky. If it’s too sticky to handle, add a tiny bit more flour, one tablespoon at a time, but avoid adding too much.
- First Rise (Bulk Fermentation): Lightly grease a clean bowl with a little oil. Place the dough in the bowl, turning it once to coat. Cover the bowl with plastic wrap or a clean kitchen towel and let it rise in a warm spot for 4-6 hours, or until doubled in size. Alternatively, for a slower rise and deeper flavor, you can refrigerate the dough overnight (8-12 hours).
- Shape the Rolls: Once the dough has risen, gently punch it down to release the air. Turn the dough out onto a lightly floured surface. Divide the dough into 12 equal pieces. For each piece, gently form it into a smooth, round ball by pulling the edges underneath and pinching them together at the bottom.
- Second Rise (Proofing): Arrange the shaped rolls in a lightly greased 9×13-inch baking dish, leaving a little space between each roll. Cover the dish loosely with plastic wrap or a clean towel and let the rolls rise in a warm spot for another 1-2 hours, or until they look puffy and have nearly doubled in size.
- Bake the Rolls: Preheat your oven to 375°F (190°C) during the last 15 minutes of the second rise. Bake the rolls for 20-25 minutes, or until they are golden brown on top and sound hollow when tapped on the bottom.
- Finish and Serve: As soon as the rolls come out of the oven, brush them generously with the remaining 2 tablespoons of melted butter. This adds shine and a lovely buttery flavor. Let them cool slightly before serving warm.
Easy Variations And Serving Ideas That Fit Real Life
These sourdough dinner rolls are incredibly versatile and can be adapted to suit various tastes and occasions. For a kid-friendly twist, you can sprinkle a little Parmesan cheese or everything bagel seasoning on top before baking. If you’re looking for a savory option, mix in a quarter cup of finely chopped fresh herbs like rosemary or chives into the dough during the kneading stage. For a touch of sweetness, a tablespoon of honey or maple syrup can be added to the wet ingredients.
These rolls are perfect for party or buffet serving. Arrange them in a basket lined with a cloth napkin for an inviting presentation. They pair beautifully with almost any meal, from hearty stews and chili to roasted chicken or a simple salad. Consider serving them with a small bowl of herbed butter or a flavorful olive oil for dipping. They also make fantastic mini sandwiches or sliders for gatherings, filled with pulled pork, deli meat, or even a veggie burger patty.
Common Slip-Ups And How To Avoid Them
Even experienced bakers can encounter small challenges, but knowing what to look out for can save your rolls.
- Dough Not Rising: The most common culprit here is an inactive sourdough starter. Ensure your starter has been fed recently and is bubbly and active before you begin. Also, make sure your water isn’t too hot (which can kill the starter) or too cold (which slows it down). A warm spot for rising is key – think a sunny window or near a pilot light.
- Over-flouring the Dough: Adding too much flour can make your rolls dense and dry. Resist the urge to add excessive flour during kneading, even if the dough feels a bit sticky. A slightly sticky dough is often a sign of good hydration. Use just enough flour to prevent sticking to your hands and the work surface.
- Under-kneading: Insufficient kneading won’t develop the gluten structure needed for soft, airy rolls. Knead until the dough is smooth and elastic. If using a stand mixer, check for the “windowpane test” – a small piece of dough should be able to stretch thin enough to see light through it without tearing.
- Over-proofing: While you want your rolls to rise, letting them go too long can cause them to collapse in the oven or have a yeasty, alcoholic smell. Keep an eye on them during the second rise; they should look puffy but not overly inflated.
- Uneven Baking: If some rolls are browner than others, your oven might have hot spots. Rotate the baking dish halfway through the baking time to ensure even browning.
How To Store It And Make It Ahead Without Ruining Texture
These sourdough dinner rolls are best enjoyed fresh and warm from the oven. However, if you have leftovers or want to get a head start, there are good ways to manage them.
To store baked rolls, place them in an airtight container or a resealable plastic bag at room temperature for up to 2-3 days. For longer storage, you can freeze baked and cooled rolls for up to 2-3 months. Wrap them individually in plastic wrap, then place them in a freezer-safe bag.
To reheat, thaw frozen rolls at room temperature if applicable. Then, wrap them in foil and warm them in a 300°F (150°C) oven

FAQs
- Can I make these ahead? Yes—prep ahead, refrigerate, then serve when ready.
- How long do leftovers last? Store covered in the fridge for 3–4 days for best texture.
- Can I adjust sweetness? Yes—add more or less sweetener to taste.
- Can I change the fruit? Yes—swap strawberries for blueberries, raspberries, or sliced banana.