Baking a delicious and healthy sourdough oat bread doesn’t have to be complicated or take days of effort.

This recipe for a maple oat sourdough sandwich loaf is designed for home bakers who want to enjoy the wholesome goodness of sourdough with a touch of sweetness and a wonderfully soft texture, perfect for everyday meals.
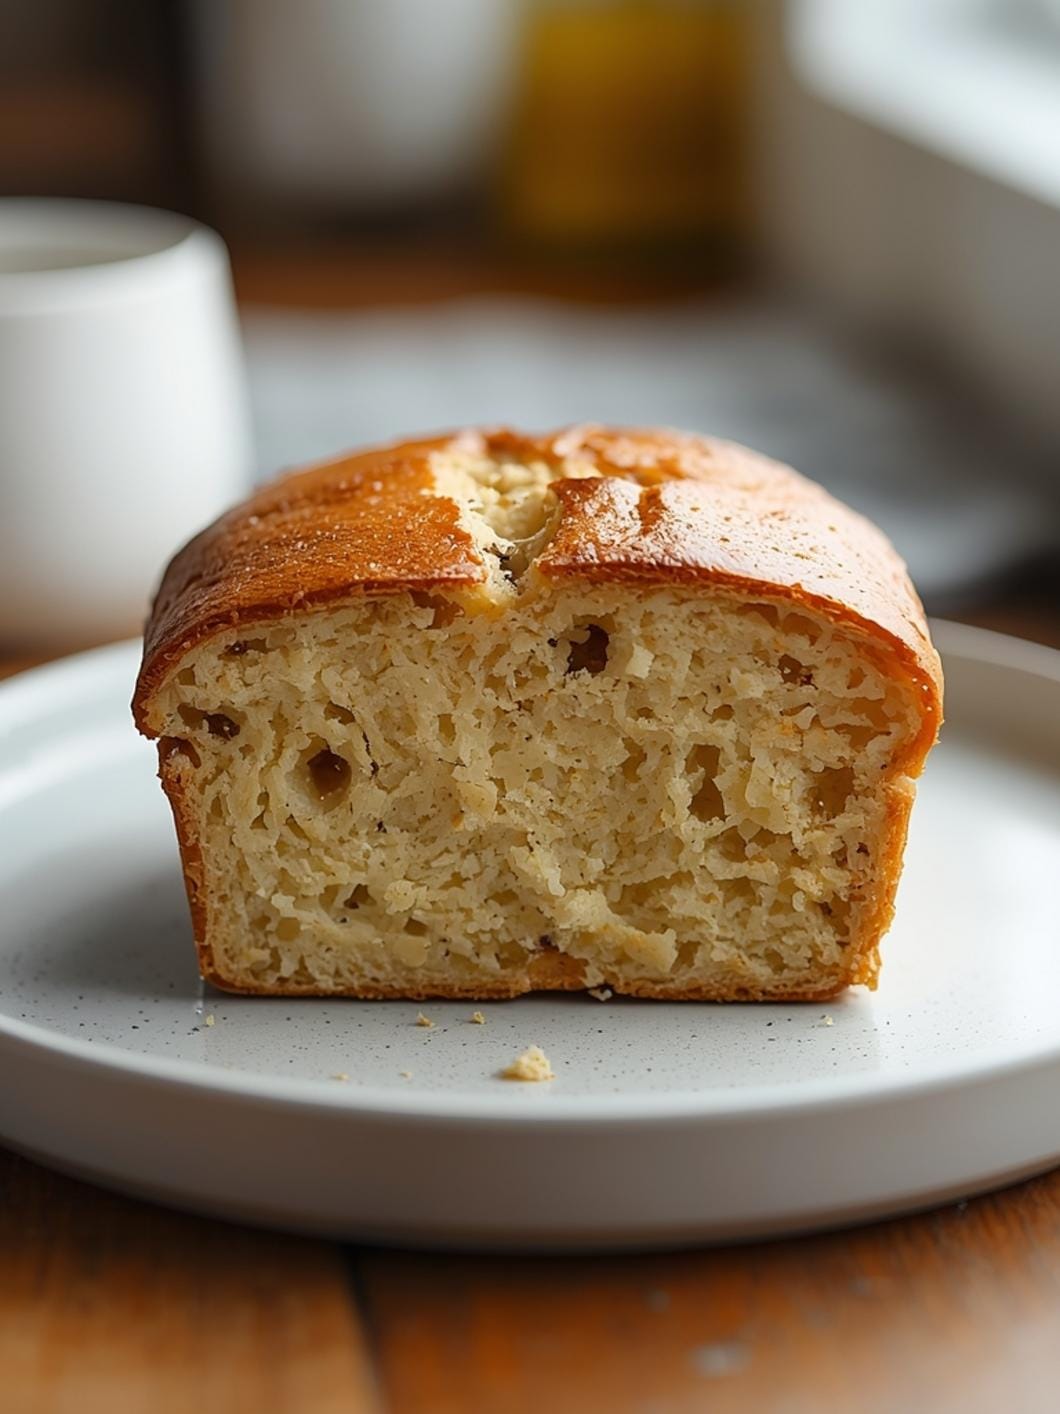
This particular loaf is ideal for busy families looking for a nutritious bread option that’s both satisfying and easy to incorporate into their routine. Forget store-bought loaves filled with unfamiliar ingredients; this homemade version offers a delightful chew and a subtle maple flavor that makes it irresistible for sandwiches or morning toast.

Maple Oat Sourdough Sandwich Loaf
- Total Time: 7-10 hours (including cooling)
- Yield: 1 loaf 1x
Description
This recipe for a maple oat sourdough sandwich loaf is designed for home bakers who want to enjoy the wholesome goodness of sourdough with a touch of sweetness and a wonderfully soft texture, perfect for everyday meals. This homemade version offers a delightful chew and a subtle maple flavor that makes it irresistible for sandwiches or morning toast.
Ingredients
Instructions
1. Combine Wet Ingredients and Starter: In a large mixing bowl, gently whisk together the active sourdough starter, warm water, maple syrup, melted butter, and salt until well combined. The mixture should look slightly milky and uniform.
2. Add Oats and Flour: Stir in the rolled oats, then gradually add the bread flour, about a cup at a time, mixing with a wooden spoon or your hands until a shaggy dough forms. It will be sticky at this stage, but don’t worry.
3. Knead the Dough: Turn the dough out onto a lightly floured surface. Knead for 8-10 minutes until the dough becomes smooth and elastic. It should pass the “windowpane test” – you should be able to stretch a small piece thin enough to see light through it without tearing.
4. First Rise (Bulk Fermentation): Place the kneaded dough into a lightly oiled bowl, turning it once to coat. Cover the bowl with plastic wrap or a damp kitchen towel. Let it rise in a warm spot for 4-6 hours, or until it has visibly increased in size and looks bubbly. The exact time will depend on your starter’s activity and your kitchen temperature.
5. Shape the Loaf: Gently turn the dough out onto a lightly floured surface. Deflate it slightly and shape it into a tight log or oval that will fit into your loaf pan. You want to create good surface tension to help with the final rise and oven spring.
6. Second Rise (Proofing): Place the shaped dough into a greased 9×5-inch loaf pan. Cover it loosely with plastic wrap or a damp towel and let it proof for 1-2 hours, or until it looks puffy and has nearly doubled in size. A gentle poke with a floured finger should leave a slight indentation that slowly springs back.
7. Prepare for Baking: Preheat your oven to 375 F (190 C) with a rack in the center. If desired, brush the top of the loaf with milk or melted butter for a softer crust, or leave plain for a crisper crust. You can also sprinkle a few more oats on top for decoration.
8. Bake the Bread: Bake for 35-40 minutes, or until the crust is golden brown and the internal temperature reaches 200-210 F (93-99 C) when measured with an instant-read thermometer. If the top is browning too quickly, you can loosely tent it with aluminum foil.
9. Cool Completely: Remove the loaf from the pan immediately after baking and place it on a wire rack to cool completely before slicing. This is crucial for the crumb to set properly and prevent a gummy texture. It usually takes 1-2 hours.
- Prep Time: 20 minutes
- Cook Time: 35-40 minutes
- Category: bread
- Method: baking
- Cuisine: american
Nutrition
- Serving Size: 1 slice
Keywords: sourdough, oat, maple, sandwich, loaf, bread, homemade, baking, easy, healthy
What You’ll Love About This Quick And Easy Recipe
This maple oat sourdough sandwich loaf is a true winner for several reasons. Firstly, it brings the incredible flavor and digestibility benefits of sourdough without requiring days of active fermentation or complex techniques. It’s designed to be approachable even for those new to sourdough baking, focusing on a straightforward process that yields consistent results. Secondly, the addition of oats not only boosts the nutritional profile with fiber but also contributes to a wonderfully soft crumb and a slightly chewy texture that holds up beautifully to all your favorite sandwich fillings. The hint of maple syrup adds a natural sweetness that complements the tang of the sourdough, making it incredibly appealing to both adults and children. This bread is perfect for a hearty breakfast toast, a satisfying lunch sandwich, or even as a side with dinner. It’s a versatile loaf that quickly becomes a family favorite.
Everything You Need To Make This Recipe Without Stress
Gathering your ingredients before you begin ensures a smooth and enjoyable baking experience. This recipe uses common pantry staples along with your active sourdough starter, making it accessible and budget-friendly. Opt for good quality ingredients where possible, as they will enhance the final flavor and texture of your loaf.
INGREDIENTS:

- 1 cup active sourdough starter (fed and bubbly)
- 1 1/2 cups warm water (around 95-105°F / 35-40°C)
- 1/4 cup maple syrup
- 2 tablespoons unsalted butter, melted
- 1 1/2 teaspoons salt
- 1 cup rolled oats (not instant)
- 4 cups bread flour, plus more for dusting
- 1 tablespoon milk or melted butter for brushing (optional, for crust)
For simple substitutions, you can use honey instead of maple syrup for a slightly different sweet note. If you don’t have bread flour, all-purpose flour can work, though your loaf might be a little less chewy. For a dairy-free option, use a plant-based milk alternative for brushing the top and a neutral oil or vegan butter substitute for the melted butter in the dough. Ensure your sourdough starter is truly active and bubbly; this is crucial for a good rise. If your starter isn’t quite ready, give it a few more hours after feeding until it shows signs of vigorous activity.
Time Needed From Start To Finish
This recipe is designed to be relatively quick for a sourdough loaf, minimizing active hands-on time while still allowing for the necessary fermentation.
- Active Prep Time: 20 minutes
- Bulk Fermentation (Rise 1): 4-6 hours (depending on room temperature and starter activity)
- Shaping & Proofing (Rise 2): 1-2 hours
- Bake Time: 35-40 minutes
- Cooling Time: 1-2 hours (essential for best texture)
- Total Project Time: Approximately 7-10 hours, including cooling, but with very little active work.
How To Make It Step By Step With Visual Cues

Creating this delicious sourdough oat loaf is a rewarding process. Follow these steps carefully for the best results.
- Combine Wet Ingredients and Starter: In a large mixing bowl, gently whisk together the active sourdough starter, warm water, maple syrup, melted butter, and salt until well combined. The mixture should look slightly milky and uniform.
- Add Oats and Flour: Stir in the rolled oats, then gradually add the bread flour, about a cup at a time, mixing with a wooden spoon or your hands until a shaggy dough forms. It will be sticky at this stage, but don’t worry.
- Knead the Dough: Turn the dough out onto a lightly floured surface. Knead for 8-10 minutes until the dough becomes smooth and elastic. It should pass the “windowpane test” – you should be able to stretch a small piece thin enough to see light through it without tearing.
- First Rise (Bulk Fermentation): Place the kneaded dough into a lightly oiled bowl, turning it once to coat. Cover the bowl with plastic wrap or a damp kitchen towel. Let it rise in a warm spot for 4-6 hours, or until it has visibly increased in size and looks bubbly. The exact time will depend on your starter’s activity and your kitchen temperature.
- Shape the Loaf: Gently turn the dough out onto a lightly floured surface. Deflate it slightly and shape it into a tight log or oval that will fit into your loaf pan. You want to create good surface tension to help with the final rise and oven spring.
- Second Rise (Proofing): Place the shaped dough into a greased 9×5-inch loaf pan. Cover it loosely with plastic wrap or a damp towel and let it proof for 1-2 hours, or until it looks puffy and has nearly doubled in size. A gentle poke with a floured finger should leave a slight indentation that slowly springs back.
- Prepare for Baking: Preheat your oven to 375°F (190°C) with a rack in the center. If desired, brush the top of the loaf with milk or melted butter for a softer crust, or leave plain for a crisper crust. You can also sprinkle a few more oats on top for decoration.
- Bake the Bread: Bake for 35-40 minutes, or until the crust is golden brown and the internal temperature reaches 200-210°F (93-99°C) when measured with an instant-read thermometer. If the top is browning too quickly, you can loosely tent it with aluminum foil.
- Cool Completely: Remove the loaf from the pan immediately after baking and place it on a wire rack to cool completely before slicing. This is crucial for the crumb to set properly and prevent a gummy texture. It usually takes 1-2 hours.
Easy Variations And Serving Ideas That Fit Real Life
This maple oat sourdough sandwich loaf is incredibly versatile, making it easy to adapt for different tastes and occasions. For a heartier loaf, you could replace 1/2 cup of the bread flour with whole wheat flour, which will add a nuttier flavor and denser texture. To boost the sweetness and texture, consider adding 1/2 cup of raisins or dried cranberries to the dough during the kneading stage. For a savory twist, omit the maple syrup and instead add 1/2 cup of shredded cheddar cheese and 1 tablespoon of dried chives or dill to the dough.
This bread is fantastic for everyday meals. Serve it toasted with butter and jam for breakfast, or use it to make classic sandwiches like turkey and provolone, or a hearty BLT. It also makes excellent grilled cheese sandwiches, where the slightly tangy sourdough pairs beautifully with melted cheese. For a fun kid-friendly option, cut the bread into fun shapes with cookie cutters before toasting, then serve with cream cheese and fruit slices. It’s also wonderful alongside a warm bowl of soup or chili, perfect for dipping.
Common Slip-Ups And How To Avoid Them
Even experienced bakers can encounter small challenges, but knowing what to watch for can help you achieve a perfect loaf every time.
- Using an Inactive Starter: This is perhaps the most common issue. If your sourdough starter isn’t active and bubbly, your bread won’t rise properly. Always feed your starter 4-12 hours before you plan to bake and ensure it’s at its peak activity, showing lots of bubbles and having a pleasant, tangy aroma.
- Not Kneading Enough: Under-kneading results in a dense, crumbly loaf. Kneading develops the gluten structure, which is essential for a light, airy texture. Aim for 8-10 minutes of active kneading until the dough is smooth and elastic. The windowpane test is a great indicator.
- Over-Proofing or Under-Proofing: Both can lead to problems. Over-proofed dough will collapse in the oven, resulting in a flat, dense loaf. Under-proofed dough will have a very dense crumb and may tear at the sides during baking. Learn to recognize the signs: a properly proofed loaf will be puffy and spring back slowly when gently poked.
- Slicing Too Soon: It’s tempting to cut into a warm loaf, but cooling is crucial. The internal structure of the bread is still setting as it cools. Slicing too early can result in a gummy texture. Always let your loaf cool completely on a wire rack for at least 1-2 hours.
- Incorrect Oven Temperature: An oven that’s too cool will result in a pale, dense loaf, while one that’s too hot can burn the crust

FAQs
- Can I make these ahead? Yes—prep ahead, refrigerate, then serve when ready.
- How long do leftovers last? Store covered in the fridge for 3–4 days for best texture.
- Can I adjust sweetness? Yes—add more or less sweetener to taste.
- Can I change the fruit? Yes—swap strawberries for blueberries, raspberries, or sliced banana.