Achieving that perfect oven spring in your baked goods might seem like a magical feat reserved for professional bakers, but it’s actually within reach for anyone, even busy home cooks.

This guide will demystify the process, offering simple, effective techniques to help your dough rise beautifully and create that desirable airy texture and impressive crust. You don’t need special equipment or advanced skills to see fantastic results.
We’ll focus on practical, beginner-friendly methods that deliver consistent oven spring without any fuss. Get ready to transform your baking with these easy-to-implement tips that will elevate your homemade treats from good to truly amazing.
Table of Contents
- What You’ll Love About This Quick And Easy Recipe
- Everything You Need To Make This Recipe Without Stress
- Time Needed From Start To Finish
- How To Make It Step By Step With Visual Cues
- Easy Variations And Serving Ideas That Fit Real Life
- Common Slip-Ups And How To Avoid Them
- How To Store It And Make It Ahead Without Ruining Texture

Achieving Perfect Oven Spring
- Total Time: Varies by recipe
- Yield: Varies by recipe
Description
This guide demystifies oven spring, offering simple, effective techniques to help your dough rise beautifully and create an airy texture and impressive crust. It focuses on practical, beginner-friendly methods that deliver consistent oven spring without special equipment or advanced skills, applicable to almost any dough-based item.
Ingredients
Instructions
1. Preheat Your Oven Thoroughly: This is perhaps the most critical step. A hot oven provides an immediate burst of heat that causes the gases in your dough to expand quickly. Aim to preheat your oven at least 20-30 minutes after it reaches the target temperature, especially if you’re using a baking stone or Dutch oven. The internal temperature of your baking vessel needs to be as hot as the air.
2. Use a Hot Baking Surface: For breads, a preheated baking stone, steel, or a Dutch oven is invaluable. These surfaces transfer intense heat directly to the bottom of your dough, accelerating the expansion. If using a Dutch oven, ensure it’s preheated with the lid on.
3. Introduce Steam Early On: Steam keeps the crust soft and pliable for longer, allowing the dough to expand without cracking prematurely. You can create steam by placing a tray of hot water on the bottom rack of your oven when you load the dough, or by spraying water into the oven walls with a spray bottle (be careful!). For Dutch oven baking, the lid traps the dough’s own moisture, creating a perfect steamy environment.
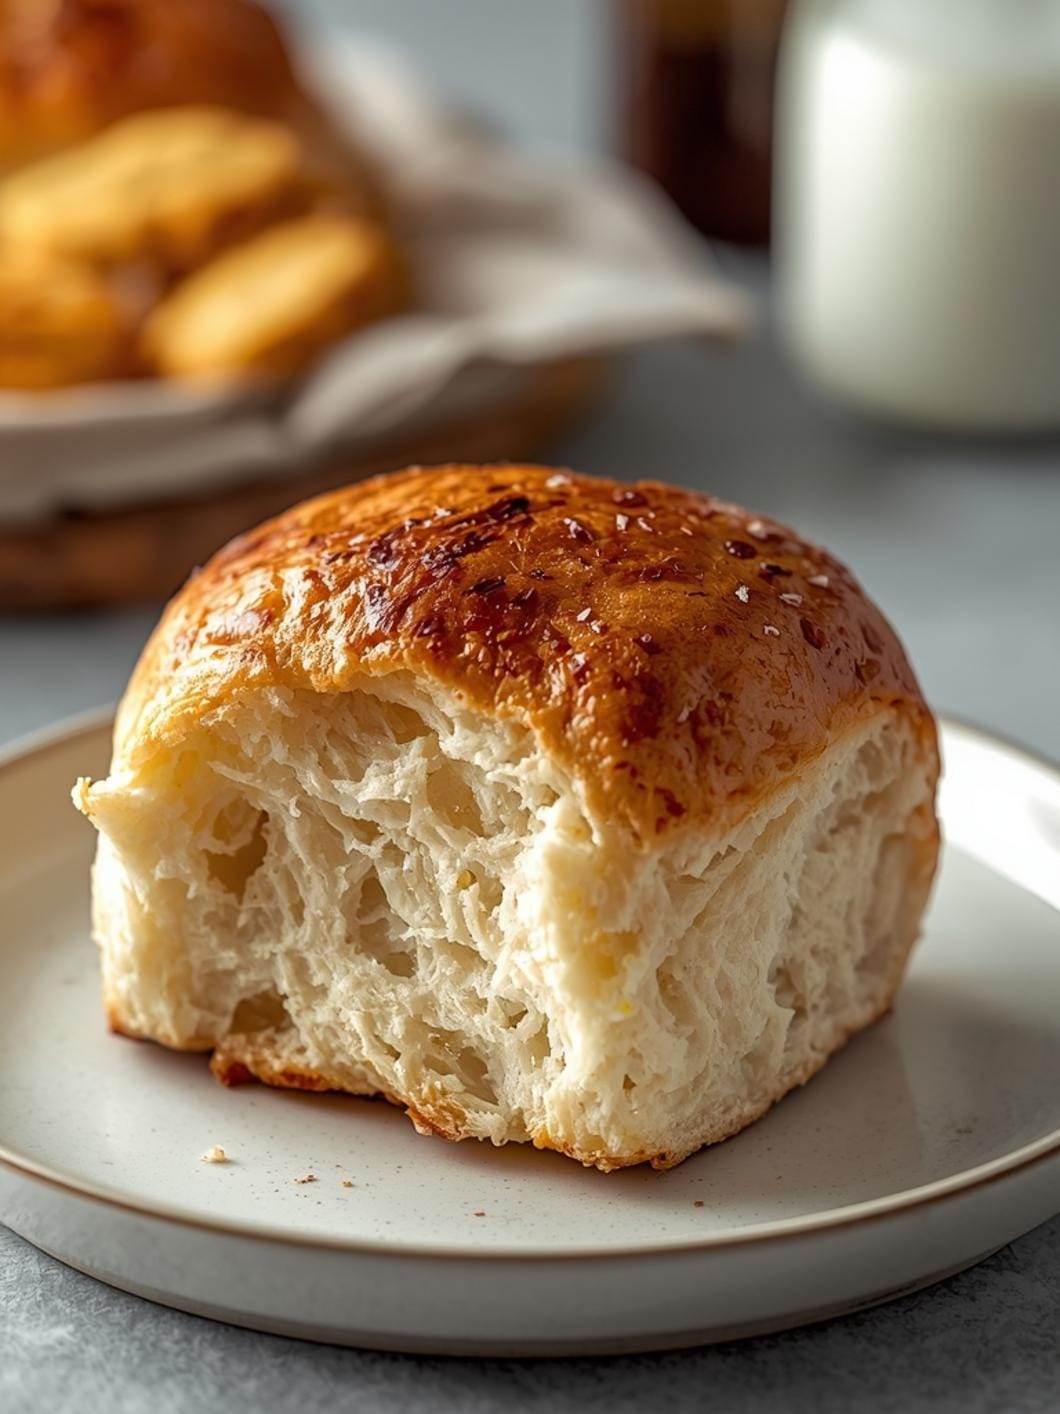
4. Score Your Dough Strategically: For loaves of bread, scoring (making shallow cuts on the surface) before baking directs the expansion. Without scoring, the dough might burst unpredictably. Use a very sharp blade (like a lame or razor blade) and make quick, confident cuts about 1/4 to 1/2 inch deep. The pattern can be decorative, but its primary function is functional.
5. Avoid Over-Proofing: While proper proofing is essential, over-proofed dough has already expended most of its rising potential before it even hits the oven. It will often collapse or have very little oven spring. To check if your dough is proofed enough, gently poke it with a floured finger. If it springs back slowly, leaving a slight indentation, it’s ready. If it springs back immediately, it needs more time. If the indentation remains and the dough feels deflated, it’s likely over-proofed.
6. Load Dough Quickly and Efficiently: Once your oven is ready and your dough is prepared, transfer it to the hot baking surface as quickly as possible to minimize heat loss from the oven. The faster it gets in, the more heat it retains, and the better the initial spring.
- Prep Time: 5-10 minutes
- Cook Time: Varies by recipe
- Category: baking technique
- Method: baking
- Cuisine: global
Nutrition
- Serving Size: Varies by recipe
Keywords: baking, oven spring, bread, dough, technique, rise, crust, airy, homemade, proofing
What You’ll Love About This Quick And Easy Recipe
This approach to maximizing oven spring is perfect for anyone who bakes regularly and wants to improve the texture and appearance of their loaves, rolls, or even quick breads. It’s particularly beneficial for beginners who are looking to understand fundamental baking principles without getting bogged down in complex scientific explanations. You’ll love how quickly you can implement these techniques and see a noticeable difference in your baked goods. This isn’t about a specific recipe, but rather a set of universal principles that can be applied to almost any dough-based item you’re making. It’s ideal for those weeknight baking sessions when you want a satisfying result without a huge time commitment, or for weekend projects where you want to impress family and friends with perfectly risen creations.
Everything You Need To Make This Recipe Without Stress
The beauty of achieving great oven spring lies less in specific ingredients and more in technique. However, having the right basic components for your chosen baked good is crucial. Since “oven spring” is a technique and not a specific dish, we’ll focus on the general components that contribute to a successful bake.
INGREDIENTS:

- Your preferred dough recipe (e.g., bread dough, pizza dough, crescent roll dough)
- Flour (for dusting)
- Water (for steam, if applicable)
- Oil or butter (for greasing, if applicable)
For most standard bread or roll recipes, you’ll typically need flour, water, yeast (or another leavening agent), salt, and sometimes sugar or fat. For store-bought doughs like crescent rolls, the ingredients are already pre-mixed for you. The key is to start with a well-hydrated dough that has been properly proofed. For simple substitutions, you can always swap out different types of flour (like whole wheat for all-purpose, keeping in mind it might require more liquid) or use different fats like olive oil instead of butter, depending on your recipe. The principles of oven spring apply universally, regardless of minor ingredient variations.
Time Needed From Start To Finish
Since achieving oven spring is a technique applied to an existing recipe, the total time will depend entirely on the specific baked good you are preparing. However, incorporating the techniques for maximizing oven spring generally adds very little, if any, extra time to your overall baking process.
- Prep Time: 5-10 minutes (for applying techniques like scoring or adding steam, not including dough preparation)
- Cook Time: Varies greatly by recipe (e.g., 12-15 minutes for crescent rolls, 30-45 minutes for a loaf of bread)
- Total Time: Will be the total time of your chosen recipe, plus the minimal additional time for technique application.
How To Make It Step By Step With Visual Cues

Achieving excellent oven spring is all about creating the right conditions for your dough to expand rapidly in the initial stages of baking. Here’s how to do it:
- Preheat Your Oven Thoroughly: This is perhaps the most critical step. A hot oven provides an immediate burst of heat that causes the gases in your dough to expand quickly. Aim to preheat your oven at least 20-30 minutes *after* it reaches the target temperature, especially if you’re using a baking stone or Dutch oven. The internal temperature of your baking vessel needs to be as hot as the air.
- Use a Hot Baking Surface: For breads, a preheated baking stone, steel, or a Dutch oven is invaluable. These surfaces transfer intense heat directly to the bottom of your dough, accelerating the expansion. If using a Dutch oven, ensure it’s preheated with the lid on.
- Introduce Steam Early On: Steam keeps the crust soft and pliable for longer, allowing the dough to expand without cracking prematurely. You can create steam by placing a tray of hot water on the bottom rack of your oven when you load the dough, or by spraying water into the oven walls with a spray bottle (be careful!). For Dutch oven baking, the lid traps the dough’s own moisture, creating a perfect steamy environment.
- Score Your Dough Strategically: For loaves of bread, scoring (making shallow cuts on the surface) before baking directs the expansion. Without scoring, the dough might burst unpredictably. Use a very sharp blade (like a lame or razor blade) and make quick, confident cuts about 1/4 to 1/2 inch deep. The pattern can be decorative, but its primary function is functional.
- Avoid Over-Proofing: While proper proofing is essential, over-proofed dough has already expended most of its rising potential before it even hits the oven. It will often collapse or have very little oven spring. To check if your dough is proofed enough, gently poke it with a floured finger. If it springs back slowly, leaving a slight indentation, it’s ready. If it springs back immediately, it needs more time. If the indentation remains and the dough feels deflated, it’s likely over-proofed.
- Load Dough Quickly and Efficiently: Once your oven is ready and your dough is prepared, transfer it to the hot baking surface as quickly as possible to minimize heat loss from the oven. The faster it gets in, the more heat it retains, and the better the initial spring.
Easy Variations And Serving Ideas That Fit Real Life
While oven spring is a technique, applying it to different baked goods opens up a world of delicious possibilities. For simple dinner rolls or crescent rolls, achieving great oven spring means a lighter, fluffier texture that’s perfect for soaking up gravies or serving alongside a hearty stew. For a family meal, imagine serving perfectly risen, crusty artisan-style bread with a simple olive oil dip or a flavorful compound butter. Kids often love tearing into warm, soft rolls, and good oven spring ensures they’re not dense or heavy.
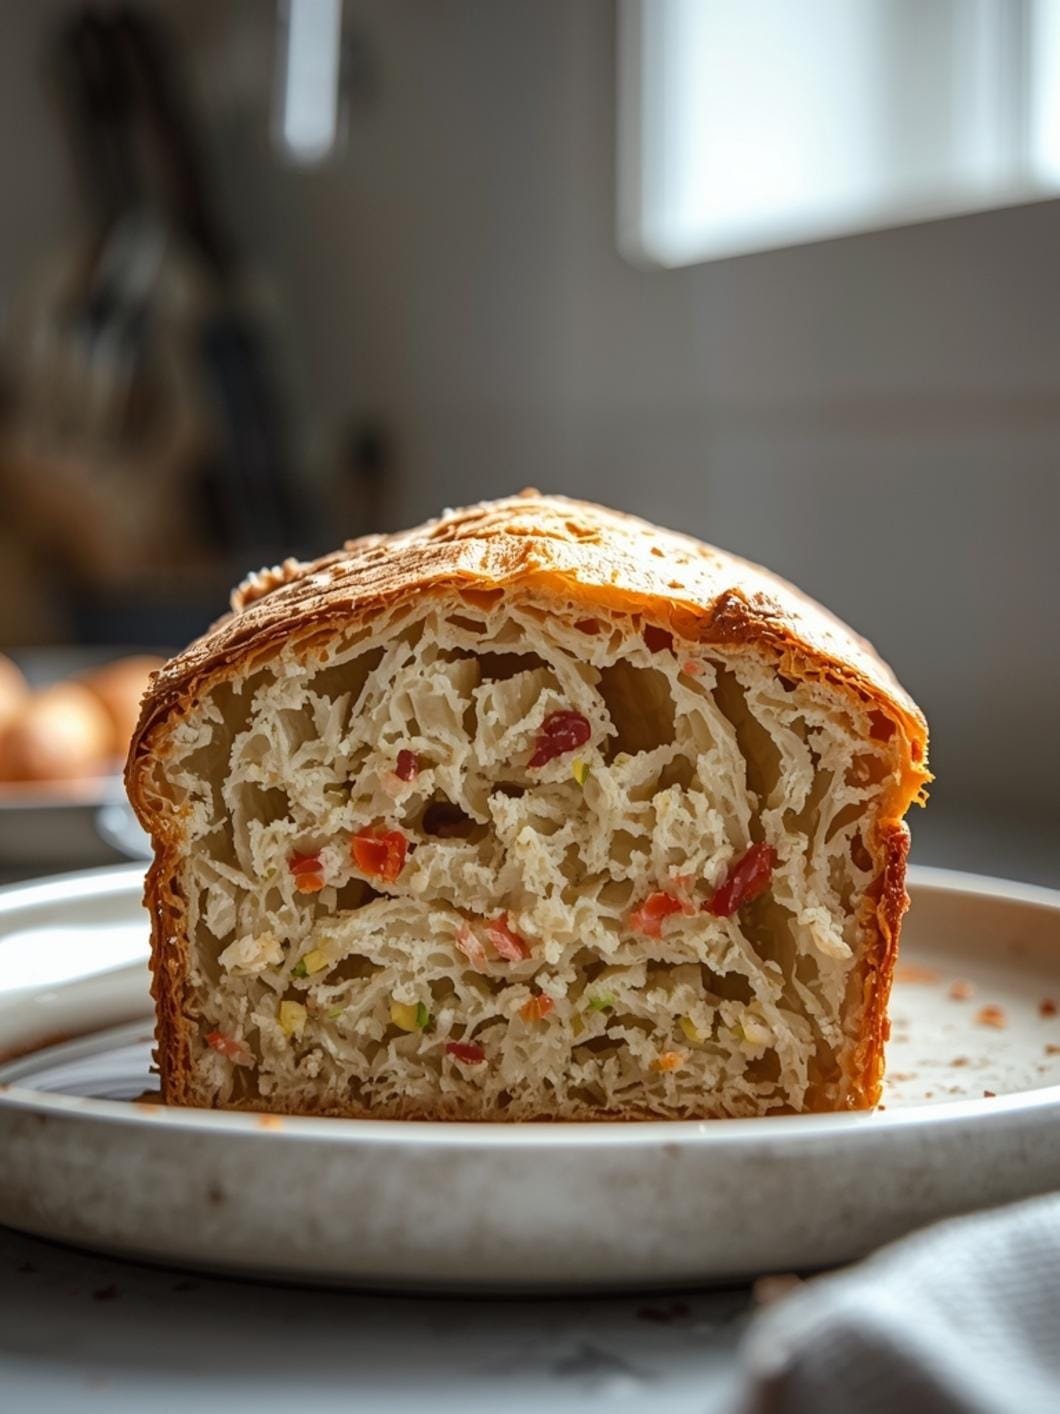
For a quick snack, you could apply these principles to a simple focaccia, ensuring a light, airy crumb. Top it with rosemary and sea salt, or cherry tomatoes and olives. For a party or buffet, a beautifully risen loaf of bread, whether it’s a rustic boule or a braided challah, makes an impressive centerpiece. You can also incorporate different seeds (sesame, poppy, sunflower) or grains into your dough for added texture and flavor, knowing that good oven spring will still be achievable.
Common Slip-Ups And How To Avoid Them
Even with the best intentions, a few common mistakes can hinder your oven spring. One frequent issue is not preheating the oven long enough. Many home ovens take longer than their indicator light suggests to truly reach and stabilize at the set temperature, especially when a baking stone or Dutch oven is inside. Always give it an extra 15-20 minutes beyond the light. Another common slip-up is opening the oven door too frequently in the initial baking stages. Every time you open the door, a significant amount of heat and precious steam escapes, which can cause the crust to set prematurely and limit expansion. Resist the urge to peek for the first 10-15 minutes.
Over-proofing your dough is another pitfall. While under-proofing means less rise overall, over-proofing leads to a dough that has exhausted its gas-producing capabilities and will often collapse or spread rather than spring up. Pay attention to the “poke test” described earlier. Finally, not using enough steam or letting it escape too quickly can result in a crust that hardens too fast, restricting the dough’s ability to expand. Ensure your steam source is effective and lasts for the critical initial phase of baking.
How To Store It And Make It Ahead Without Ruining Texture
The techniques for achieving oven spring are applied during the baking process itself, so “making it ahead” primarily refers to preparing your dough in advance. For most bread doughs, you can prepare the dough up to the first rise, then punch it down, shape it, and retard it in the refrigerator overnight (or up to 24-48 hours, depending on the recipe). This slow, cold fermentation can actually enhance flavor and sometimes even improve oven spring by strengthening the gluten structure. When you’re ready to bake, remove the dough from the fridge, let it come to room temperature, and proceed with the final proof and baking, applying the oven spring techniques.
Once your baked goods are out of the oven and have cooled, proper storage is key to maintaining their texture. For crusty breads, store them at room temperature in a paper bag or a bread box for 1-2 days. Avoid airtight containers for crusty breads, as this traps moisture and will make the crust soft. For softer rolls or enriched breads, an airtight container or plastic bag at room temperature will keep them fresh for 2-3 days. For longer

FAQs
- Can I make these ahead? Yes—prep ahead, refrigerate, then serve when ready.
- How long do leftovers last? Store covered in the fridge for 3–4 days for best texture.
- Can I adjust sweetness? Yes—add more or less sweetener to taste.
- Can I change the fruit? Yes—swap strawberries for blueberries, raspberries, or sliced banana.