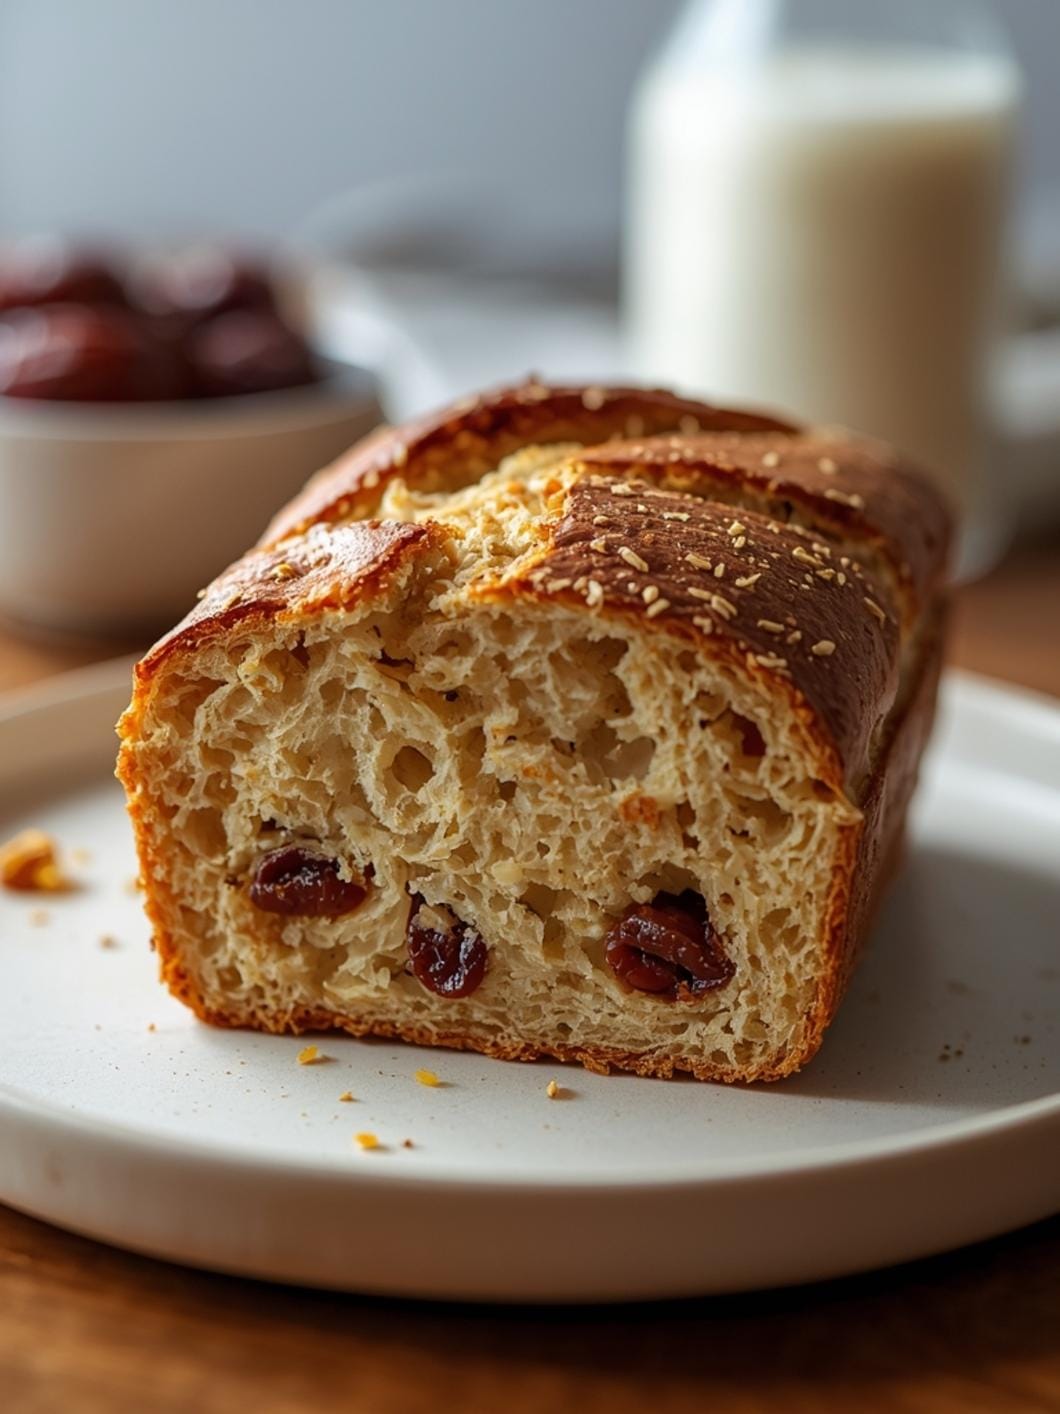
There’s nothing quite like the aroma of freshly baked bread filling your home, especially when it carries the sweet, comforting notes of maple.

This recipe for maple sourdough bread brings that cozy feeling right to your kitchen, offering a delightful twist on traditional sourdough that’s perfect for the cooler months. Imagine a soft, slightly sweet loaf, kissed with the rich flavor of maple, ready to be enjoyed with your morning coffee or as a comforting side with dinner.
This sweet sourdough creation is designed to be approachable for home bakers, whether you’re a seasoned sourdough enthusiast or just starting your journey. We’ll guide you through making beautiful, flavorful loaves that capture the essence of fall and winter, turning simple ingredients into a truly special treat.

Maple Sourdough Bread
- Total Time: 6.5 to 10.5 hours
- Yield: 1 loaf 1x
Description
This recipe for maple sourdough bread offers a delightful twist on traditional sourdough, perfect for cooler months. It’s a soft, slightly sweet loaf with rich maple flavor, ideal for breakfast or as a comforting side. The recipe is approachable for all skill levels, guiding you through making flavorful loaves that capture the essence of fall and winter.
Ingredients
Instructions
1. Combine Wet Ingredients and Starter: In a large mixing bowl, gently whisk together the active sourdough starter, warm water, and maple syrup until well combined. The mixture should look milky and slightly frothy.
2. Add Dry Ingredients: Stir in the salt and then gradually add the bread flour, one cup at a time, mixing with a wooden spoon or your hands until a shaggy dough forms. It should be sticky but come together into a mass. Cover the bowl with a damp kitchen towel or plastic wrap and let it rest for 30 minutes. This resting period, called autolyse, helps the flour fully hydrate.
3. Incorporate Butter and Begin Bulk Fermentation: After the rest, pour the melted butter over the dough. Gently knead the butter into the dough for a few minutes until it’s fully incorporated. The dough will feel a bit slippery at first but will eventually absorb the butter. Now, begin the bulk fermentation. Over the next 4-6 hours (or 8-12 hours if cold proofing in the fridge), perform a series of “stretch and folds.” Every 30-60 minutes during the first 2-3 hours, gently pull a section of the dough up from the edge of the bowl, stretch it, and fold it over the center. Rotate the bowl and repeat this 4-6 times for each set. This builds strength in the dough.
4. Shape the Loaf: Once the dough has visibly increased in volume (it should be bubbly and jiggling), gently turn it out onto a lightly floured surface. Shape it into a round or oval loaf, creating tension on the surface. You can do this by gently pulling the edges of the dough towards the center and then flipping it over to create a smooth top.
5. Final Proofing: Transfer the shaped dough into a floured banneton basket or a bowl lined with a floured kitchen towel, seam-side up. Cover it and let it proof at room temperature for 2-4 hours, or in the refrigerator overnight for 8-12 hours. The dough should feel puffy and slightly spring back when gently poked.
6. Preheat Oven and Score: About 30 minutes before baking, preheat your oven to 450 F (232 C) with a Dutch oven inside. Carefully remove the hot Dutch oven. Gently invert the proofed dough into the hot Dutch oven. If using an egg wash (for a golden crust), whisk the beaten egg with milk and brush it over the top of the dough. Using a sharp razor blade or knife, score the top of the loaf with your desired design.
7. Bake the Bread: Place the lid on the Dutch oven and bake for 30 minutes. Remove the lid and continue baking for another 10-15 minutes, or until the crust is deeply golden brown and the internal temperature reaches 200-210 F (93-99 C).
8. Cool Completely: Carefully remove the bread from the Dutch oven and transfer it to a wire rack to cool completely before slicing. This is crucial for the crumb to set properly and for the best texture and flavor.
- Prep Time: 20 minutes
- Cook Time: 40-45 minutes
- Category: bread
- Method: baking
- Cuisine: american
Nutrition
- Serving Size: 1 slice
Keywords: sourdough, maple, bread, baking, homemade, sweet, comfort food, fall, winter, breakfast
What You’ll Love About This Quick And Easy Recipe
This maple sourdough bread recipe is a true winner for several reasons, making it an ideal choice for busy families and anyone looking for a comforting bake. First, the subtle sweetness from the maple syrup transforms a classic sourdough into something uniquely satisfying, making it appealing even to those who might not typically reach for a plain sourdough loaf. It’s perfect for adding a touch of warmth to a chilly morning breakfast spread or serving alongside a hearty stew for dinner. This recipe is designed to be straightforward, focusing on clear steps that yield consistent results without requiring advanced baking techniques. It’s a fantastic way to utilize your active sourdough starter in a new and exciting way, bringing a delicious, homemade touch to any meal or snack time.
Everything You Need To Make This Recipe Without Stress
Gathering your ingredients beforehand makes the baking process smooth and enjoyable. This recipe uses common pantry staples alongside your lively sourdough starter to create a wonderfully flavored loaf.
INGREDIENTS:

- 1 cup active sourdough starter, fed and bubbly
- 1 ½ cups warm water (around 95-100°F)
- ¼ cup pure maple syrup
- 2 teaspoons salt
- 5 cups bread flour, plus more for dusting
- 2 tablespoons unsalted butter, melted, plus more for greasing
- 1 large egg, beaten (for egg wash, optional)
- 1 tablespoon milk (for egg wash, optional)
For simple substitutions, you can easily adapt this recipe to fit what you have on hand. If you don’t have bread flour, all-purpose flour can be used, though the texture of the final loaf might be slightly less chewy. For a dairy-free option, substitute the unsalted butter with a neutral-flavored oil like avocado or grapeseed oil, and use a plant-based milk for the egg wash, if you choose to use one. Always opt for pure maple syrup for the best flavor; imitation syrups won’t provide the same depth or natural sweetness.
Time Needed From Start To Finish
This recipe, while involving the natural fermentation of sourdough, is broken down into manageable stages. The hands-on time is surprisingly minimal, with most of the duration dedicated to the dough’s bulk fermentation and proofing.
- Active Prep Time: 20 minutes
- Bulk Fermentation: 4-6 hours (or overnight in the fridge for 8-12 hours)
- Shaping and Final Proof: 2-4 hours
- Bake Time: 40-45 minutes
- Total Time (including fermentation/proofing): Approximately 6.5 to 10.5 hours (or longer if cold proofing)
While the total time might seem long due to the nature of sourdough, the actual time you spend actively working on the bread is quite short, making it a perfect project to fit into a weekend or even a busy weekday with some planning.
How To Make It Step By Step With Visual Cues

Creating this maple sourdough bread is a rewarding process. Follow these steps to achieve a perfectly baked, flavorful loaf.
- Combine Wet Ingredients and Starter: In a large mixing bowl, gently whisk together the active sourdough starter, warm water, and maple syrup until well combined. The mixture should look milky and slightly frothy.
- Add Dry Ingredients: Stir in the salt and then gradually add the bread flour, one cup at a time, mixing with a wooden spoon or your hands until a shaggy dough forms. It should be sticky but come together into a mass. Cover the bowl with a damp kitchen towel or plastic wrap and let it rest for 30 minutes. This resting period, called autolyse, helps the flour fully hydrate.
- Incorporate Butter and Begin Bulk Fermentation: After the rest, pour the melted butter over the dough. Gently knead the butter into the dough for a few minutes until it’s fully incorporated. The dough will feel a bit slippery at first but will eventually absorb the butter. Now, begin the bulk fermentation. Over the next 4-6 hours (or 8-12 hours if cold proofing in the fridge), perform a series of “stretch and folds.” Every 30-60 minutes during the first 2-3 hours, gently pull a section of the dough up from the edge of the bowl, stretch it, and fold it over the center. Rotate the bowl and repeat this 4-6 times for each set. This builds strength in the dough.
- Shape the Loaf: Once the dough has visibly increased in volume (it should be bubbly and jiggling), gently turn it out onto a lightly floured surface. Shape it into a round or oval loaf, creating tension on the surface. You can do this by gently pulling the edges of the dough towards the center and then flipping it over to create a smooth top.
- Final Proofing: Transfer the shaped dough into a floured banneton basket or a bowl lined with a floured kitchen towel, seam-side up. Cover it and let it proof at room temperature for 2-4 hours, or in the refrigerator overnight for 8-12 hours. The dough should feel puffy and slightly spring back when gently poked.
- Preheat Oven and Score: About 30 minutes before baking, preheat your oven to 450°F (232°C) with a Dutch oven inside. Carefully remove the hot Dutch oven. Gently invert the proofed dough into the hot Dutch oven. If using an egg wash (for a golden crust), whisk the beaten egg with milk and brush it over the top of the dough. Using a sharp razor blade or knife, score the top of the loaf with your desired design.
- Bake the Bread: Place the lid on the Dutch oven and bake for 30 minutes. Remove the lid and continue baking for another 10-15 minutes, or until the crust is deeply golden brown and the internal temperature reaches 200-210°F (93-99°C).
- Cool Completely: Carefully remove the bread from the Dutch oven and transfer it to a wire rack to cool completely before slicing. This is crucial for the crumb to set properly and for the best texture and flavor.
Easy Variations And Serving Ideas That Fit Real Life
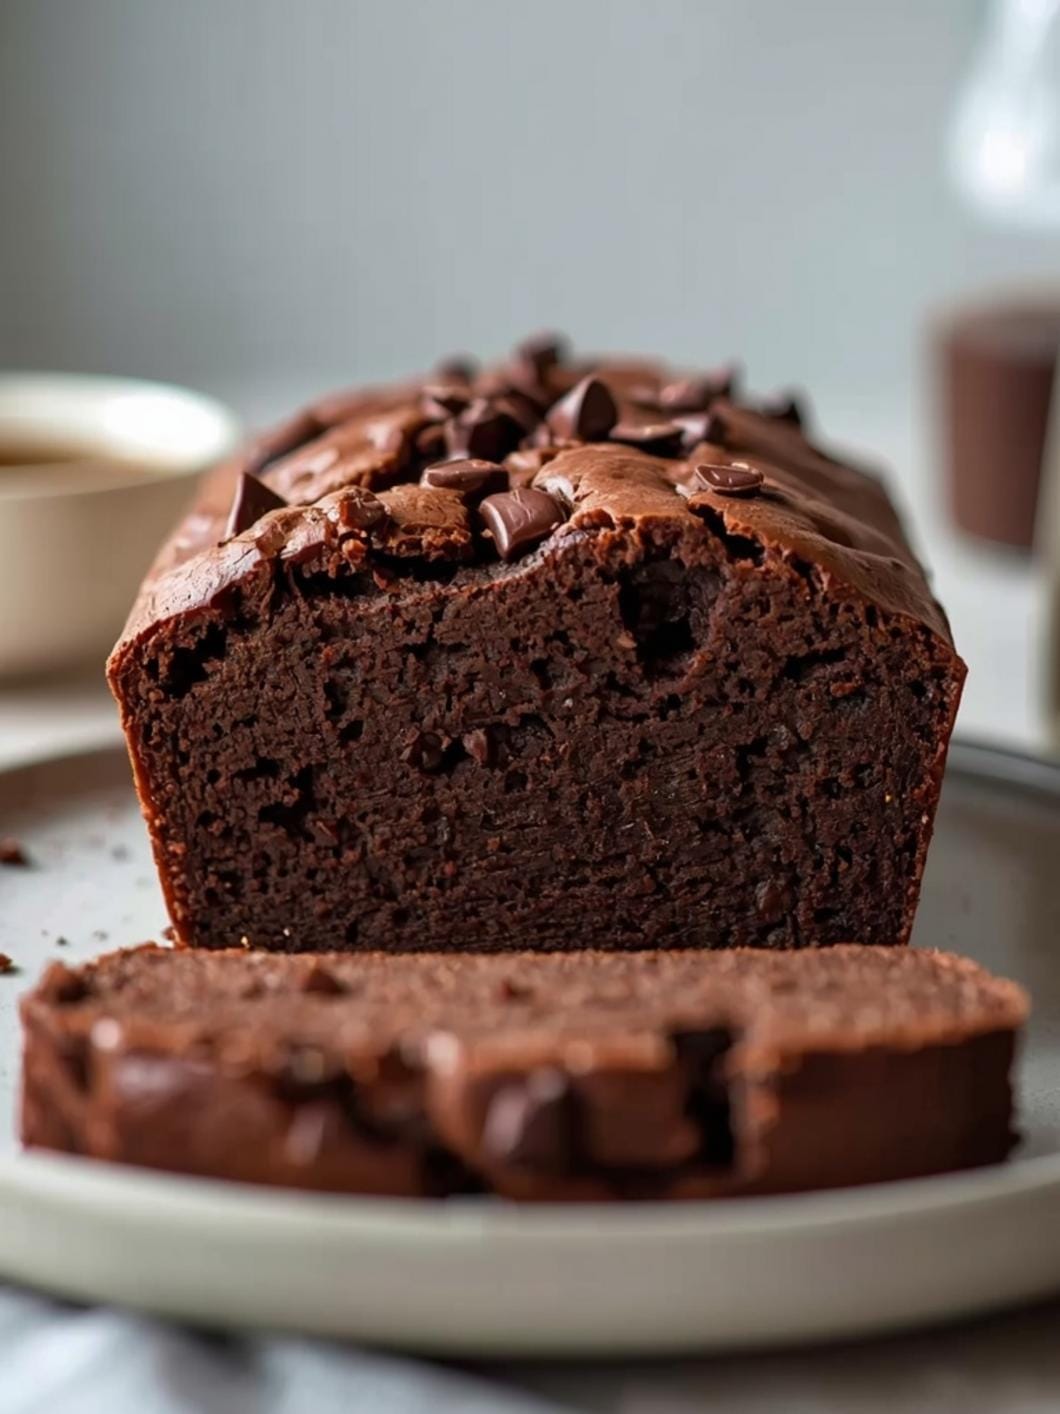
This maple sourdough bread is incredibly versatile and can be enjoyed in many ways. For a simple breakfast, slice it thick and toast it, then spread with butter or cream cheese. It also makes fantastic French toast! For a more decadent treat, drizzle with extra maple syrup or a sprinkle of cinnamon sugar.
To make it even more special, consider adding mix-ins during the shaping stage. A handful of chopped walnuts or pecans would complement the maple flavor beautifully, or dried cranberries for a touch of tartness. For a savory twist, you could reduce the maple syrup slightly and add a tablespoon of fresh rosemary or thyme. This bread also pairs wonderfully with a cheese board, especially with aged cheddar or a creamy brie. For a kid-friendly option, simply serve slices with their favorite jam or a smear of peanut butter for a nutritious snack.
Common Slip-Ups And How To Avoid Them
Even experienced bakers can encounter challenges, but with sourdough, understanding a few common pitfalls can make all the difference.
One frequent issue is an inactive sourdough starter. If your starter isn’t consistently bubbly and doubling in size after feeding, it won’t have the strength to properly leaven your bread. Ensure your starter is fed regularly and active before beginning the recipe.
Another common mistake is under-proofing or over-proofing. Under-proofed dough will result in a dense loaf with a tight crumb, while over-proofed dough can collapse in the oven, leading to a flat loaf. Learn to recognize the signs: a properly proofed dough will be visibly larger, feel airy, and spring back slowly when gently poked. If it springs back too quickly, it needs more time; if it doesn’t spring back at all, it’s likely over-proofed.
Not developing enough gluten during the bulk fermentation can also lead to a flat loaf. The stretch and fold technique is crucial for building strength in the dough. Don’t skip these steps, and ensure you’re performing them gently but effectively.
Finally, slicing the bread too early is a common temptation. While the aroma is irresistible, cutting into a warm loaf can compromise its texture, making it gummy

FAQs
- Can I make these ahead? Yes—prep ahead, refrigerate, then serve when ready.
- How long do leftovers last? Store covered in the fridge for 3–4 days for best texture.
- Can I adjust sweetness? Yes—add more or less sweetener to taste.
- Can I change the fruit? Yes—swap strawberries for blueberries, raspberries, or sliced banana.