Baking a beautiful, fluffy sourdough loaf doesn’t have to be an all-day affair.

This simple recipe for a minimal rustic sourdough loaf is designed for busy home bakers who want that satisfying homemade bread experience without the fuss. It’s perfect for creating delicious sandwiches, from classic deli meats to gourmet fillings, offering a soft yet sturdy base for all your culinary creations.
This large-batch sourdough bread is incredibly versatile, making it ideal for meal prepping your lunches for the week or sharing with family and friends at your next gathering. Forget complicated techniques and endless waiting; this recipe focuses on straightforward steps to deliver a delightful loaf every time.

Minimal Rustic Sourdough Loaf
- Total Time: 5-7 hours
- Yield: 1 large loaf 1x
Description
This simple recipe for a minimal rustic sourdough loaf is designed for busy home bakers who want that satisfying homemade bread experience without the fuss. It’s perfect for creating delicious sandwiches, from classic deli meats to gourmet fillings, offering a soft yet sturdy base for all your culinary creations. This large-batch sourdough bread is incredibly versatile, making it ideal for meal prepping your lunches for the week or sharing with family and friends at your next gathering. Forget complicated techniques and endless waiting; this recipe focuses on straightforward steps to deliver a delightful loaf every time.
Ingredients
Instructions
1. 1. Activate Your Starter: In a large mixing bowl, combine the active sourdough starter with the warm water, sugar, and olive oil. Whisk gently until the starter is mostly dissolved and the mixture is well combined. It should look milky and slightly frothy, indicating your starter is alive and ready to work.
2. 2. Mix the Dough: Add the salt and 3 cups of the all-purpose flour to the wet ingredients. Mix with a sturdy spoon or your hands until a shaggy dough forms. Gradually add the remaining 1 cup of flour, a little at a time, until the dough comes together and pulls away from the sides of the bowl. It should still be somewhat sticky but manageable.
3. 3. Knead for Development: Turn the dough out onto a lightly floured surface. Knead for 8-10 minutes until the dough is smooth and elastic. You’ll notice it becoming less sticky and more pliable as you knead. A good test is the “windowpane test”: gently stretch a small piece of dough; if you can stretch it thin enough to see light through it without tearing, it’s ready.
4. 4. First Rise (Bulk Fermentation): Lightly oil a clean bowl. Place the kneaded dough in the bowl, turning it once to coat with oil. Cover the bowl with plastic wrap or a damp kitchen towel. Let it rise in a warm spot for 3-4 hours, or until it has nearly doubled in size. You’ll see bubbles forming on the surface, and the dough will feel light and airy.
5. 5. Shape the Loaf: Gently turn the risen dough out onto a lightly floured surface. Shape it into a rustic loaf or a round boule. For a sandwich loaf, you can gently pat it into a rectangle and then roll it up tightly, pinching the seam closed. If using a proofing basket (banneton), dust it generously with flour or line a bowl with a floured towel. Place the shaped dough seam-side up in the basket/bowl.
6. 6. Second Rise (Proofing): Cover the dough loosely with plastic wrap or a damp towel. Let it proof at room temperature for 1-2 hours, or until visibly puffy and soft to the touch. Alternatively, for a deeper flavor development and easier handling, you can refrigerate it overnight (8-12 hours). The dough should spring back slowly when gently poked.
7. 7. Prepare for Baking: Preheat your oven to 450F (230C) with a Dutch oven or baking stone inside for at least 30 minutes. Carefully remove the hot Dutch oven. If using a baking stone, lightly dust a baking sheet with cornmeal. Gently invert the dough onto a piece of parchment paper or the prepared baking sheet. Score the top of the loaf with a sharp knife or razor blade to allow for expansion.
8. 8. Bake the Loaf: Carefully transfer the dough (on parchment paper) into the hot Dutch oven, or place it directly onto the baking stone. Bake for 25 minutes with the lid on (if using a Dutch oven), then remove the lid and bake for another 10-15 minutes, or until the crust is deep golden brown and the internal temperature reaches 200-210F (93-99C).
9. 9. Cool Completely: Transfer the baked loaf to a wire rack and let it cool completely before slicing. This is crucial for the crumb to set properly and prevents a gummy texture. Resist the urge to slice it warm!
- Prep Time: 20 minutes
- Cook Time: 35-40 minutes
- Category: main dish
- Method: baking
- Cuisine: american
Nutrition
- Serving Size: 1 slice
Keywords: sourdough, bread, rustic, sandwich, homemade, easy, baking, yeast-free, starter, loaf
What You’ll Love About This Quick And Easy Recipe
This recipe is a game-changer for anyone who craves homemade sourdough but feels intimidated by traditional methods. It works because it streamlines the process, focusing on essential steps to achieve a fantastic result without unnecessary complexity. It’s perfect for beginner bakers, busy parents, or anyone looking to add a touch of homemade goodness to their daily meals. You’ll find yourself reaching for this recipe on a regular basis, whether you’re making school lunches, packing picnic sandwiches, or simply enjoying a slice with your favorite soup. The minimal approach means less stress and more enjoyment, proving that delicious sourdough can indeed be an everyday luxury.
Everything You Need To Make This Recipe Without Stress
Gathering your ingredients before you start is key to a smooth baking experience. This recipe uses common pantry staples, ensuring you won’t need to hunt for obscure items. The quality of your ingredients does make a difference, especially with something as fundamental as bread, so choose wisely.
INGREDIENTS:

- 1 cup active sourdough starter (fed and bubbly)
- 1 ½ cups warm water (around 95-105°F / 35-40°C)
- 1 tablespoon granulated sugar
- 1 tablespoon olive oil
- 1 ½ teaspoons fine sea salt
- 4 cups all-purpose flour, plus more for dusting
- Cornmeal, for dusting (optional)
For simple substitutions, you can use bread flour instead of all-purpose flour for a slightly chewier crumb, though all-purpose works beautifully for a soft sandwich loaf. If you don’t have olive oil, any neutral-flavored oil like vegetable or canola oil will do in a pinch, but olive oil adds a nice subtle flavor. Fine sea salt is recommended for its even distribution and clean taste, but kosher salt can be used; just be sure to adjust the amount as kosher salt is less dense than fine sea salt.
Time Needed From Start To Finish
One of the best aspects of this minimal sourdough recipe is its relatively quick turnaround compared to many traditional sourdough processes. While there’s still some waiting involved for fermentation, the active hands-on time is quite manageable.
- Prep Time: 20 minutes
- Bulk Fermentation: 3-4 hours (at room temperature)
- Proofing: 1-2 hours (or overnight in the fridge)
- Bake Time: 35-40 minutes
- Total Time: Approximately 5-7 hours (or longer with overnight proofing), with only about 20 minutes of active work.
How To Make It Step By Step With Visual Cues

Creating this rustic sourdough loaf is a rewarding process, and these steps will guide you to a perfect result. Pay attention to the visual cues to ensure your dough is developing correctly.
- Activate Your Starter: In a large mixing bowl, combine the active sourdough starter with the warm water, sugar, and olive oil. Whisk gently until the starter is mostly dissolved and the mixture is well combined. It should look milky and slightly frothy, indicating your starter is alive and ready to work.
- Mix the Dough: Add the salt and 3 cups of the all-purpose flour to the wet ingredients. Mix with a sturdy spoon or your hands until a shaggy dough forms. Gradually add the remaining 1 cup of flour, a little at a time, until the dough comes together and pulls away from the sides of the bowl. It should still be somewhat sticky but manageable.
- Knead for Development: Turn the dough out onto a lightly floured surface. Knead for 8-10 minutes until the dough is smooth and elastic. You’ll notice it becoming less sticky and more pliable as you knead. A good test is the “windowpane test”: gently stretch a small piece of dough; if you can stretch it thin enough to see light through it without tearing, it’s ready.
- First Rise (Bulk Fermentation): Lightly oil a clean bowl. Place the kneaded dough in the bowl, turning it once to coat with oil. Cover the bowl with plastic wrap or a damp kitchen towel. Let it rise in a warm spot for 3-4 hours, or until it has nearly doubled in size. You’ll see bubbles forming on the surface, and the dough will feel light and airy.
- Shape the Loaf: Gently turn the risen dough out onto a lightly floured surface. Shape it into a rustic loaf or a round boule. For a sandwich loaf, you can gently pat it into a rectangle and then roll it up tightly, pinching the seam closed. If using a proofing basket (banneton), dust it generously with flour or line a bowl with a floured towel. Place the shaped dough seam-side up in the basket/bowl.
- Second Rise (Proofing): Cover the dough loosely with plastic wrap or a damp towel. Let it proof at room temperature for 1-2 hours, or until visibly puffy and soft to the touch. Alternatively, for a deeper flavor development and easier handling, you can refrigerate it overnight (8-12 hours). The dough should spring back slowly when gently poked.
- Prepare for Baking: Preheat your oven to 450°F (230°C) with a Dutch oven or baking stone inside for at least 30 minutes. Carefully remove the hot Dutch oven. If using a baking stone, lightly dust a baking sheet with cornmeal. Gently invert the dough onto a piece of parchment paper or the prepared baking sheet. Score the top of the loaf with a sharp knife or razor blade to allow for expansion.
- Bake the Loaf: Carefully transfer the dough (on parchment paper) into the hot Dutch oven, or place it directly onto the baking stone. Bake for 25 minutes with the lid on (if using a Dutch oven), then remove the lid and bake for another 10-15 minutes, or until the crust is deep golden brown and the internal temperature reaches 200-210°F (93-99°C).
- Cool Completely: Transfer the baked loaf to a wire rack and let it cool completely before slicing. This is crucial for the crumb to set properly and prevents a gummy texture. Resist the urge to slice it warm!
Easy Variations And Serving Ideas That Fit Real Life
This minimal rustic sourdough loaf is incredibly versatile and can be adapted to suit various tastes and occasions. For a kid-friendly twist, try adding a handful of shredded cheese or dried herbs like oregano or basil to the dough during the kneading stage. This adds extra flavor that appeals to younger palates.
For a more savory option, consider mixing in a few tablespoons of chopped sun-dried tomatoes or olives. These additions transform the loaf into a flavorful bread perfect for serving alongside a Mediterranean-inspired meal or as part of a charcuterie board. You can also sprinkle the top with sesame seeds, poppy seeds, or a blend of everything bagel seasoning before baking for an extra layer of texture and taste.
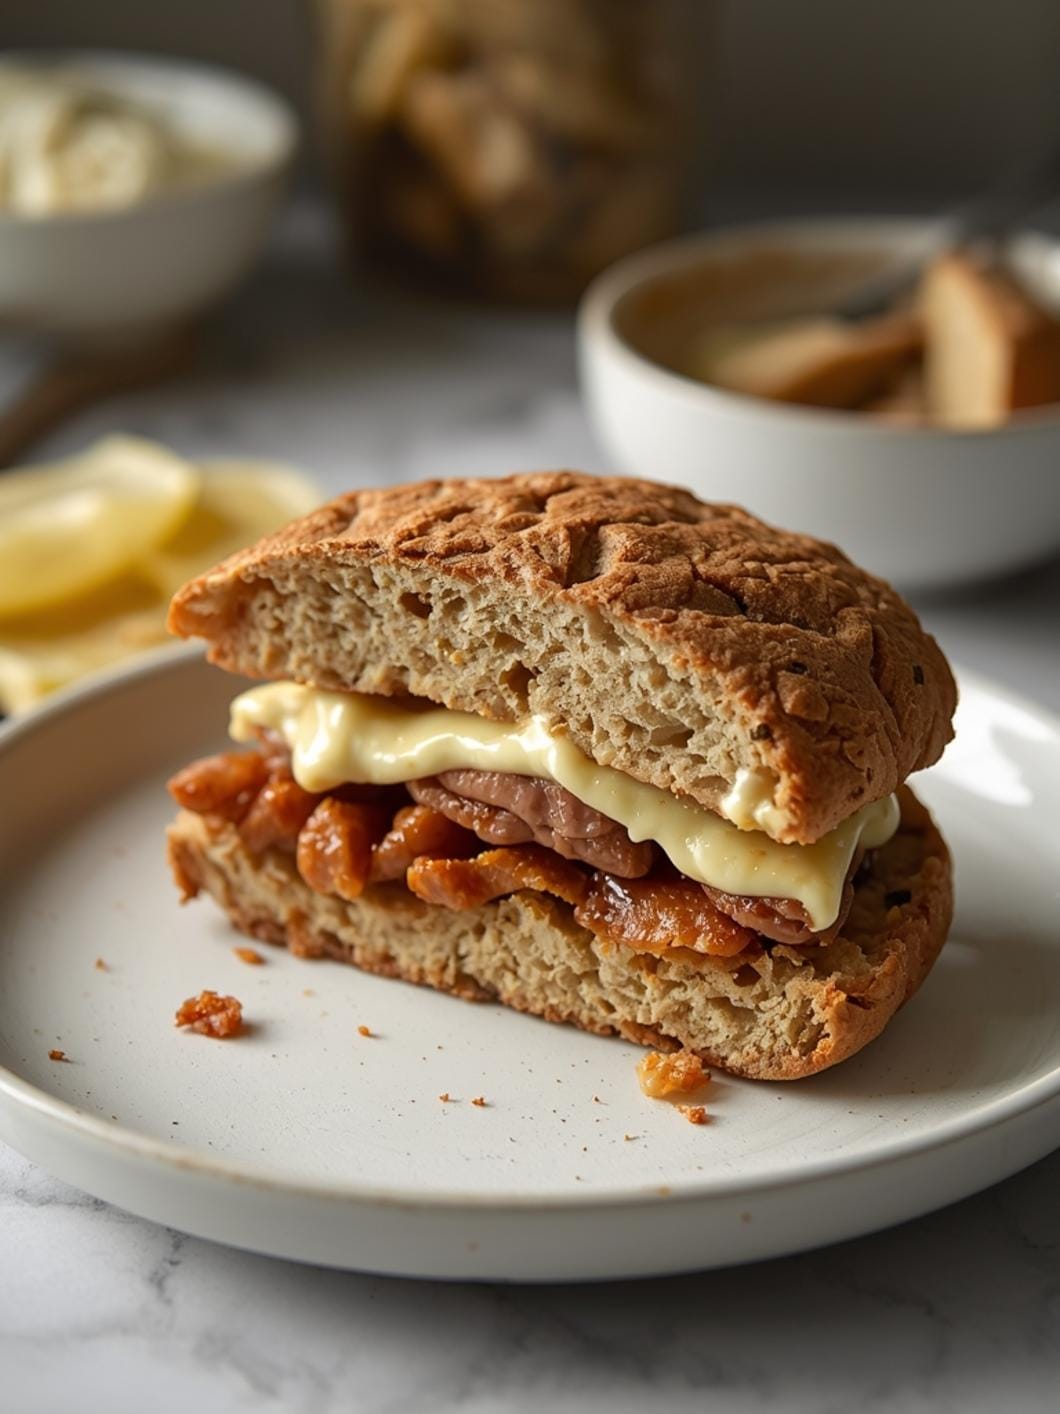
When it comes to serving, this bread truly shines as the foundation for sandwiches. Think classic turkey and provolone, a hearty BLT, or even a sophisticated avocado toast. It’s also fantastic toasted and served with butter and jam for breakfast, or alongside a comforting bowl of soup or stew. For a party or buffet, slice the loaf thinly and serve with a variety of dips like hummus, spinach dip, or a simple olive oil and balsamic vinegar blend.
Common Slip-Ups And How To Avoid Them
Even with a straightforward recipe, a few common mistakes can impact your sourdough success. Being aware of these can help you achieve a perfect loaf every time.
One frequent issue is using an inactive sourdough starter. If your starter isn’t bubbly and active after a recent feeding, it won’t have the strength to properly leaven your bread. Always ensure your starter is fed and vigorous before beginning the recipe.
Another common pitfall is under-kneading the dough. Insufficient kneading leads to a weak gluten structure, resulting in a dense, crumbly loaf. Knead until the dough is smooth and passes the windowpane test, which shows the gluten has developed adequately.
Over-proofing or under-proofing can also cause problems. If the dough over-proofs, it can collapse in the oven, leading to a flat loaf. If it under-proofs, the bread will be dense and have a tight crumb. Pay attention to the visual cues: the dough should be visibly puffy and spring back slowly when gently poked, not immediately or not at all.
Finally, slicing the bread before it has fully cooled is a common mistake. While tempting, slicing hot bread can lead to a gummy, unpleasant

FAQs
- Can I make these ahead? Yes—prep ahead, refrigerate, then serve when ready.
- How long do leftovers last? Store covered in the fridge for 3–4 days for best texture.
- Can I adjust sweetness? Yes—add more or less sweetener to taste.
- Can I change the fruit? Yes—swap strawberries for blueberries, raspberries, or sliced banana.