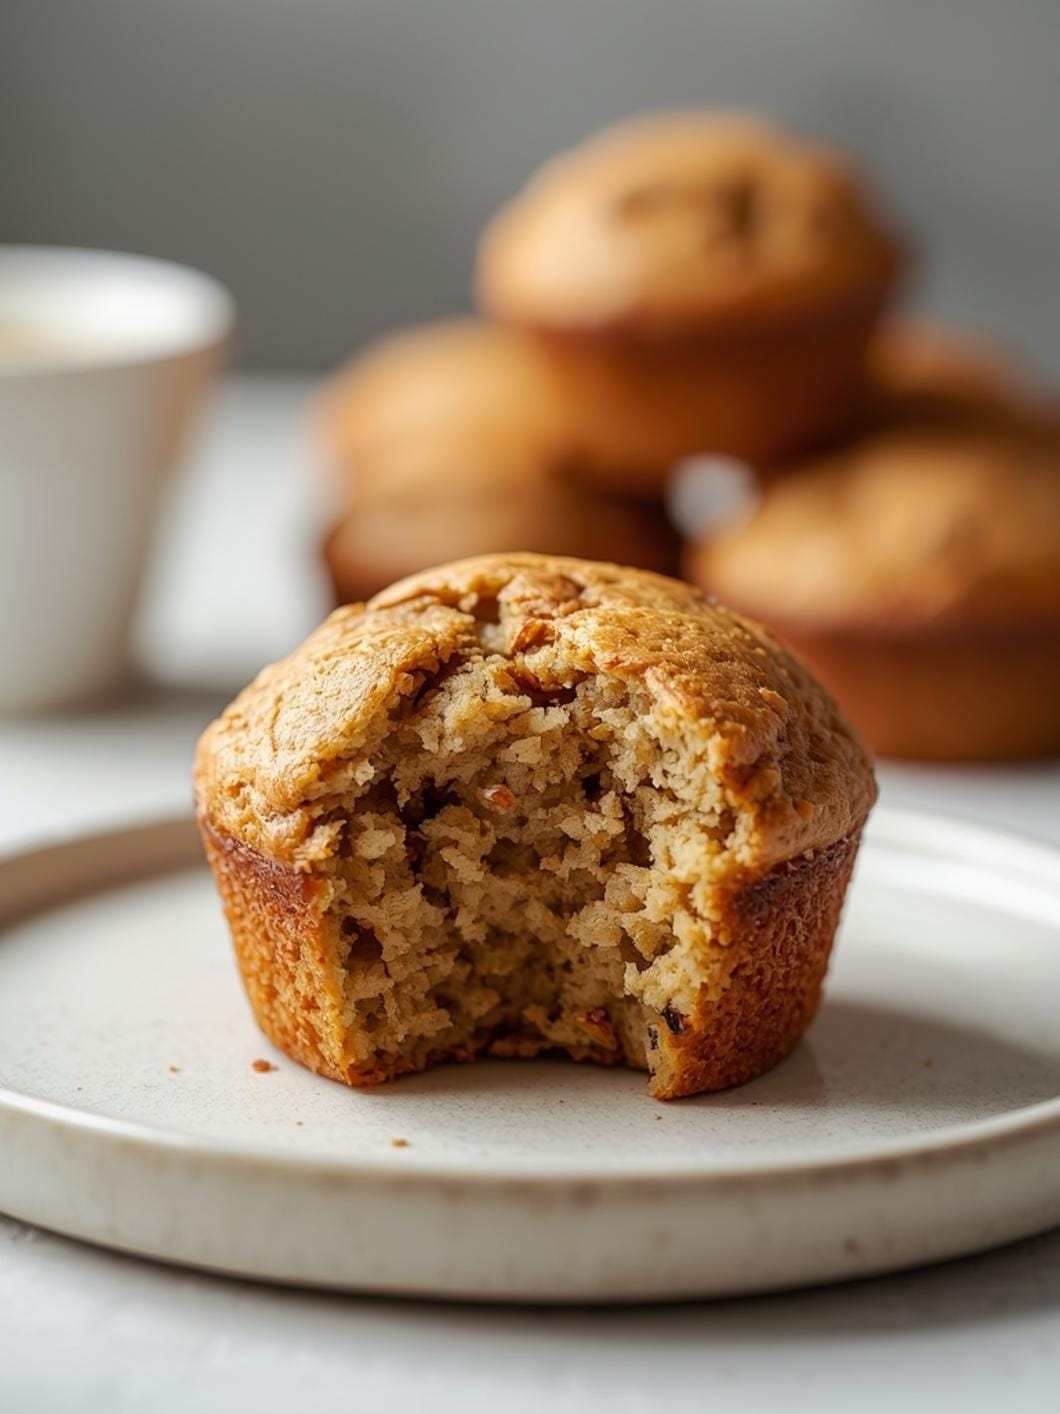
Get ready to elevate your burger and slider nights with these incredibly soft and fluffy sourdough discard buns! This recipe is designed for speed and simplicity, ensuring you can whip up a batch of homemade buns without the usual fuss of traditional bread baking. It’s a fantastic way to utilize your sourdough discard while creating something truly special for your family meals.

These quick sourdough buns are perfect for those spontaneous backyard barbecues, weeknight dinners, or whenever you crave a fresh, homemade touch to your sandwiches. They’re surprisingly easy to make, even for beginner bakers, and deliver a tender texture that perfectly complements any filling, from juicy burgers to savory pulled pork sliders.
Table of Contents

Quick Sourdough Discard Buns
- Total Time: 1 hour 35 minutes to 2 hours 30 minutes
- Yield: 8-12 buns 1x
Description
Elevate your burger and slider nights with these incredibly soft and fluffy sourdough discard buns. This recipe is designed for speed and simplicity, ensuring you can whip up a batch of homemade buns without the usual fuss of traditional bread baking. It’s a fantastic way to utilize your sourdough discard while creating something truly special for your family meals. These quick sourdough buns are perfect for those spontaneous backyard barbecues, weeknight dinners, or whenever you crave a fresh, homemade touch to your sandwiches. They’re surprisingly easy to make, even for beginner bakers, and deliver a tender texture that perfectly complements any filling, from juicy burgers to savory pulled pork sliders.
Ingredients
Instructions
1. 1. Activate the Yeast: In a large mixing bowl, combine the warm water, active dry yeast, and granulated sugar. Stir gently and let it sit for 5-10 minutes until the mixture becomes foamy. This foaminess indicates that your yeast is active and ready to work its magic.
2. 2. Combine Wet Ingredients: To the activated yeast mixture, add the unfed sourdough discard, melted butter, and one large egg. Whisk everything together until it’s well combined and smooth.
3. 3. Mix in Dry Ingredients: Gradually add the salt and 3 1/2 cups of all-purpose flour to the wet ingredients. Mix with a wooden spoon or a stand mixer with a dough hook until a shaggy dough forms. If the dough is still very sticky, add the remaining 1/2 cup of flour, a little at a time, until it pulls away from the sides of the bowl.
4. 4. Knead the Dough: Turn the dough out onto a lightly floured surface and knead for 5-7 minutes. The dough should become smooth and elastic. Alternatively, if using a stand mixer, knead on medium speed for 5 minutes.
5. 5. First Rise: Place the kneaded dough in a lightly oiled bowl, turning it once to coat. Cover the bowl with plastic wrap or a clean kitchen towel and let it rise in a warm place for 60-90 minutes, or until it has doubled in size.
6. 6. Shape the Buns: Gently punch down the risen dough to release the air. Divide the dough into 8-12 equal pieces, depending on whether you want burger-sized buns or smaller slider buns. Shape each piece into a smooth, tight ball by pulling the edges underneath and rolling it against the counter with the palm of your hand.
7. 7. Second Rise and Preheat Oven: Arrange the shaped buns on a parchment-lined baking sheet, leaving some space between them. Cover loosely with plastic wrap or a kitchen towel and let them rise again for 30-45 minutes, or until visibly puffy. During this time, preheat your oven to 375 F (190 C).
8. 8. Egg Wash and Bake: Just before baking, gently brush the tops of the buns with the beaten egg wash. If desired, sprinkle with sesame seeds or poppy seeds. Bake for 15-20 minutes, or until the buns are golden brown on top and sound hollow when tapped on the bottom.
9. 9. Cooling: Transfer the baked buns to a wire rack to cool completely before slicing and serving. This allows the steam to escape and prevents them from becoming soggy.
- Prep Time: 20 minutes
- Cook Time: 15-20 minutes
- Category: bread
- Method: baking
- Cuisine: american
Nutrition
- Serving Size: 1 bun
Keywords: sourdough, buns, discard, bread, burgers, sliders, easy, homemade, quick, baking
What You’ll Love About This Quick And Easy Recipe
This recipe is a game-changer for anyone who loves the idea of homemade bread but doesn’t have hours to dedicate to it. It’s specifically crafted for using sourdough discard, which means you get that wonderful depth of flavor without waiting for multiple proofs. This makes it ideal for busy parents, new bakers, or anyone looking for a more efficient way to bake. You’ll appreciate how quickly these buns come together, making them a perfect addition to a weeknight dinner menu or a last-minute gathering. They’re also incredibly versatile, serving as the perfect vessel for everything from classic beef burgers to vegetarian patties, or even as dinner rolls alongside a hearty soup or stew. The soft, slightly tangy crumb adds a gourmet touch to any meal, making ordinary dishes feel extraordinary.
Everything You Need To Make This Recipe Without Stress
Gathering your ingredients ahead of time makes the baking process smooth and enjoyable. This recipe uses common pantry staples, so you likely have most of what you need already. The star ingredient, sourdough discard, is what gives these buns their unique flavor and tender texture without the long fermentation times associated with active sourdough.
INGREDIENTS:

- 1 cup warm water (105-115°F)
- 2 teaspoons active dry yeast
- 1 tablespoon granulated sugar
- 1 cup unfed sourdough discard (100% hydration)
- 1/4 cup unsalted butter, melted
- 1 large egg
- 1 teaspoon salt
- 3 1/2 – 4 cups all-purpose flour, plus more for dusting
- 1 large egg, beaten (for egg wash)
- Sesame seeds or poppy seeds (optional, for topping)
For the warm water, ensure it’s not too hot, as this can kill the yeast. A kitchen thermometer is helpful here, but if you don’t have one, it should feel comfortably warm to the touch, like bathwater. Any brand of active dry yeast will work well. When it comes to sourdough discard, aim for a 100% hydration discard, which means it was fed with equal parts flour and water. If your discard is thicker or thinner, you might need to adjust the flour slightly in the main dough. All-purpose flour is perfect for achieving a soft, tender bun, but you could experiment with a small amount of bread flour for a chewier texture if you prefer. The melted butter adds richness and tenderness, while the egg contributes to the structure and a lovely golden color.
Time Needed From Start To Finish
This recipe is designed for speed, allowing you to enjoy fresh, homemade buns without a significant time commitment.
- Prep Time: 20 minutes
- Rise Time: 60-90 minutes
- Bake Time: 15-20 minutes
- Total Time: Approximately 1 hour 35 minutes to 2 hours 30 minutes
The rise time can vary depending on the warmth of your kitchen. A warmer environment will encourage a faster rise.
How To Make It Step By Step With Visual Cues

Creating these soft sourdough discard buns is a straightforward process. Follow these steps for perfect results every time.
- Activate the Yeast: In a large mixing bowl, combine the warm water, active dry yeast, and granulated sugar. Stir gently and let it sit for 5-10 minutes until the mixture becomes foamy. This foaminess indicates that your yeast is active and ready to work its magic.
- Combine Wet Ingredients: To the activated yeast mixture, add the unfed sourdough discard, melted butter, and one large egg. Whisk everything together until it’s well combined and smooth.
- Mix in Dry Ingredients: Gradually add the salt and 3 1/2 cups of all-purpose flour to the wet ingredients. Mix with a wooden spoon or a stand mixer with a dough hook until a shaggy dough forms. If the dough is still very sticky, add the remaining 1/2 cup of flour, a little at a time, until it pulls away from the sides of the bowl.
- Knead the Dough: Turn the dough out onto a lightly floured surface and knead for 5-7 minutes. The dough should become smooth and elastic. Alternatively, if using a stand mixer, knead on medium speed for 5 minutes.
- First Rise: Place the kneaded dough in a lightly oiled bowl, turning it once to coat. Cover the bowl with plastic wrap or a clean kitchen towel and let it rise in a warm place for 60-90 minutes, or until it has doubled in size.
- Shape the Buns: Gently punch down the risen dough to release the air. Divide the dough into 8-12 equal pieces, depending on whether you want burger-sized buns or smaller slider buns. Shape each piece into a smooth, tight ball by pulling the edges underneath and rolling it against the counter with the palm of your hand.
- Second Rise and Preheat Oven: Arrange the shaped buns on a parchment-lined baking sheet, leaving some space between them. Cover loosely with plastic wrap or a kitchen towel and let them rise again for 30-45 minutes, or until visibly puffy. During this time, preheat your oven to 375°F (190°C).
- Egg Wash and Bake: Just before baking, gently brush the tops of the buns with the beaten egg wash. If desired, sprinkle with sesame seeds or poppy seeds. Bake for 15-20 minutes, or until the buns are golden brown on top and sound hollow when tapped on the bottom.
- Cooling: Transfer the baked buns to a wire rack to cool completely before slicing and serving. This allows the steam to escape and prevents them from becoming soggy.
Easy Variations And Serving Ideas That Fit Real Life
These quick sourdough buns are incredibly versatile and can be adapted to suit various tastes and occasions. For a savory twist, try incorporating dried herbs like oregano, basil, or rosemary into the dough during the kneading stage. About 1-2 teaspoons of dried herbs would be perfect. You could also add a tablespoon of grated Parmesan cheese for an extra layer of flavor, making them fantastic alongside Italian-inspired meals.
For a slightly sweeter bun, perfect for breakfast sandwiches or even a unique dessert slider, you can increase the sugar by another tablespoon and add a pinch of cinnamon to the dough. Brushing with melted butter and a sprinkle of cinnamon sugar after baking would be a delightful finish.
When it comes to serving, these buns are the ultimate foundation for your favorite burgers, whether they’re classic beef, turkey, chicken, or plant-based patties. For sliders, think pulled pork, BBQ chicken, or even mini grilled cheese sandwiches. They also make excellent dinner rolls served warm with butter alongside a comforting soup or stew. You can even slice them and toast them for a sturdy base for open-faced sandwiches or avocado toast. Don’t forget to offer a variety of toppings like sliced cheese, fresh lettuce, tomatoes, pickles, and your favorite condiments to let everyone customize their creation.
Common Slip-Ups And How To Avoid Them
Even with a straightforward recipe, a few common mistakes can impact the final outcome. Being aware of these can help you achieve perfect buns every time.
One frequent issue is over-flouring the dough. Adding too much flour can result in dense, dry buns. Always start with the lower end of the flour range and add more only if the dough is excessively sticky. The dough should be soft and slightly tacky, not stiff.
Another common pitfall is not allowing enough rise time. Rushing the rising process will lead to smaller, denser buns. Ensure your kitchen is warm enough (around 70-75°F or 21-24°C) and be patient. The dough should visibly double in size during the first rise and become puffy during the second. If your kitchen is cool, you can create a warm environment by placing the covered bowl in a slightly warm (but not hot) oven that has been turned off, or near a sunny window.
Over-kneading or under-kneading can also affect texture. Under-kneading won’t develop the gluten sufficiently, leading to a crumbly texture. Over-kneading can make the dough tough. Aim for a dough that is smooth and elastic, springing back slowly when gently poked.
Finally, over-baking can dry out the buns, making them hard. Keep an eye on them towards the end of the baking time. They should be golden brown and sound hollow when tapped on the bottom. If they’re browning too quickly, you can loosely tent them with aluminum foil.
How To Store It And Make It

FAQs
- Can I make these ahead? Yes—prep ahead, refrigerate, then serve when ready.
- How long do leftovers last? Store covered in the fridge for 3–4 days for best texture.
- Can I adjust sweetness? Yes—add more or less sweetener to taste.
- Can I change the fruit? Yes—swap strawberries for blueberries, raspberries, or sliced banana.