There’s something incredibly satisfying about a warm, crusty loaf of bread, especially one you’ve made yourself.
 11")
This rustic honey oat sourdough loaf delivers on that promise with an unexpected ease that will delight even the most novice home baker. Forget complicated techniques and endless kneading; this recipe is designed for simplicity and delicious results.
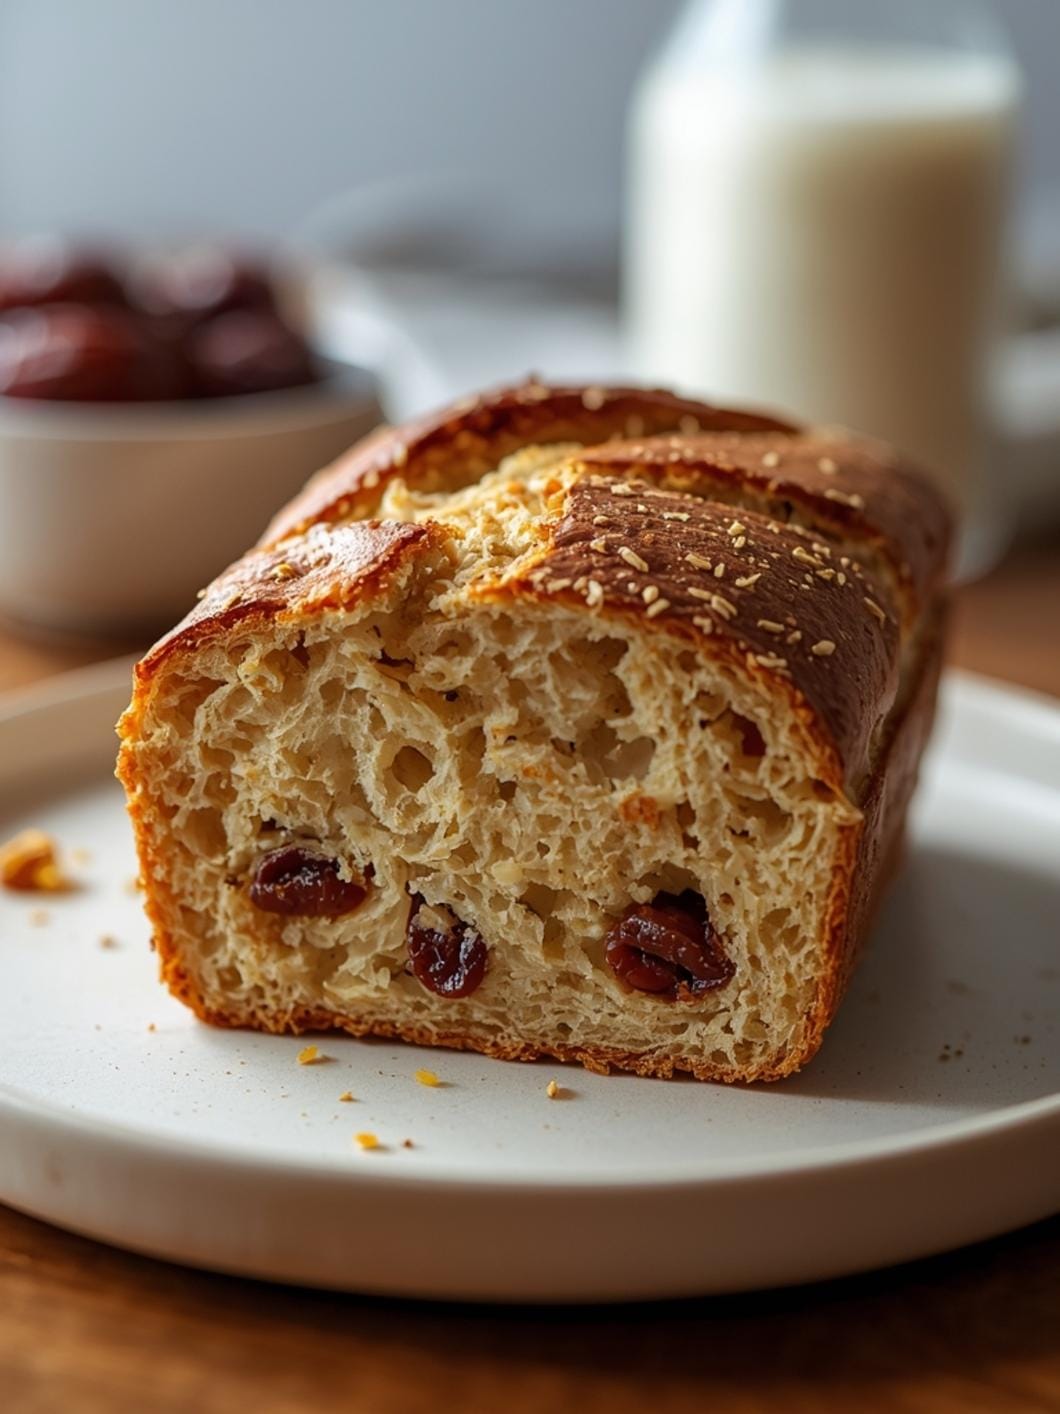
Imagine the aroma filling your kitchen as this beautiful bread bakes, then slicing into a tender crumb with hints of sweet honey and wholesome oats. It’s perfect for breakfast, alongside a hearty soup, or as a delightful snack. Get ready to impress yourself and your family with this straightforward approach to a classic favorite.
Table of Contents
- What You’ll Love About This Quick And Easy Recipe
- Everything You Need To Make This Recipe Without Stress
- Time Needed From Start To Finish
- How To Make It Step By Step With Visual Cues
- Easy Variations And Serving Ideas That Fit Real Life
- Common Slip-Ups And How To Avoid Them
- How To Store It And Make It Ahead Without Ruining Texture
 12")
Rustic Honey Oat Sourdough Loaf
- Total Time: 10-15 hours
- Yield: 1 loaf 1x
Description
This rustic honey oat sourdough loaf is a simple, no-knead recipe that delivers a warm, crusty bread with a tender crumb, perfect for beginners. It features the sweet hint of honey and wholesome oats, making it ideal for breakfast, alongside soup, or as a delightful snack.
Ingredients
Instructions
1. Combine Wet Ingredients and Starter: In a large mixing bowl, gently whisk together the active sourdough starter, warm water, honey, and olive oil until well combined. The mixture should look milky and slightly frothy from the starter.
2. Add Dry Ingredients: To the wet mixture, add the bread flour, 1 cup of rolled oats, and salt. Use a sturdy spoon or a Danish dough whisk to mix everything until no dry streaks of flour remain. The dough will be shaggy and sticky, not smooth like traditional kneaded dough. Do not overmix; just ensure all ingredients are incorporated.
3. First Rise (Bulk Fermentation): Cover the bowl tightly with plastic wrap or a damp kitchen towel. Let the dough rest at room temperature (around 70-75F) for 8 to 12 hours. This long rest allows the sourdough starter to work its magic, developing flavor and structure. You’ll know it’s ready when the dough has visibly increased in size (often doubled) and has a bubbly surface.
4. Shape the Loaf: Lightly flour your work surface and gently scrape the dough out of the bowl. It will be very soft and sticky. Gently fold the edges of the dough towards the center a few times to create a somewhat round shape, building a little surface tension. Try not to deflate it too much.
5. Second Rise (Proofing): Place the shaped dough into a floured banneton basket or a bowl lined with a floured kitchen towel, seam-side up. Cover it again with plastic wrap or a damp towel and let it proof at room temperature for 1 to 2 hours. Alternatively, you can cold proof it in the refrigerator for 8-16 hours for a deeper flavor development.
6. Preheat Oven and Dutch Oven: About 30 minutes before baking, place a Dutch oven (with its lid) into your oven and preheat to 450F (232C). Getting the Dutch oven screaming hot is crucial for a great crust.
7. Bake the Bread: Carefully remove the hot Dutch oven from the oven. Gently invert the dough from the banneton or bowl into the hot Dutch oven. If desired, score the top of the dough with a sharp knife or razor blade (a simple “X” or a single slash works well). Sprinkle the remaining 2 tablespoons of rolled oats over the top. Cover with the lid and bake for 30 minutes.
8. Final Bake and Cool: Remove the lid from the Dutch oven and continue baking for another 15-25 minutes, or until the crust is deeply golden brown and the internal temperature reaches 200-210F (93-99C). Carefully remove the bread from the Dutch oven and place it on a wire rack to cool completely before slicing. This cooling step is essential for the crumb to set properly.
- Prep Time: 15 minutes
- Cook Time: 45-55 minutes
- Category: bread
- Method: baking
- Cuisine: american
Nutrition
- Serving Size: 1 slice
Keywords: sourdough, bread, oat, honey, no-knead, rustic, homemade, baking, easy, comfort food
What You’ll Love About This Quick And Easy Recipe
This honey oat sourdough loaf is a game-changer for anyone who loves homemade bread but doesn’t have hours to dedicate to the process. It’s incredibly forgiving, making it ideal for beginners who might be intimidated by traditional sourdough baking. The “no-knead” method means minimal hands-on time, allowing the magic of fermentation to do most of the work for you. This recipe is perfect for busy weeknights when you want a comforting side, or for a relaxed weekend breakfast. It’s also a fantastic way to introduce the wonderful flavors of sourdough to your family without the stress of a highly technical bake. Serve it warm with butter, jam, or alongside your favorite savory dishes.
Everything You Need To Make This Recipe Without Stress
Gathering your ingredients before you start is key to a smooth baking experience. This recipe uses common pantry staples, so you likely have most of what you need already. The beauty of a no-knead bread is its simplicity, relying on time rather than muscle for development.
INGREDIENTS:
 13")
- 1 cup active sourdough starter, fed and bubbly
- 1 ½ cups warm water (around 90-100°F)
- 1/4 cup honey
- 1 tablespoon olive oil
- 3 cups bread flour, plus more for dusting
- 1 cup rolled oats, plus 2 tablespoons for topping
- 2 teaspoons salt
For the flour, bread flour is recommended for its higher protein content, which helps create a chewier crumb, but all-purpose flour can be used in a pinch, though the texture might be slightly less robust. When choosing oats, opt for old-fashioned rolled oats rather than instant or steel-cut, as they provide the best texture and absorb moisture appropriately. Any good quality honey will work beautifully here; local honey can add an extra layer of flavor.
Time Needed From Start To Finish
While the active hands-on time for this no-knead sourdough is minimal, the overall process does require patience for the fermentation.
- Prep Time: 15 minutes (mixing ingredients)
- First Rise (Bulk Fermentation): 8-12 hours (overnight is ideal)
- Second Rise (Proofing): 1-2 hours
- Bake Time: 45-55 minutes
- Total Time: Approximately 10-15 hours (mostly inactive waiting time)
How To Make It Step By Step With Visual Cues
 14")
This recipe breaks down into a few simple stages, making it manageable even for those new to baking with sourdough. Follow these steps for a perfectly rustic loaf.
- Combine Wet Ingredients and Starter: In a large mixing bowl, gently whisk together the active sourdough starter, warm water, honey, and olive oil until well combined. The mixture should look milky and slightly frothy from the starter.
- Add Dry Ingredients: To the wet mixture, add the bread flour, 1 cup of rolled oats, and salt. Use a sturdy spoon or a Danish dough whisk to mix everything until no dry streaks of flour remain. The dough will be shaggy and sticky, not smooth like traditional kneaded dough. Do not overmix; just ensure all ingredients are incorporated.
- First Rise (Bulk Fermentation): Cover the bowl tightly with plastic wrap or a damp kitchen towel. Let the dough rest at room temperature (around 70-75°F) for 8 to 12 hours. This long rest allows the sourdough starter to work its magic, developing flavor and structure. You’ll know it’s ready when the dough has visibly increased in size (often doubled) and has a bubbly surface.
- Shape the Loaf: Lightly flour your work surface and gently scrape the dough out of the bowl. It will be very soft and sticky. Gently fold the edges of the dough towards the center a few times to create a somewhat round shape, building a little surface tension. Try not to deflate it too much.
- Second Rise (Proofing): Place the shaped dough into a floured banneton basket or a bowl lined with a floured kitchen towel, seam-side up. Cover it again with plastic wrap or a damp towel and let it proof at room temperature for 1 to 2 hours. Alternatively, you can cold proof it in the refrigerator for 8-16 hours for a deeper flavor development.
- Preheat Oven and Dutch Oven: About 30 minutes before baking, place a Dutch oven (with its lid) into your oven and preheat to 450°F (232°C). Getting the Dutch oven screaming hot is crucial for a great crust.
- Bake the Bread: Carefully remove the hot Dutch oven from the oven. Gently invert the dough from the banneton or bowl into the hot Dutch oven. If desired, score the top of the dough with a sharp knife or razor blade (a simple “X” or a single slash works well). Sprinkle the remaining 2 tablespoons of rolled oats over the top. Cover with the lid and bake for 30 minutes.
- Final Bake and Cool: Remove the lid from the Dutch oven and continue baking for another 15-25 minutes, or until the crust is deeply golden brown and the internal temperature reaches 200-210°F (93-99°C). Carefully remove the bread from the Dutch oven and place it on a wire rack to cool completely before slicing. This cooling step is essential for the crumb to set properly.
Easy Variations And Serving Ideas That Fit Real Life
This honey oat sourdough is wonderfully versatile and can be adapted to suit various tastes and occasions.
- Nutty Addition: For extra crunch and flavor, try adding ½ cup of chopped walnuts or pecans along with the oats in step 2.
- Sweet Swirl: Before the second rise, you could gently flatten the dough, spread a thin layer of cinnamon sugar or a fruit jam, then roll it up and shape it for a sweet swirl effect.
- Savory Twist: Omit the honey and add 1-2 tablespoons of fresh rosemary or thyme, and a handful of shredded Parmesan cheese for a savory herb loaf perfect with dinner.
- Kid-Friendly Serving: Kids often love this bread toasted with a smear of cream cheese or peanut butter. Cut into fun shapes with cookie cutters before toasting for an extra treat.
- Party/Buffet Serving: Slice the cooled loaf into thick pieces and arrange them on a platter with a selection of cheeses, charcuterie, and fruit for an elegant appetizer spread. It’s also fantastic for dipping into olive oil and balsamic vinegar.
- Soup Companion: This rustic loaf is the ultimate companion for hearty stews, chili, or any creamy soup. Its sturdy crust and tender interior are perfect for soaking up every last drop.
Common Slip-Ups And How To Avoid Them
Even with a simple recipe, a few common mistakes can impact your results. Being aware of these can help you achieve a perfect loaf every time.
- Using an Inactive Starter: The most crucial element for good sourdough is an active, bubbly starter. If your starter isn’t robust, your bread won’t rise properly. Feed your starter 4-12 hours before you plan to mix the dough, ensuring it’s at its peak activity.
- Not Enough Fermentation Time: Rushing the first rise (bulk fermentation) will result in a dense, underdeveloped loaf. Pay attention to the visual cues: the dough should double in size and be bubbly. Room temperature plays a big role; colder rooms require longer fermentation.
- Over-Handling the Dough: This is a no-knead recipe, meaning you want to handle the dough as little as possible, especially after the first rise. Too much handling can deflate the precious air bubbles that give sourdough its characteristic open crumb.
- Slicing Too Soon: It’s tempting to cut into a warm loaf, but cooling is vital. The bread continues to cook and set as it cools. Slicing too early can lead to a gummy texture. Always let it cool completely on a wire rack for at least 2 hours.
- Not Using a Hot Dutch Oven: The super-hot Dutch oven creates steam, which is essential for a beautiful, crispy crust and a good oven spring. Don’t skip the preheating step!
How To Store It And Make It Ahead Without Ruining Texture
Proper storage ensures your delicious honey oat sourdough stays fresh and enjoyable for longer.
- Room Temperature Storage: Once completely cooled, store the loaf in a bread box, a paper bag, or wrapped in a clean kitchen towel at room temperature. This helps maintain the
 15")
FAQs
- Can I make these ahead? Yes—prep ahead, refrigerate, then serve when ready.
- How long do leftovers last? Store covered in the fridge for 3–4 days for best texture.
- Can I adjust sweetness? Yes—add more or less sweetener to taste.
- Can I change the fruit? Yes—swap strawberries for blueberries, raspberries, or sliced banana.