There’s nothing quite like the aroma of freshly baked bread filling your kitchen, and with this simple sourdough loaf recipe, you can achieve that comforting experience even if you’re new to baking.

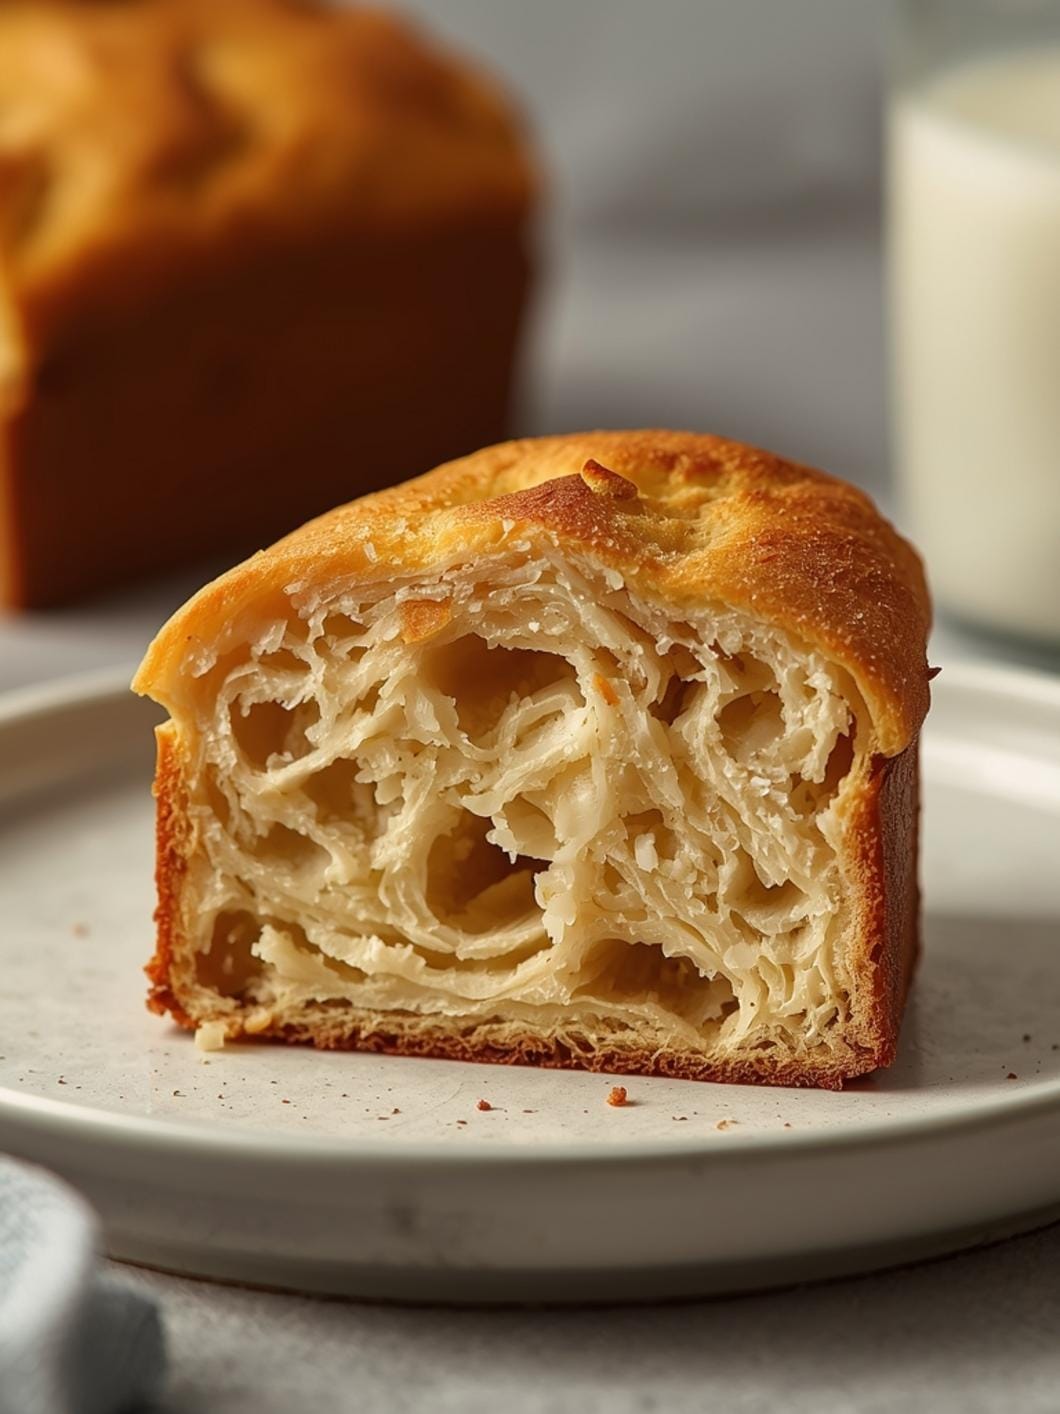
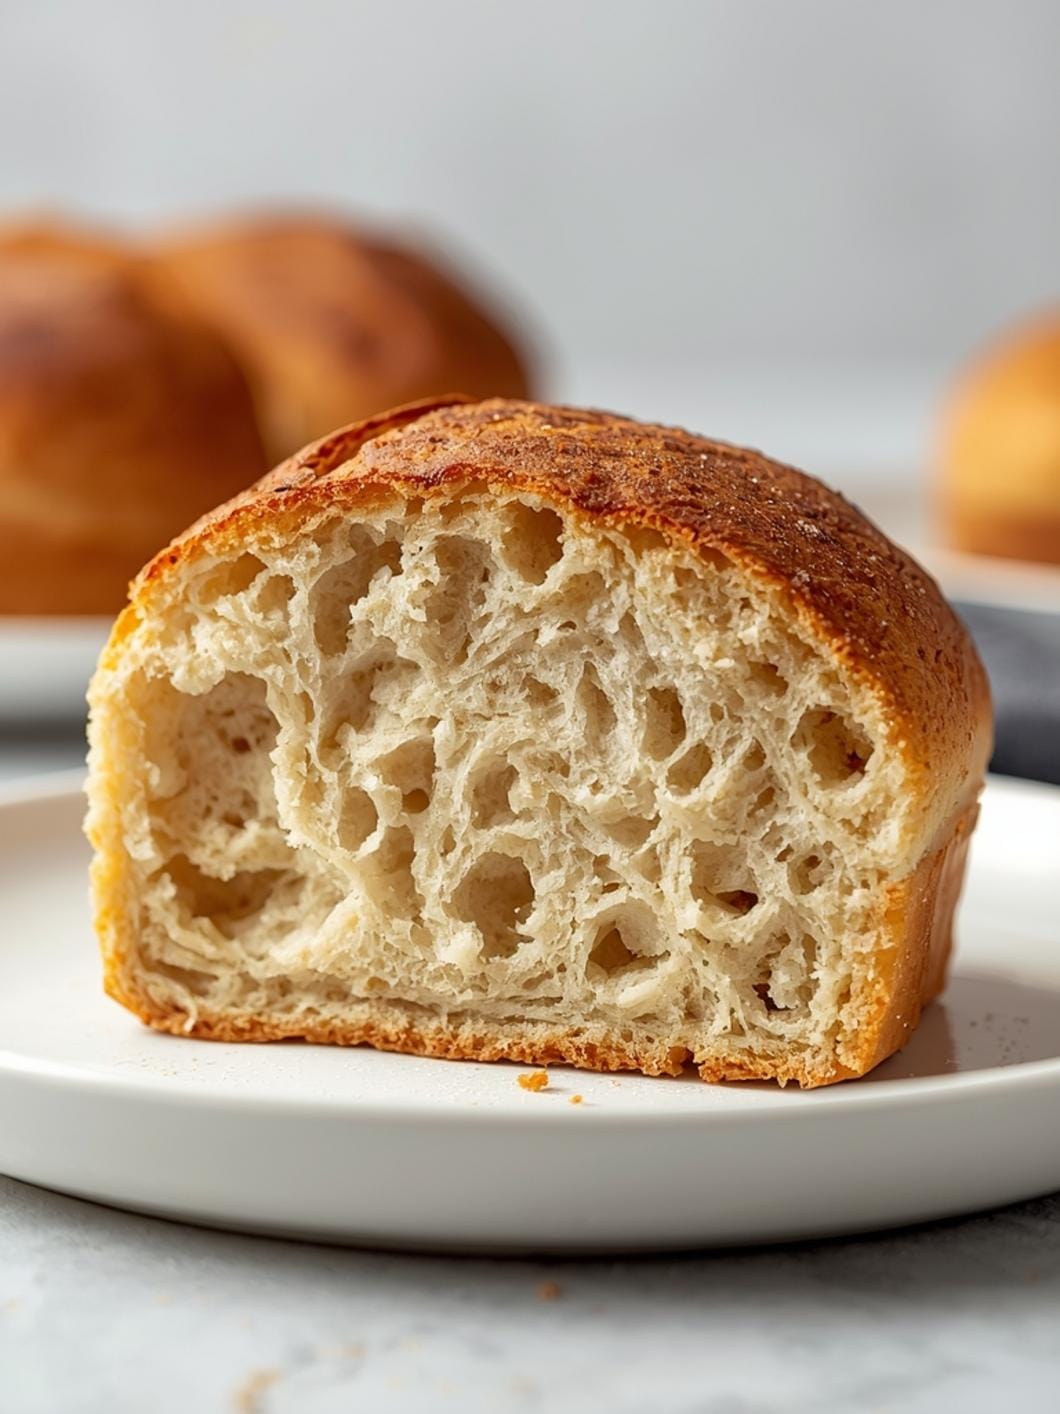
This guide focuses on creating a beautiful, rustic country sourdough loaf that boasts a wonderfully chewy interior and a perfectly crisp crust. It’s a truly satisfying bake that feels impressive but is surprisingly straightforward.
This recipe is designed for home bakers who want to dive into the world of sourdough without feeling overwhelmed. We’ll walk through each step to ensure you get a fantastic result, perfect for slicing and serving with your favorite meals or enjoying simply with a smear of butter. Get ready to bake a loaf that will make you proud!

Simple Sourdough Loaf
- Total Time: 7-10 hours (same-day bake)
- Yield: 1 loaf 1x
Description
This recipe guides you through baking a rustic country sourdough loaf with a chewy interior and crisp crust, perfect for beginners. It simplifies the process, allowing you to achieve coveted sourdough flavor and texture without extensive experience, making it ideal for a weekend project or a relaxed weeknight bake.
Ingredients
Instructions
1. Combine Starter and Water: In a large mixing bowl, gently whisk together your active sourdough starter and the warm water until the starter is mostly dissolved and the mixture is cloudy. This ensures even distribution of the starter throughout the dough.
2. Add Flour and Salt: Add the flour to the bowl, followed by the salt. Use a sturdy spoon or your hands to mix everything together until no dry flour remains. The dough will be shaggy and sticky at this stage. Don’t worry about kneading it perfectly; just ensure all ingredients are incorporated. Cover the bowl with a clean kitchen towel or plastic wrap and let it rest for 30 minutes. This resting period, called autolyse, allows the flour to fully hydrate.
3. Perform First Set of Folds: After the rest, uncover the dough. With wet hands, grab a portion of the dough from one side, stretch it upwards, and fold it over to the center. Rotate the bowl a quarter turn and repeat this stretch and fold motion three more times, completing one full round. The dough will start to feel a bit smoother and more elastic. Cover and let it rest for 30 minutes.
4. Repeat Folding Process: Repeat the stretch and fold process (Step 3) three more times, with 30-minute rests in between each set of folds. By the end of these four sets of folds, the dough should feel significantly stronger, smoother, and more cohesive. It will have developed good elasticity.
5. Bulk Fermentation (First Rise): After the last set of folds, cover the bowl and let the dough undergo its bulk fermentation. This will take 3-5 hours at room temperature (around 70-75 F / 21-24 C), or longer if your kitchen is cooler. The dough should increase in volume by about 30-50% and appear bubbly on the surface. It should also jiggle slightly when you gently shake the bowl.
6. Shape the Dough: Lightly flour your work surface. Gently turn the dough out onto the floured surface. Carefully shape the dough into a round or oval, using a bench scraper or your hands to create tension on the surface. You want to create a taut skin on the outside of the loaf. Place the shaped dough seam-side up into a floured banneton (proofing basket) or a bowl lined with a floured kitchen towel.
7. Proof the Loaf (Second Rise): Cover the banneton or bowl and let the dough proof at room temperature for 1-2 hours, or place it in the refrigerator for 8-12 hours (or overnight). The dough should feel puffy and spring back slowly when gently poked.
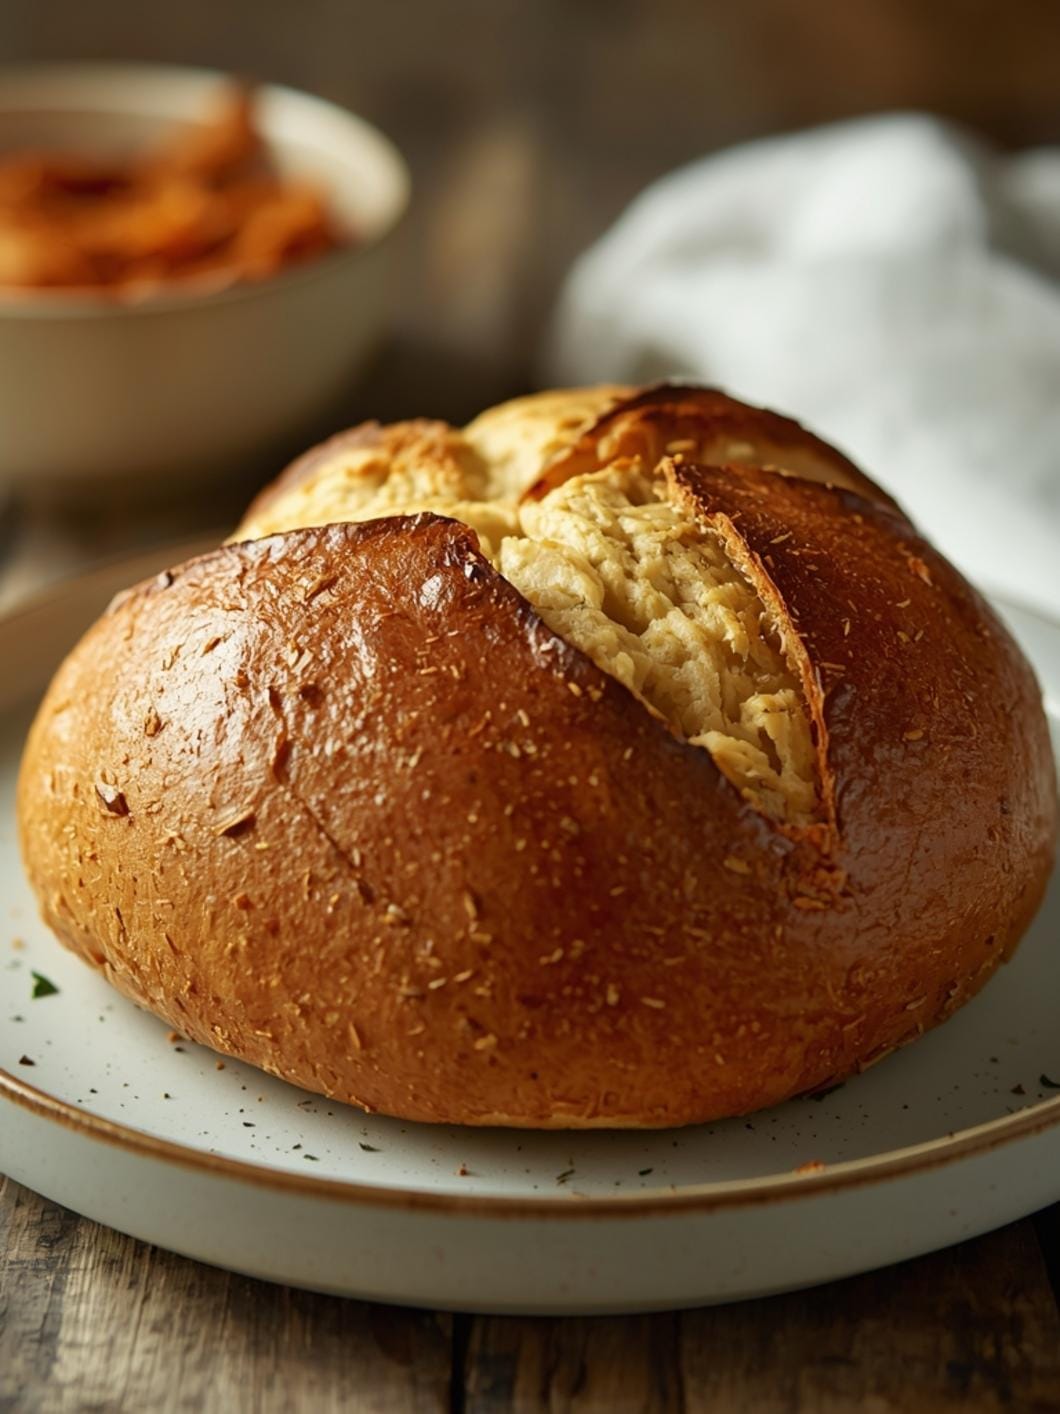
8. Preheat Oven and Bake: About 30 minutes before baking, place a Dutch oven (with its lid) into your oven and preheat to 450 F (232 C). Once preheated, carefully remove the hot Dutch oven. Gently invert the dough from the banneton into the hot Dutch oven. Score the top of the dough with a sharp knife or razor blade (a simple cross or a single slash works well). Cover with the lid and bake for 30 minutes.
9. Finish Baking: Remove the lid from the Dutch oven. Reduce the oven temperature to 425 F (218 C) and continue baking for another 15-20 minutes, or until the crust is deeply golden brown and sounds hollow when tapped on the bottom.
10. Cool Completely: Carefully remove the loaf from the Dutch oven and place it on a wire rack to cool completely for at least 1-2 hours before slicing. This cooling period is essential for the crumb to set and for the flavors to fully develop. Slicing too early can result in a gummy texture.
- Prep Time: 15-20 minutes active
- Cook Time: 40-50 minutes
- Category: bread
- Method: baking
- Cuisine: american
Nutrition
- Serving Size: 1 slice
Keywords: sourdough, bread, loaf, baking, homemade, rustic, country bread, starter, easy, beginner
What You’ll Love About This Quick And Easy Recipe
This simple sourdough loaf recipe is a true gem for several reasons. First and foremost, it’s incredibly approachable for beginners. We’re focusing on a method that simplifies the process, allowing you to achieve that coveted sourdough flavor and texture without needing years of baking experience. It’s perfect for anyone who has been curious about sourdough but felt intimidated by complex instructions or long fermentation times. This recipe is designed to be relatively quick for a sourdough, meaning you can mix it up and have a fresh loaf ready on the same day, making it ideal for a weekend project or even a relaxed weeknight bake if you plan ahead slightly.
You’ll love the rustic charm of this country loaf – it looks like something straight out of a European bakery, with its golden-brown crust and inviting cracks. The taste is subtly tangy, with a deep, satisfying bread flavor that pairs wonderfully with almost anything. Serve it alongside a hearty soup, use it for incredible sandwiches, or simply enjoy thick slices toasted with butter and jam for breakfast. It’s a versatile bread that elevates any meal and is guaranteed to impress your family and friends. This recipe is for anyone who appreciates real, homemade bread and wants to add a touch of artisanal flair to their kitchen without the fuss.
Everything You Need To Make This Recipe Without Stress
Gathering your ingredients before you begin is a great way to ensure a smooth baking process. This recipe uses common pantry staples, making it easy to get started without a special trip to the store. We’ll also discuss a few simple substitutions if you need them.
INGREDIENTS:

- 100 grams active sourdough starter
- 350 grams warm water (around 90-95°F / 32-35°C)
- 500 grams unbleached all-purpose flour or bread flour
- 10 grams fine sea salt
- Extra flour for dusting
For the flour, while bread flour is often recommended for its higher protein content which contributes to a chewier crumb, unbleached all-purpose flour works perfectly well for this beginner-friendly recipe and will still yield a delicious loaf. Just make sure it’s unbleached for the best flavor and texture. When it comes to salt, fine sea salt is preferred for its clean taste and even distribution, but regular table salt can be used in a pinch, though you might want to reduce the amount slightly as it can be saltier by volume. The most crucial ingredient is your active sourdough starter; ensure it’s bubbly and active, having been fed 4-12 hours prior to mixing.
Time Needed From Start To Finish
Baking sourdough can sometimes feel like a long process, but this recipe is designed to be manageable within a single day, or at least with active steps spread out.
- Active Prep Time: Approximately 15-20 minutes (mixing dough, folding)
- Bulk Fermentation (First Rise): 4-6 hours (depending on kitchen temperature and starter activity)
- Shaping & Proofing (Second Rise): 1-2 hours (or overnight in the fridge for convenience)
- Baking Time: 40-50 minutes
- Cooling Time: At least 1-2 hours (crucial for texture and flavor)
Total Time (Same-Day Bake): Roughly 7-10 hours, including active and inactive times. While this isn’t a 30-minute recipe, the hands-on time is minimal, and the waiting periods allow you to go about your day while the magic happens.
How To Make It Step By Step With Visual Cues

Follow these clear steps to bake your beautiful sourdough loaf. Paying attention to the feel of the dough will help you understand the process better.
- Combine Starter and Water: In a large mixing bowl, gently whisk together your active sourdough starter and the warm water until the starter is mostly dissolved and the mixture is cloudy. This ensures even distribution of the starter throughout the dough.
- Add Flour and Salt: Add the flour to the bowl, followed by the salt. Use a sturdy spoon or your hands to mix everything together until no dry flour remains. The dough will be shaggy and sticky at this stage. Don’t worry about kneading it perfectly; just ensure all ingredients are incorporated. Cover the bowl with a clean kitchen towel or plastic wrap and let it rest for 30 minutes. This resting period, called autolyse, allows the flour to fully hydrate.
- Perform First Set of Folds: After the rest, uncover the dough. With wet hands, grab a portion of the dough from one side, stretch it upwards, and fold it over to the center. Rotate the bowl a quarter turn and repeat this stretch and fold motion three more times, completing one full round. The dough will start to feel a bit smoother and more elastic. Cover and let it rest for 30 minutes.
- Repeat Folding Process: Repeat the stretch and fold process (Step 3) three more times, with 30-minute rests in between each set of folds. By the end of these four sets of folds, the dough should feel significantly stronger, smoother, and more cohesive. It will have developed good elasticity.
- Bulk Fermentation (First Rise): After the last set of folds, cover the bowl and let the dough undergo its bulk fermentation. This will take 3-5 hours at room temperature (around 70-75°F / 21-24°C), or longer if your kitchen is cooler. The dough should increase in volume by about 30-50% and appear bubbly on the surface. It should also jiggle slightly when you gently shake the bowl.
- Shape the Dough: Lightly flour your work surface. Gently turn the dough out onto the floured surface. Carefully shape the dough into a round or oval, using a bench scraper or your hands to create tension on the surface. You want to create a taut skin on the outside of the loaf. Place the shaped dough seam-side up into a floured banneton (proofing basket) or a bowl lined with a floured kitchen towel.
- Proof the Loaf (Second Rise): Cover the banneton or bowl and let the dough proof at room temperature for 1-2 hours, or place it in the refrigerator for 8-12 hours (or overnight). The dough should feel puffy and spring back slowly when gently poked.
- Preheat Oven and Bake: About 30 minutes before baking, place a Dutch oven (with its lid) into your oven and preheat to 450°F (232°C). Once preheated, carefully remove the hot Dutch oven. Gently invert the dough from the banneton into the hot Dutch oven. Score the top of the dough with a sharp knife or razor blade (a simple cross or a single slash works well). Cover with the lid and bake for 30 minutes.
- Finish Baking: Remove the lid from the Dutch oven. Reduce the oven temperature to 425°F (218°C) and continue baking for another 15-20 minutes, or until the crust is deeply golden brown and sounds hollow when tapped on the bottom.
- Cool Completely: Carefully remove the loaf from the Dutch oven and place it on a wire rack to cool completely for at least 1-2 hours before slicing. This cooling period is essential for the crumb to set and for the flavors to fully develop. Slicing too early can result in a gummy texture.
Easy Variations And Serving Ideas That Fit Real Life
This simple sourdough loaf is incredibly versatile and can be enjoyed in countless ways. For a quick and easy breakfast, toast a thick slice and top it with avocado, a fried egg, or your favorite jam. It makes an excellent base for open-faced sandwiches with deli meats, cheese, and fresh vegetables for a simple lunch.
To elevate your dinner, serve warm slices alongside a hearty stew, chili, or a fresh green salad. The slightly tangy flavor of sourdough perfectly complements rich, savory dishes. For a crowd-pleasing appetizer, slice the loaf, brush with olive oil, sprinkle with garlic powder and herbs, and toast until golden for delicious crostini. You can serve these with bruschetta, a cheese board, or a simple dip.
If you want to add some flavor to the dough itself, consider mixing in a handful of chopped fresh rosemary and a tablespoon of garlic powder during the initial mixing stage. For a cheesy twist, incorporate 1/2 cup of shredded cheddar or Gruyere cheese during the last set of folds. Kids often love sourdough bread

FAQs
- Can I make these ahead? Yes—prep ahead, refrigerate, then serve when ready.
- How long do leftovers last? Store covered in the fridge for 3–4 days for best texture.
- Can I adjust sweetness? Yes—add more or less sweetener to taste.
- Can I change the fruit? Yes—swap strawberries for blueberries, raspberries, or sliced banana.