Baking a delicious, soft, and fluffy loaf of bread that’s also gluten-free can sometimes feel like a challenge.

But with this simple buckwheat bread recipe, you’re in for a treat! This recipe focuses on creating a wonderfully tender crumb and a satisfying texture, proving that gluten-free doesn’t mean compromising on taste or quality.
This whole grain loaf is perfect for anyone looking for a healthier bread option that’s easy to make and incredibly versatile. Whether you’re new to gluten-free baking or a seasoned pro, you’ll appreciate how straightforward and rewarding this recipe is, yielding a beautiful loaf every time.

Soft and Fluffy Gluten-Free Buckwheat Bread
- Total Time: 2 hours 10 minutes to 2 hours 30 minutes
- Yield: 1 loaf 1x
Description
This recipe guides you through making a delicious, soft, and fluffy gluten-free buckwheat bread. It’s designed to be beginner-friendly, using common ingredients, and yields a wonderfully tender crumb and satisfying texture. Perfect for sandwiches, toast, or alongside meals, this versatile loaf is a great option for anyone seeking a healthier, easy-to-make bread.
Ingredients
Instructions
1. Activate the Yeast: In a large mixing bowl, combine the warm water, yeast, and honey (or maple syrup). Stir gently and let it sit for 5-10 minutes until the mixture becomes foamy. This foam indicates that your yeast is active and ready to work its magic. If it doesn’t foam, your water might not have been warm enough, or your yeast might be old, and you should start over.
2. Combine Dry Ingredients: In a separate medium bowl, whisk together the buckwheat flour, tapioca flour, psyllium husk powder, and salt. Make sure all ingredients are well combined to ensure even distribution throughout the dough.
3. Mix Wet and Dry: Pour the olive oil into the activated yeast mixture. Then, gradually add the dry ingredient mixture to the wet ingredients, mixing with a sturdy spoon or a stand mixer with a paddle attachment until a thick, uniform dough forms. The dough will be quite sticky and thick, more like a batter than a traditional wheat dough.
4. Prepare for Rising: Lightly grease a 9×5-inch loaf pan with olive oil. Transfer the dough into the prepared loaf pan, using a spatula to smooth the top. You can also lightly wet your hands to help shape the dough if it’s too sticky.
5. First Rise: Cover the loaf pan loosely with plastic wrap or a clean kitchen towel. Place it in a warm, draft-free spot for 45-60 minutes, or until the dough has risen by about 50-75% and looks visibly puffy. It won’t double in size like traditional bread, but it should definitely show a noticeable rise.
6. Preheat Oven and Bake: While the dough is rising, preheat your oven to 375 F (190 C). Once the dough has risen, remove the cover and place the loaf pan in the preheated oven. Bake for 40-45 minutes, or until the crust is golden brown and the internal temperature reaches 200-210 F (93-99 C) when checked with an instant-read thermometer.
7. Cooling is Key: Once baked, immediately remove the bread from the oven. Let it cool in the loaf pan for about 10-15 minutes before carefully transferring it to a wire rack to cool completely. This cooling step is critical for gluten-free bread, as it allows the internal structure to set and prevents a gummy texture. Do not slice until fully cooled, ideally for at least 30 minutes, but longer is better.
- Prep Time: 15 minutes
- Cook Time: 40-45 minutes
- Category: bread
- Method: baking
- Cuisine: american
Nutrition
- Serving Size: 1 slice
Keywords: gluten-free, buckwheat, bread, homemade, easy, fluffy, whole grain, baking, healthy, sandwich
What You’ll Love About This Quick And Easy Recipe
This soft and fluffy buckwheat bread recipe is a true kitchen hero for many reasons. First and foremost, it’s naturally gluten-free, making it an excellent choice for those with celiac disease, gluten sensitivities, or anyone simply looking to reduce their gluten intake. It uses buckwheat flour, which despite its name, is not related to wheat and is a fantastic whole grain alternative. This recipe is designed to be beginner-friendly, avoiding complex techniques or hard-to-find ingredients, so even novice bakers can achieve a perfect loaf. It’s ideal for busy weekdays when you want fresh, homemade bread without spending hours in the kitchen, or for a weekend project that feels rewarding but isn’t overly demanding. Serve it for breakfast with your favorite spread, as the base for a hearty sandwich at lunch, or alongside a comforting soup for dinner. Its mild, earthy flavor pairs well with almost anything.
Everything You Need To Make This Recipe Without Stress
Gathering all your ingredients before you start baking will ensure a smooth and enjoyable process. This recipe uses common pantry staples, with buckwheat flour being the star, which is readily available in most grocery stores or health food sections.
INGREDIENTS:

- 1 ½ cups warm water (105-115°F)
- 2 ¼ teaspoons active dry yeast (one standard packet)
- 1 tablespoon honey or maple syrup
- 2 cups buckwheat flour
- ½ cup tapioca flour (or arrowroot starch)
- ¼ cup psyllium husk powder
- 1 teaspoon salt
- 2 tablespoons olive oil (plus extra for greasing)
For substitutions, if you don’t have tapioca flour, arrowroot starch works perfectly as a 1:1 replacement, providing similar binding and texture benefits. While psyllium husk powder is highly recommended for its binding properties in gluten-free baking, if you absolutely cannot find it, you might try a flax egg (1 tablespoon ground flaxseed mixed with 3 tablespoons water per “egg”) but the texture may vary slightly. For the sweetener, either honey or maple syrup will work equally well, adding a touch of sweetness and helping to activate the yeast. Using a good quality olive oil will impart a subtle, pleasant flavor, but any neutral-flavored oil like avocado or grapeseed oil can also be used. Ensure your yeast is fresh for the best rise.
Time Needed From Start To Finish
One of the best aspects of this soft fluffy buckwheat bread is how efficiently it comes together, making it a perfect fit for a busy schedule.
- Preparation time: 15 minutes
- Rising time: 45-60 minutes
- Baking time: 40-45 minutes
- Cooling time: 30 minutes (minimum, for best slicing)
- Total time: Approximately 2 hours 10 minutes to 2 hours 30 minutes
This timeline includes active hands-on time, passive rising, and baking. The cooling time is crucial for gluten-free breads to set properly, so try not to rush it!
How To Make It Step By Step With Visual Cues

Making this buckwheat bread is a straightforward process. Follow these steps for a perfect, fluffy loaf every time.
- Activate the Yeast: In a large mixing bowl, combine the warm water, yeast, and honey (or maple syrup). Stir gently and let it sit for 5-10 minutes until the mixture becomes foamy. This foam indicates that your yeast is active and ready to work its magic. If it doesn’t foam, your water might not have been warm enough, or your yeast might be old, and you should start over.
- Combine Dry Ingredients: In a separate medium bowl, whisk together the buckwheat flour, tapioca flour, psyllium husk powder, and salt. Make sure all ingredients are well combined to ensure even distribution throughout the dough.
- Mix Wet and Dry: Pour the olive oil into the activated yeast mixture. Then, gradually add the dry ingredient mixture to the wet ingredients, mixing with a sturdy spoon or a stand mixer with a paddle attachment until a thick, uniform dough forms. The dough will be quite sticky and thick, more like a batter than a traditional wheat dough.
- Prepare for Rising: Lightly grease a 9×5-inch loaf pan with olive oil. Transfer the dough into the prepared loaf pan, using a spatula to smooth the top. You can also lightly wet your hands to help shape the dough if it’s too sticky.
- First Rise: Cover the loaf pan loosely with plastic wrap or a clean kitchen towel. Place it in a warm, draft-free spot for 45-60 minutes, or until the dough has risen by about 50-75% and looks visibly puffy. It won’t double in size like traditional bread, but it should definitely show a noticeable rise.
- Preheat Oven and Bake: While the dough is rising, preheat your oven to 375°F (190°C). Once the dough has risen, remove the cover and place the loaf pan in the preheated oven. Bake for 40-45 minutes, or until the crust is golden brown and the internal temperature reaches 200-210°F (93-99°C) when checked with an instant-read thermometer.
- Cooling is Key: Once baked, immediately remove the bread from the oven. Let it cool in the loaf pan for about 10-15 minutes before carefully transferring it to a wire rack to cool completely. This cooling step is critical for gluten-free bread, as it allows the internal structure to set and prevents a gummy texture. Do not slice until fully cooled, ideally for at least 30 minutes, but longer is better.
Easy Variations And Serving Ideas That Fit Real Life
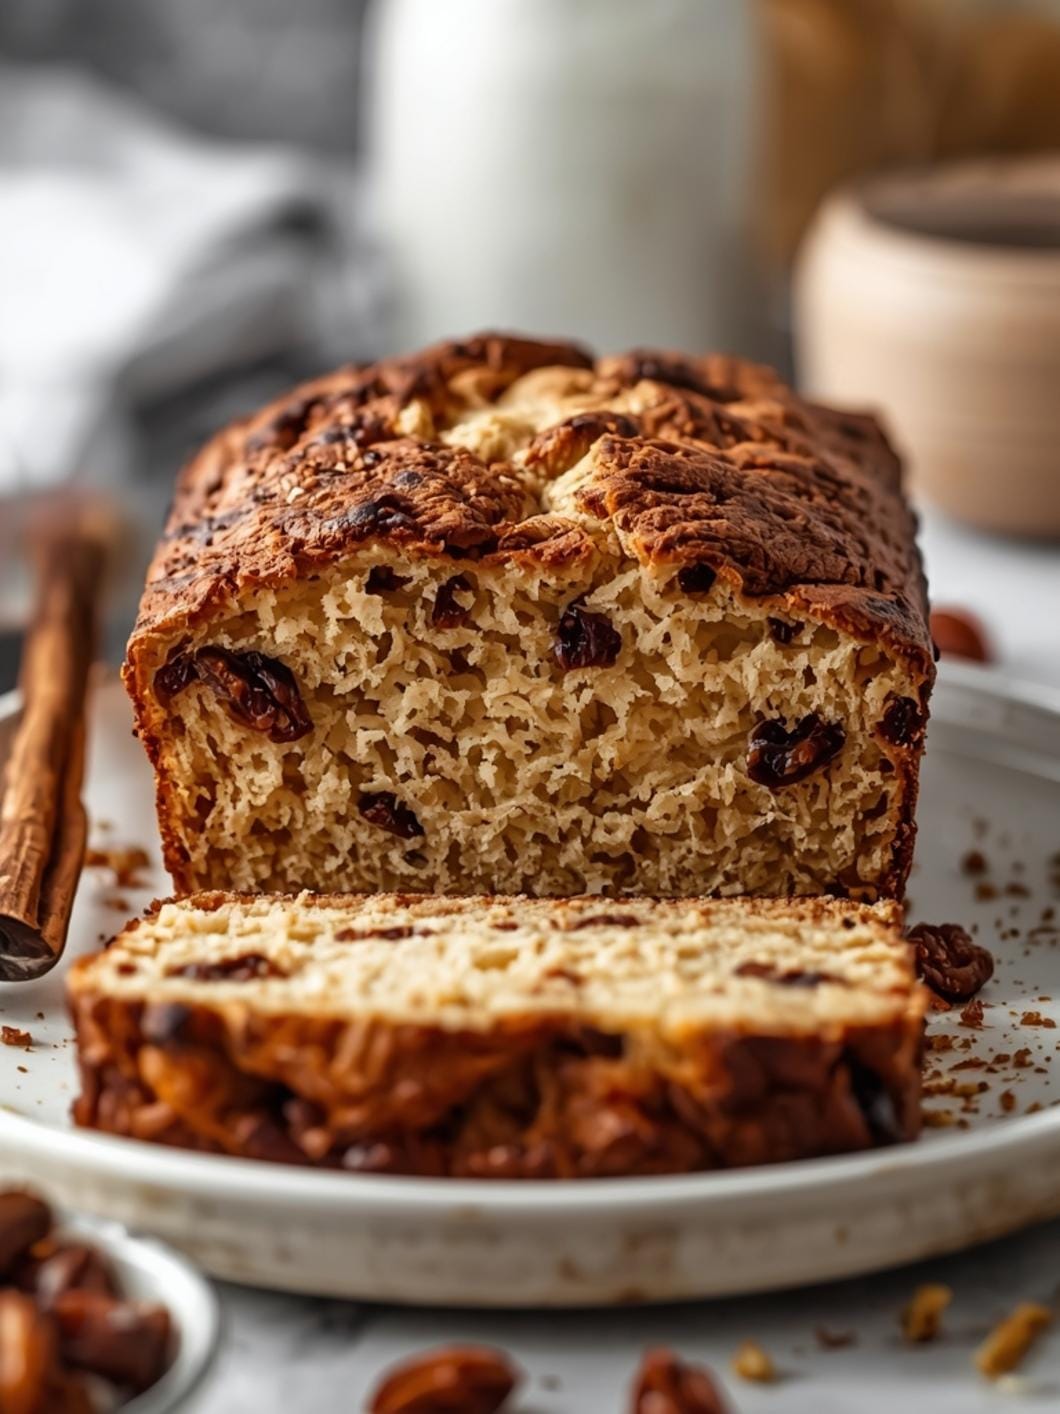
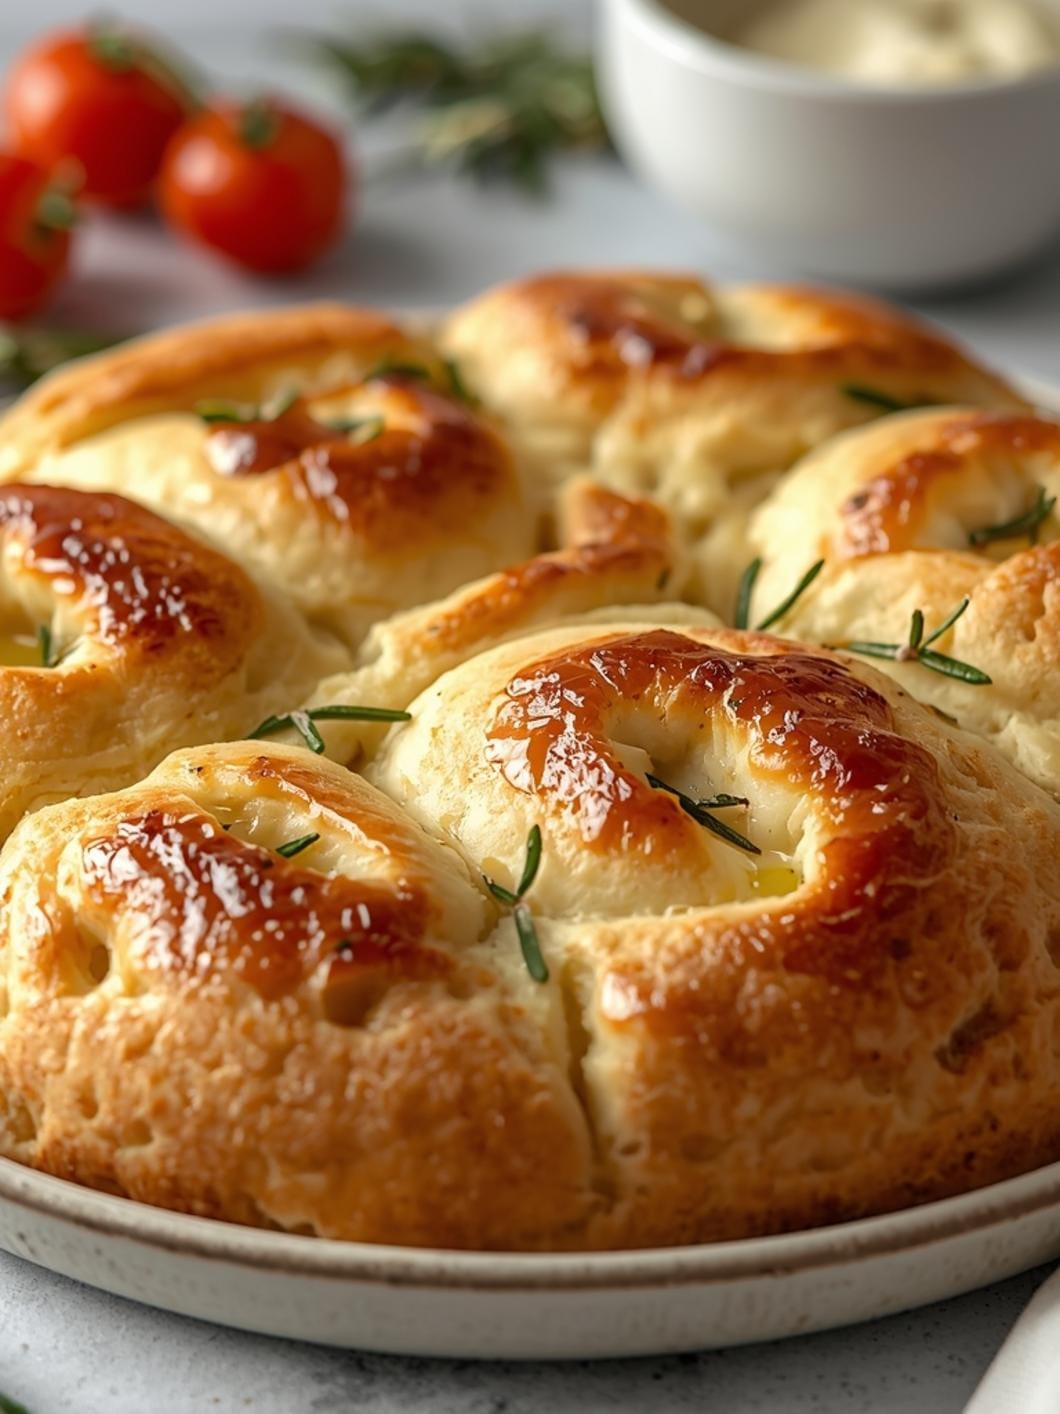
This soft fluffy buckwheat bread is incredibly versatile, making it easy to adapt for different tastes and occasions. For a savory twist, try adding 1/4 cup of chopped fresh rosemary or dried herbs like oregano and thyme to the dry ingredients. You could also mix in 1/4 cup of sunflower seeds or pumpkin seeds for added texture and nutrition, perfect for a hearty sandwich. If you prefer a slightly sweeter loaf, a pinch of cinnamon or a handful of raisins can be incorporated into the dough. For a richer flavor, consider brushing the top of the loaf with a little melted butter or olive oil before baking.
When it comes to serving, the possibilities are endless. This bread makes fantastic toast, especially when topped with avocado, a fried egg, or your favorite jam. It’s sturdy enough for sandwiches, whether you’re packing a school lunch with turkey and cheese or creating a gourmet vegetarian delight with hummus and roasted vegetables. For a simple snack, a slice with a smear of cream cheese or almond butter is delicious. On a buffet, slice it thinly and serve with a variety of dips, cheeses, or as an accompaniment to a soup or salad. Kids often enjoy it toasted with a little butter and honey, making it a wholesome and satisfying option for breakfast or an after-school treat.
Common Slip-Ups And How To Avoid Them
Even with a simple recipe, a few common mistakes can impact your final loaf. Being aware of these can help you avoid them and ensure baking success.
- Not Activating the Yeast Properly: If your water isn’t warm enough (below 105°F), the yeast won’t activate. If it’s too hot (above 115°F), it can kill the yeast. Always check the temperature with a thermometer. If your yeast mixture doesn’t get foamy, discard it and start again with fresh yeast and properly tempered water.
- Rushing the Rise Time: Gluten-free doughs don’t rise as dramatically as traditional wheat doughs, but they still need time. Don’t expect it to double in size; a 50-75% increase in volume is usually sufficient. Rushing this step will result in a dense, heavy loaf. Ensure your rising spot is warm and draft-free.
- Cutting the Bread While Still Warm: This is perhaps the most common mistake with gluten-free bread. The internal structure of gluten-free loaves is very delicate when hot. Slicing too early can lead to a gummy texture and the bread falling apart. Always allow it to cool completely on a wire rack, ideally for at least 30 minutes to an hour, before slicing.
- Incorrect Flour Measurements: Baking, especially gluten-free baking, is a science. Using too much or too little flour can significantly alter the texture. Always measure your flours accurately, preferably by weight if you have a kitchen scale, or by using the “spoon and

FAQs
- Can I make these ahead? Yes—prep ahead, refrigerate, then serve when ready.
- How long do leftovers last? Store covered in the fridge for 3–4 days for best texture.
- Can I adjust sweetness? Yes—add more or less sweetener to taste.
- Can I change the fruit? Yes—swap strawberries for blueberries, raspberries, or sliced banana.