Get ready to impress your guests with these incredible sourdough bread bowls, perfect for holding your favorite party dips or a comforting bowl of soup! This recipe makes creating homemade Italian bread bowls surprisingly simple, transforming any gathering into a memorable feast. You’ll love how easy it is to achieve that perfect crusty exterior and soft, chewy interior, ready to be filled with deliciousness.

Whether you’re hosting a casual get-together or a more formal dinner, these bread bowls are a fantastic way to elevate your presentation and add a touch of rustic charm. Forget store-bought options; this easy sourdough recipe brings the bakery experience right into your kitchen, ensuring fresh, flavorful results every time. Let’s dive into the details and discover how to make the best bread bowls that will have everyone asking for the recipe!

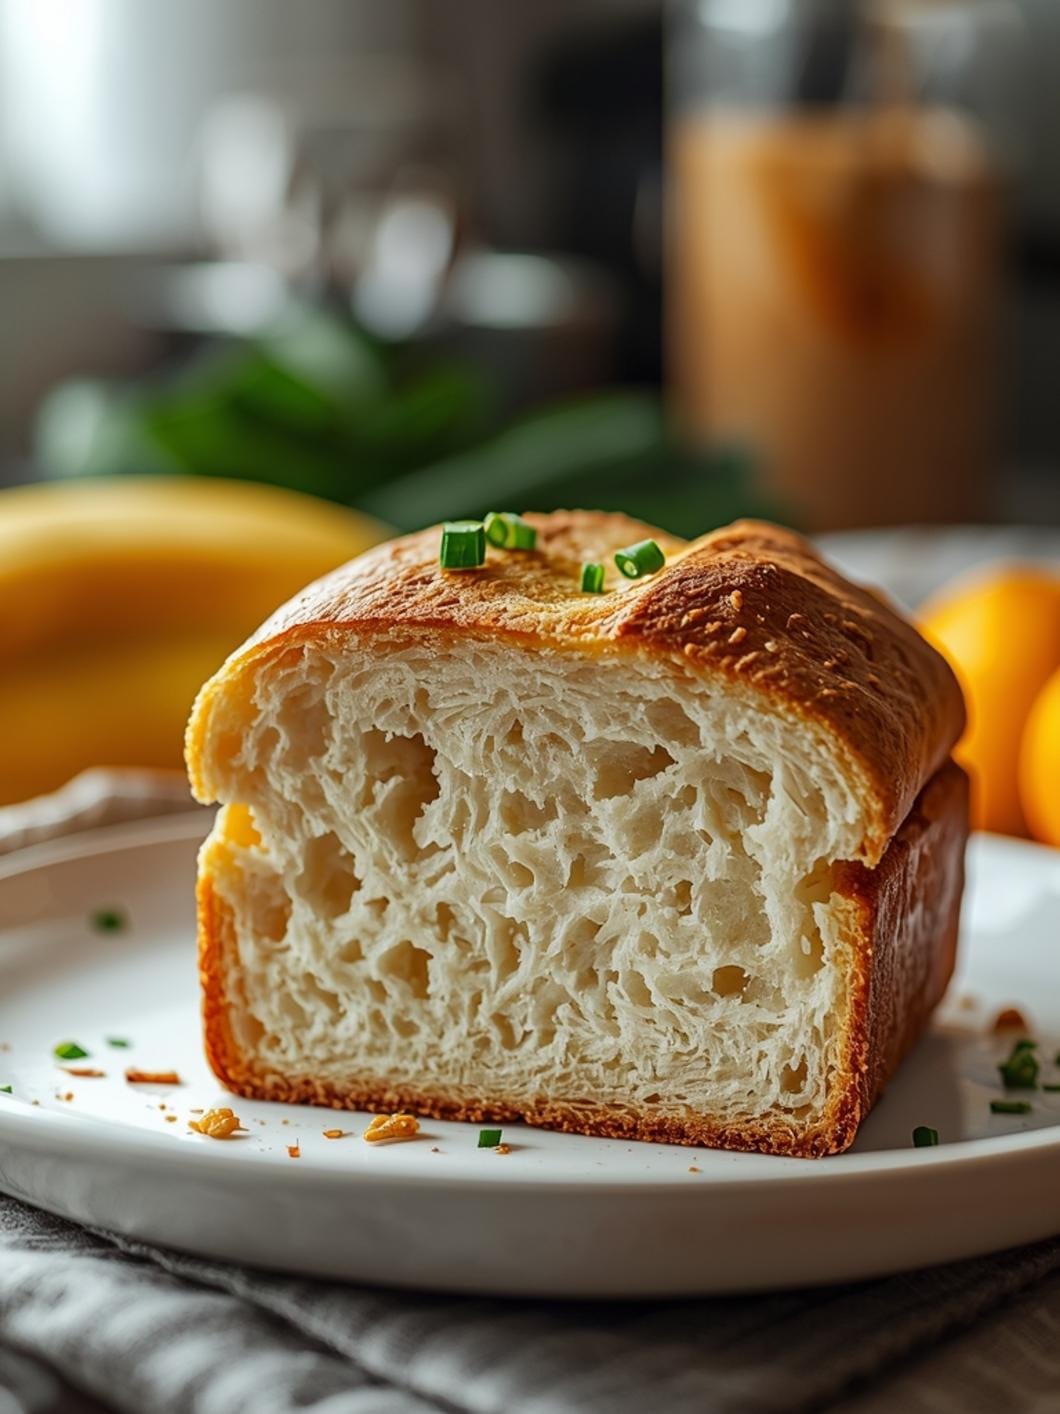
Sourdough Bread Bowls
- Total Time: 6-9 hours (with 1 hour active work)
- Yield: 4-6 bread bowls 1x
Description
Impress your guests with these incredible homemade sourdough bread bowls, perfect for holding your favorite party dips or a comforting bowl of soup. This recipe makes creating crusty, soft Italian bread bowls surprisingly simple, elevating any gathering with rustic charm and fresh, flavorful results.
Ingredients
Instructions
1. 1. Activate the Sourdough Starter: In a large mixing bowl, combine your active sourdough starter, warm water, and sugar. Stir gently with a wooden spoon or spatula until the starter is mostly dissolved. This step gets the yeast working and ready for the flour.
2. 2. Mix the Dough: Add the salt and 4 cups of the all-purpose flour to the wet ingredients. Mix until a shaggy dough forms and all the flour is incorporated. It will be sticky at this stage. Add the remaining 1 cup of flour gradually, kneading by hand in the bowl or on a lightly floured surface for 5-7 minutes until the dough is smooth and elastic. If using a stand mixer, use the dough hook attachment for 5-7 minutes on medium-low speed.
3. 3. First Rise (Bulk Fermentation): Lightly grease a clean large bowl with olive oil. Place the dough in the bowl, turning it once to coat all sides. Cover the bowl tightly with plastic wrap or a damp kitchen towel. Let it rise in a warm place for 4-6 hours, or until doubled in size. Alternatively, for a longer, slower fermentation and more flavor, you can refrigerate it overnight (8-12 hours).
4. 4. Shape the Bread Bowls: Gently punch down the risen dough to release the air. Turn it out onto a lightly floured surface. Divide the dough into 4-6 equal pieces, depending on your desired bowl size. Shape each piece into a tight, round ball by pulling the edges under and pinching them together at the bottom. This creates surface tension for a good rise.
5. 5. Second Rise (Proofing): Lightly dust a baking sheet with cornmeal or line it with parchment paper. Place the shaped dough balls on the prepared baking sheet, leaving ample space between them. Cover loosely with plastic wrap or a damp towel and let them rise in a warm place for 1-2 hours, or until visibly puffy and almost doubled in size. Preheat your oven to 400 F (200 C) during the last 30 minutes of proofing.
6. 6. Bake the Bread Bowls: Once proofed, use a sharp knife or a bread lame to score an “X” or a simple pattern on the top of each dough ball. This helps control the expansion during baking. Bake for 30-35 minutes, or until the crust is golden brown and sounds hollow when tapped on the bottom. An internal temperature of 200-210 F (93-99 C) indicates doneness.
7. 7. Cool and Prepare for Filling: Transfer the baked bread bowls to a wire rack to cool completely. Once cool, use a serrated knife to carefully cut a circle from the top of each bread bowl, about 3/4 inch from the edge. Scoop out the soft interior bread, leaving a sturdy wall and bottom. You can save the scooped-out bread for croutons or breadcrumbs!
- Prep Time: 20-25 minutes
- Cook Time: 30-35 minutes
- Category: main dish
- Method: baking
- Cuisine: italian
Nutrition
- Serving Size: 1 bread bowl
Keywords: sourdough, bread bowls, homemade, appetizer, soup, party food, baking, easy, entertaining, rustic
What You’ll Love About This Quick And Easy Recipe
This recipe is a true game-changer for anyone who loves to entertain or simply enjoys a hearty meal. It works beautifully because it demystifies the art of sourdough baking, making it accessible even for beginners. You don’t need to be an experienced baker to achieve fantastic results, which is a huge plus for busy families and individuals looking for impressive yet practical dishes. It’s especially great for those moments when you want to serve something special without spending hours in the kitchen. Imagine a cozy family dinner with warm soup served in edible bowls, or a lively party where guests can scoop up their favorite dip directly from a flavorful, crusty vessel. This recipe is for anyone who appreciates homemade goodness, a touch of elegance, and a whole lot of flavor, making it perfect for weekend gatherings, potlucks, or even a comforting weeknight meal.
Everything You Need To Make This Recipe Without Stress
Gathering your ingredients is the first step to creating these delightful sourdough bread bowls. The beauty of this recipe lies in its simplicity and the readily available items you’ll need.
INGREDIENTS:

- 1 cup active sourdough starter, fed and bubbly
- 1 ½ cups warm water (around 95-105°F)
- 1 tablespoon granulated sugar
- 2 teaspoons salt
- 5 cups all-purpose flour, plus more for dusting
- 2 tablespoons olive oil, plus more for greasing
- Cornmeal, for dusting (optional)
For the flour, while all-purpose works perfectly, you can experiment with bread flour for a chewier texture if you prefer. Ensure your sourdough starter is active and bubbly, as this is key to the bread’s rise and flavor. If your starter isn’t quite ready, give it another feeding and allow it to become active before starting the recipe. The warm water helps activate the yeast in the starter and encourages a good rise. A good quality olive oil will add a subtle richness to the dough, but any neutral oil will work in a pinch.
Time Needed From Start To Finish
Creating these wonderful sourdough bread bowls does require a bit of patience due to the fermentation process, but the active hands-on time is surprisingly minimal.
- Prep Time: 20-25 minutes (mixing dough, initial shaping)
- Bulk Fermentation: 4-6 hours (or overnight in the fridge)
- Proofing: 1-2 hours
- Bake Time: 30-35 minutes
- Total Time: Approximately 6-9 hours (depending on fermentation), with about 1 hour of active work.
While the total time might seem long, most of it is passive waiting time, allowing the sourdough to do its magic. You can easily fit the steps into a busy day or even prepare the dough the night before for baking the next day.
How To Make It Step By Step With Visual Cues

Follow these clear instructions to create perfect sourdough bread bowls every time.
- Activate the Sourdough Starter: In a large mixing bowl, combine your active sourdough starter, warm water, and sugar. Stir gently with a wooden spoon or spatula until the starter is mostly dissolved. This step gets the yeast working and ready for the flour.
- Mix the Dough: Add the salt and 4 cups of the all-purpose flour to the wet ingredients. Mix until a shaggy dough forms and all the flour is incorporated. It will be sticky at this stage. Add the remaining 1 cup of flour gradually, kneading by hand in the bowl or on a lightly floured surface for 5-7 minutes until the dough is smooth and elastic. If using a stand mixer, use the dough hook attachment for 5-7 minutes on medium-low speed.
- First Rise (Bulk Fermentation): Lightly grease a clean large bowl with olive oil. Place the dough in the bowl, turning it once to coat all sides. Cover the bowl tightly with plastic wrap or a damp kitchen towel. Let it rise in a warm place for 4-6 hours, or until doubled in size. Alternatively, for a longer, slower fermentation and more flavor, you can refrigerate it overnight (8-12 hours).
- Shape the Bread Bowls: Gently punch down the risen dough to release the air. Turn it out onto a lightly floured surface. Divide the dough into 4-6 equal pieces, depending on your desired bowl size. Shape each piece into a tight, round ball by pulling the edges under and pinching them together at the bottom. This creates surface tension for a good rise.
- Second Rise (Proofing): Lightly dust a baking sheet with cornmeal or line it with parchment paper. Place the shaped dough balls on the prepared baking sheet, leaving ample space between them. Cover loosely with plastic wrap or a damp towel and let them rise in a warm place for 1-2 hours, or until visibly puffy and almost doubled in size. Preheat your oven to 400°F (200°C) during the last 30 minutes of proofing.
- Bake the Bread Bowls: Once proofed, use a sharp knife or a bread lame to score an “X” or a simple pattern on the top of each dough ball. This helps control the expansion during baking. Bake for 30-35 minutes, or until the crust is golden brown and sounds hollow when tapped on the bottom. An internal temperature of 200-210°F (93-99°C) indicates doneness.
- Cool and Prepare for Filling: Transfer the baked bread bowls to a wire rack to cool completely. Once cool, use a serrated knife to carefully cut a circle from the top of each bread bowl, about ¾ inch from the edge. Scoop out the soft interior bread, leaving a sturdy wall and bottom. You can save the scooped-out bread for croutons or breadcrumbs!
Easy Variations And Serving Ideas That Fit Real Life
These sourdough bread bowls are incredibly versatile and can be adapted for various occasions and tastes. For a fun, kid-friendly option, consider making smaller bread bowls and filling them with mac and cheese or mini meatballs in marinara sauce. Kids love having their own edible dish!
For an elegant party or buffet, fill larger bowls with creamy spinach and artichoke dip, a rich cheese fondue, or a hearty chili. You can also use them for individual servings of French onion soup, clam chowder, or a vibrant tomato bisque. Toppings can be as simple as a sprinkle of fresh herbs like parsley or chives, a drizzle of olive oil, or a dusting of Parmesan cheese.
If you want to add a little extra flavor to the bread itself, consider incorporating dried herbs like oregano or rosemary into the dough during the mixing stage. For a cheesy twist, add shredded cheddar or mozzarella to the dough. You can also brush the tops of the baked bowls with garlic butter before serving for an extra layer of deliciousness. Don’t forget to serve the scooped-out bread on the side for dipping!
Common Slip-Ups And How To Avoid Them
Even experienced bakers can encounter small challenges, but these common pitfalls are easy to sidestep.
- Inactive Sourdough Starter: The most crucial element for a good rise is an active, bubbly starter. If your starter isn’t lively, your bread bowls will be dense and flat. Always make sure your starter has been fed and is showing signs of activity (bubbles, increased volume) before you begin.
- Over-flouring the Dough: Adding too much flour can result in a dry, tough dough that’s difficult to work with and yields dense bread. Add flour gradually and stop when the dough is no longer excessively sticky but still pliable. A slightly sticky dough is often a good sign for sourdough.
- Not Allowing Enough Rise Time: Sourdough fermentation can be slower than commercial yeast. Rushing the bulk fermentation or proofing stages will lead to underdeveloped flavor and a poor texture. Be patient and allow the dough to double in size for the first rise and become visibly puffy for the second.
- Not Scoring the Dough: Scoring the top of the dough before baking isn’t just for aesthetics; it helps control where the bread expands. Without scoring, the crust can tear unevenly, leading to a less appealing shape. A sharp knife or bread lame makes this easy.
- Cutting Into Hot Bread Bowls: While tempting, cutting into hot bread bowls can make the interior gummy and difficult to remove cleanly. Allow them to cool completely on a wire rack before hollowing them out. This also helps

FAQs
- Can I make these ahead? Yes—prep ahead, refrigerate, then serve when ready.
- How long do leftovers last? Store covered in the fridge for 3–4 days for best texture.
- Can I adjust sweetness? Yes—add more or less sweetener to taste.
- Can I change the fruit? Yes—swap strawberries for blueberries, raspberries, or sliced banana.