Understanding the interior of your sourdough bread, often referred to as its “crumb,” is a fundamental skill for any home baker looking to improve their sourdough game.

The crumb tells a story about your dough’s fermentation, hydration, and shaping, offering valuable insights into what went right and what could be adjusted next time. It’s a key indicator of your sourdough’s overall success and eating quality.
This guide will help you decipher the mysteries within your loaf, focusing on the differences between an open crumb and a tight crumb. By learning to “read” your sourdough’s interior, you’ll be better equipped to troubleshoot issues and consistently bake delicious, perfectly textured bread. Let’s dive into the details and unlock the secrets to a good crumb.
Table of Contents
- What You’ll Love About This Quick And Easy Recipe
- Everything You Need To Make This Recipe Without Stress
- Time Needed From Start To Finish
- How To Make It Step By Step With Visual Cues
- Easy Variations And Serving Ideas That Fit Real Life
- Common Slip-Ups And How To Avoid Them
- How To Store It And Make It Ahead Without Ruining Texture

Understanding Your Sourdough Crumb
- Total Time: 5-10 minutes (for analysis)
- Yield: 1 loaf 1x
Description
This guide helps home bakers understand and analyze the interior (crumb) of their sourdough bread. It explains how to interpret the crumb’s characteristics, such as open versus tight, to troubleshoot baking issues and improve future loaves. It emphasizes observation skills and basic sourdough principles rather than a traditional recipe.
Ingredients
Instructions
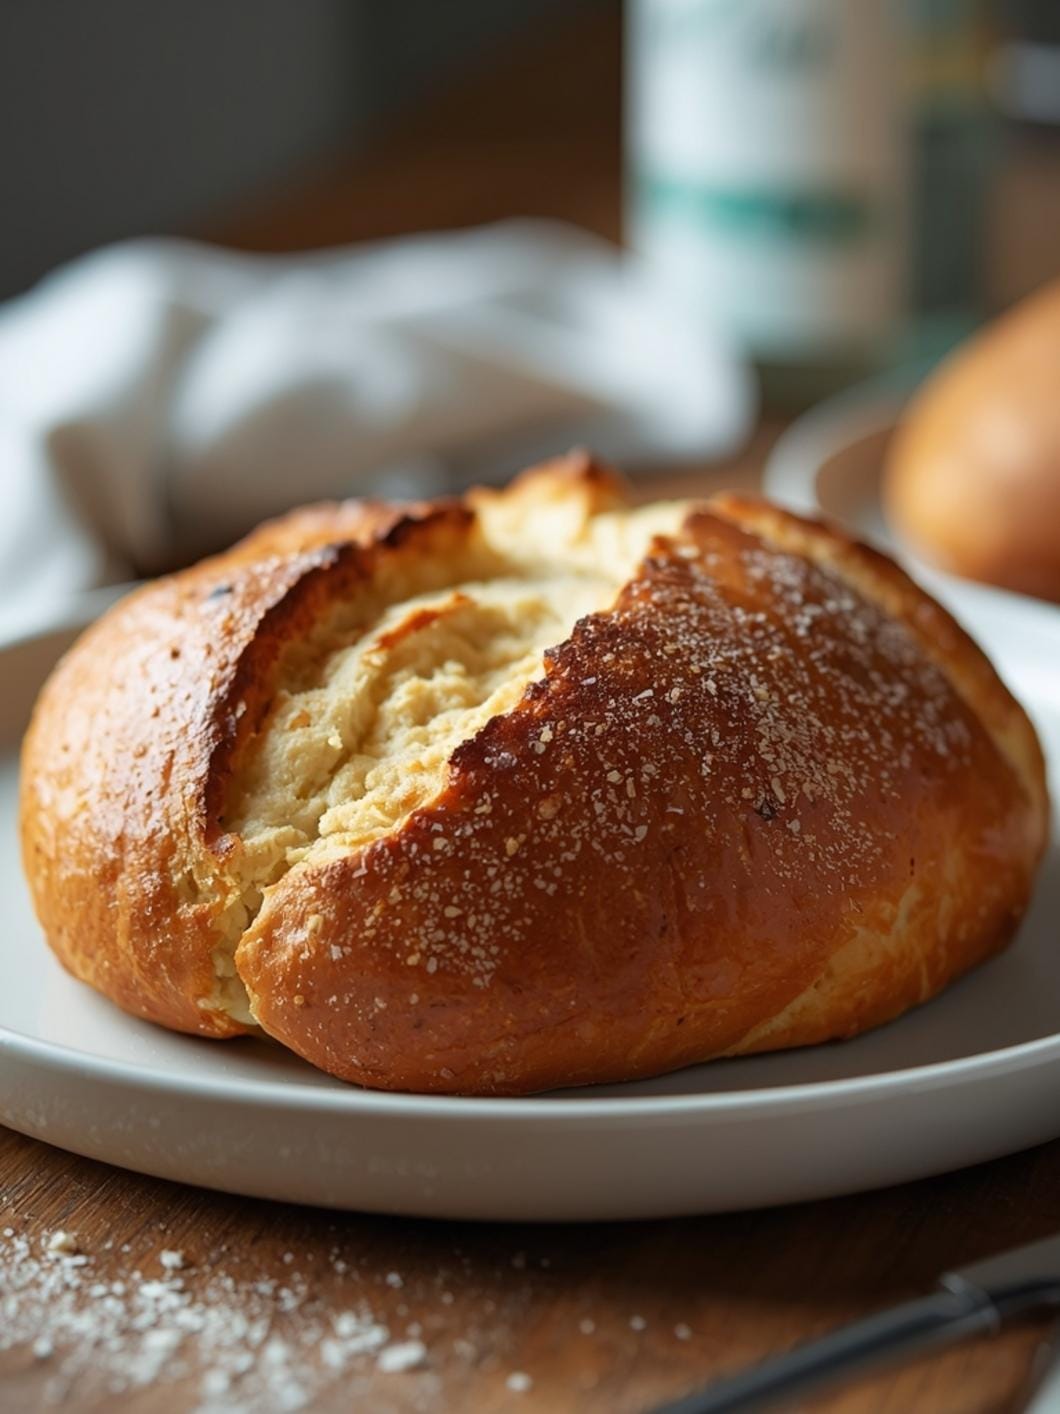
1. 1. Ensure Your Loaf is Fully Cooled: This is the most critical first step. Cutting into a warm loaf can compress the crumb, making it appear denser than it actually is. Wait at least 2-4 hours, or even overnight, for the loaf to cool completely to room temperature.
2. 2. Prepare Your Cutting Station: Place your cooled sourdough loaf on a clean cutting board. Have a sharp serrated bread knife ready.
3. 3. Make a Clean Slice: Carefully slice the loaf roughly in the middle, or about one-third of the way in from one end. Aim for a clean, even cut that reveals the full cross-section of the bread.
4. 4. Observe the Overall Structure: Take a moment to look at the entire cut surface. Notice the distribution of holes, the texture of the bread itself, and any variations from the center to the crust.
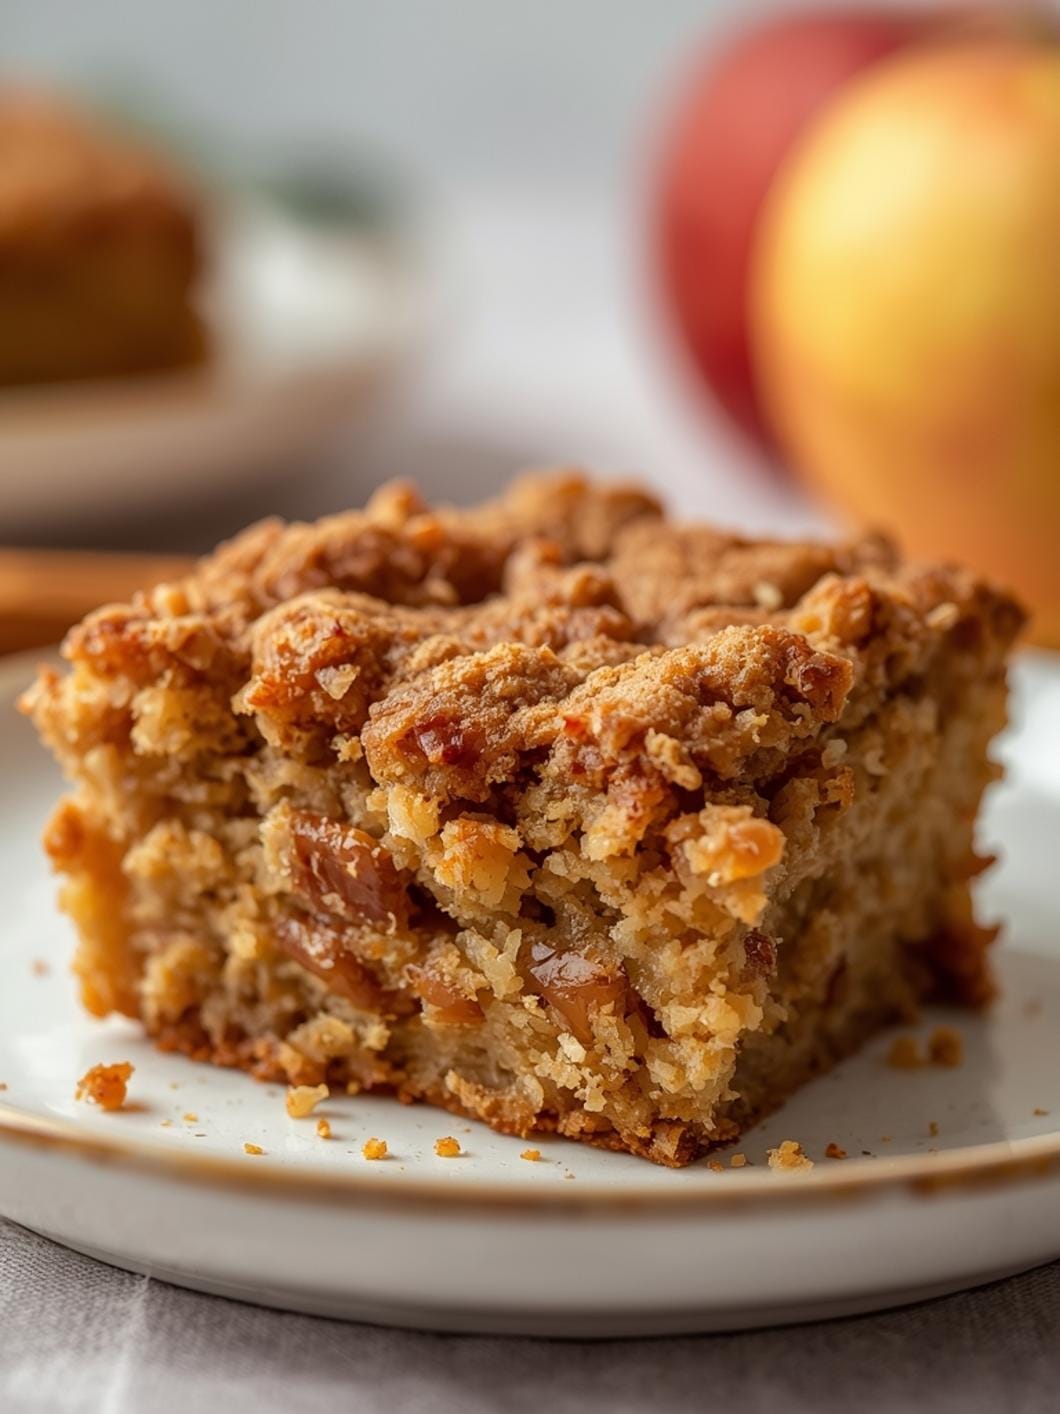
5. 5. Identify the Crumb Type (Open vs. Tight): Open Crumb: Characterized by irregular, varied-sized holes distributed throughout the loaf. Some holes might be quite large, while others are smaller. The bread itself should feel light and airy. This often indicates good fermentation, proper shaping, and sufficient hydration. Tight Crumb: Characterized by small, uniform holes, or a dense, cake-like texture with very few holes. The bread might feel heavy or gummy. This can suggest under-fermentation, over-proofing, insufficient hydration, or issues with shaping.
6. 6. Look for Consistency: Is the crumb consistent throughout the loaf, or are there dense spots, large tunnels, or a very dense bottom? Inconsistencies can point to uneven mixing, shaping issues, or temperature variations during fermentation.
7. 7. Note Any Gummy Texture: If the crumb feels wet, sticky, or gummy, even after cooling, it could indicate underbaking, too much hydration for the flour, or insufficient fermentation.
- Prep Time: 5 minutes
- Cook Time: Varies (baking time)
- Category: baking guide
- Method: observation
- Cuisine: sourdough
Nutrition
- Serving Size: 1 slice
Keywords: sourdough, crumb, baking, bread, analysis, fermentation, hydration, troubleshooting, technique, guide
What You’ll Love About This Quick And Easy Recipe
This guide isn’t a recipe in the traditional sense, but it’s a vital tool for anyone who bakes sourdough bread, from beginners just starting their sourdough journey to more experienced bakers looking to refine their technique. You’ll love how clearly it explains the visual cues inside your bread, empowering you to understand the impact of your baking choices. This knowledge is perfect for those “aha!” moments when you finally connect a specific technique to the resulting texture. It’s for anyone who wants to move beyond just following instructions and truly understand the science and art behind their sourdough. This information is always relevant, whether you’re baking a simple country loaf for a weeknight dinner or an elaborate artisan bread for a special occasion.
Everything You Need To Make This Recipe Without Stress
To understand your sourdough crumb, you don’t need any special ingredients, just your freshly baked sourdough loaf and a keen eye. The “ingredients” here are observational skills and a basic understanding of sourdough principles.
INGREDIENTS:

- 1 freshly baked sourdough loaf
- A sharp bread knife
- A clean cutting board
After you’ve baked your loaf and allowed it to cool completely (this is crucial for an accurate crumb assessment!), you’ll simply need to slice into it. While not an ingredient, a good light source can help you observe the details of the crumb more clearly. There are no substitutions here, as the loaf itself is the subject of our study.
Time Needed From Start To Finish
The “prep time” for evaluating your sourdough crumb is minimal, essentially just the time it takes to slice your cooled loaf. The “cook time” is the time it took to bake your bread, but for the purpose of this guide, we’re focusing on the post-baking analysis. The “total time” for this learning process is really ongoing; each loaf you bake offers a new opportunity to learn and refine your understanding. However, the actual act of assessing a single loaf’s crumb will take no more than 5-10 minutes once it’s cooled and ready to cut.
How To Make It Step By Step With Visual Cues

Analyzing your sourdough crumb is a straightforward process that involves observation and understanding what you’re seeing. Follow these steps to effectively read your loaf’s interior:
- Ensure Your Loaf is Fully Cooled: This is the most critical first step. Cutting into a warm loaf can compress the crumb, making it appear denser than it actually is. Wait at least 2-4 hours, or even overnight, for the loaf to cool completely to room temperature.
- Prepare Your Cutting Station: Place your cooled sourdough loaf on a clean cutting board. Have a sharp serrated bread knife ready.
- Make a Clean Slice: Carefully slice the loaf roughly in the middle, or about one-third of the way in from one end. Aim for a clean, even cut that reveals the full cross-section of the bread.
- Observe the Overall Structure: Take a moment to look at the entire cut surface. Notice the distribution of holes, the texture of the bread itself, and any variations from the center to the crust.
- Identify the Crumb Type (Open vs. Tight): * Open Crumb: Characterized by irregular, varied-sized holes distributed throughout the loaf. Some holes might be quite large, while others are smaller. The bread itself should feel light and airy. This often indicates good fermentation, proper shaping, and sufficient hydration. * Tight Crumb: Characterized by small, uniform holes, or a dense, cake-like texture with very few holes. The bread might feel heavy or gummy. This can suggest under-fermentation, over-proofing, insufficient hydration, or issues with shaping.
- Look for Consistency: Is the crumb consistent throughout the loaf, or are there dense spots, large tunnels, or a very dense bottom? Inconsistencies can point to uneven mixing, shaping issues, or temperature variations during fermentation.
- Note Any Gummy Texture: If the crumb feels wet, sticky, or gummy, even after cooling, it could indicate underbaking, too much hydration for the flour, or insufficient fermentation.
Easy Variations And Serving Ideas That Fit Real Life
While this guide isn’t about making a specific dish, the insights you gain from understanding your crumb directly impact how you enjoy your sourdough. A well-understood crumb means a better loaf, which in turn enhances any serving idea.
- For an Open Crumb Loaf: This type of bread is fantastic for showcasing its texture. Serve it simply with good olive oil and balsamic vinegar for dipping. It’s also perfect for hearty sandwiches, as the irregular holes can hold dressings and fillings without becoming soggy too quickly. Toasted slices with avocado and a sprinkle of everything bagel seasoning are a crowd-pleaser.
- For a Tighter Crumb Loaf: While a very tight crumb might indicate an issue, a moderately tight crumb is still excellent for many uses. It’s ideal for making bruschetta, as it provides a sturdy base. It also works wonderfully for grilled cheese sandwiches or as a side for soups and stews, where its density can absorb liquids well.
- Kid-Friendly Options: Kids often enjoy a slightly denser bread for dipping into tomato soup or for making simple buttered toast. For an open crumb, cutting it into fun shapes with cookie cutters before toasting can make it more appealing.
The best “variation” is to apply the knowledge from this crumb analysis to your next bake, aiming for the crumb you desire for your intended use.
Common Slip-Ups And How To Avoid Them
Understanding your sourdough crumb helps you identify common baking mistakes and improve your results. Here are some typical issues and how to address them:
- Crumb is Too Dense and Gummy: This is often a sign of under-fermentation (not enough time for the yeast and bacteria to work) or underbaking (not enough time in the oven). Ensure your starter is active before using it, allow sufficient bulk fermentation time, and bake until the internal temperature reaches 200-210°F (93-99°C).
- Large Tunnels or “Flying Crust”: This usually indicates over-proofing. The dough fermented too long, and the gluten structure weakened, leading to large, uncontrolled air pockets. Adjust your proofing times, especially in warmer environments. It can also be caused by insufficient shaping, where the dough doesn’t have enough tension to hold its structure.
- Uneven Crumb with Dense Spots: This might be due to inconsistent mixing, where ingredients aren’t fully incorporated, or insufficient shaping, leaving pockets of unworked dough or trapped air. Ensure thorough mixing and develop good gluten strength.
- Crumb is Dry and Crumbly: This can happen if your dough was too dry (insufficient hydration) or if it was overbaked. Try increasing your dough’s hydration slightly in your next batch or reducing baking time if the crust is already very dark.
- Crumb is Uniformly Small-Holed (Tight but not Gummy): This isn’t necessarily a “mistake” if that’s your preference, but if you’re aiming for open crumb, it often points to insufficient gluten development, a weak starter, or not enough fermentation. Focus on stronger folds during bulk fermentation and ensure your starter is consistently vigorous.
How To Store It And Make It Ahead Without Ruining Texture
This guide is about analyzing your baked loaf, so “making it ahead” refers to the baking process itself. Once you’ve baked your sourdough and assessed its crumb, proper storage is key to maintaining its texture and freshness.
- Storing Your Sourdough Loaf: After cooling completely, store your sourdough at room temperature. The best way to keep the crust crisp and the interior fresh is to store it cut-side down on a clean cutting board. You can also place it in a linen bread bag or a paper bag. Avoid airtight plastic bags or containers for the first day or two, as they can soften the crust.
- For Longer Storage: If you won’t finish the loaf within 2-3 days, slicing it and freezing the slices is an excellent option. Place parchment paper between slices to prevent sticking, then store them in a freezer-safe bag or container.
- Reheating Frozen Slices: Pop frozen slices directly into a toaster or toaster oven for a quick and delicious refresh.
- Reheating a Whole Loaf: To revive a day-old or slightly stale loaf, you can lightly mist it with water and reheat it in a preheated

FAQs
- Can I make these ahead? Yes—prep ahead, refrigerate, then serve when ready.
- How long do leftovers last? Store covered in the fridge for 3–4 days for best texture.
- Can I adjust sweetness? Yes—add more or less sweetener to taste.
- Can I change the fruit? Yes—swap strawberries for blueberries, raspberries, or sliced banana.