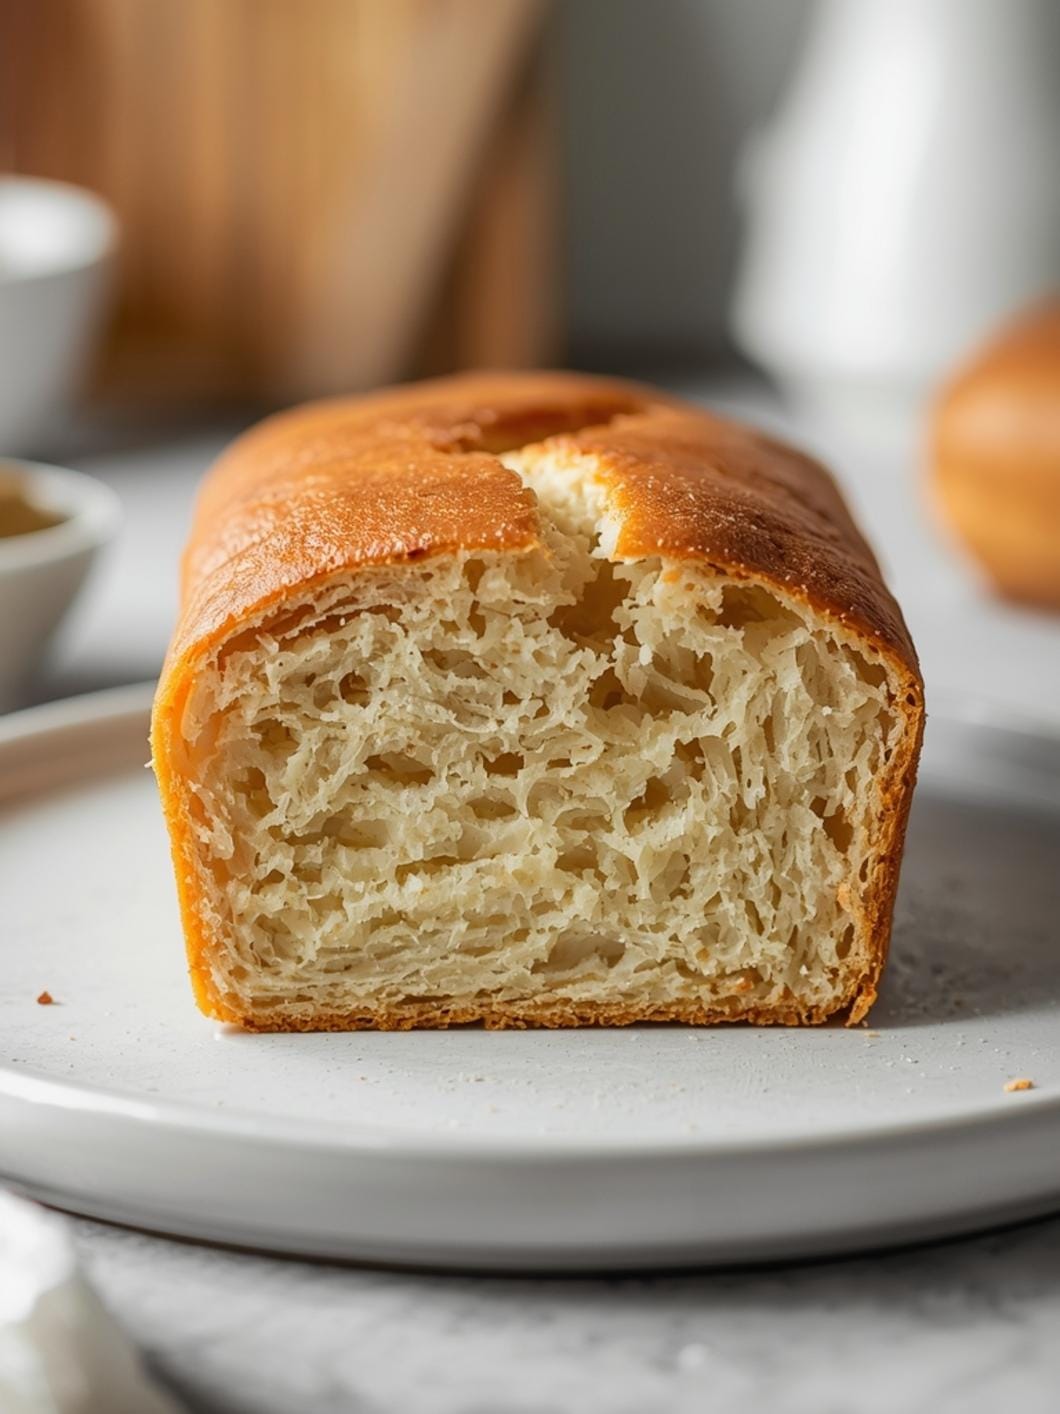
Sourdough baking is an art and a science, and one of the most common challenges bakers face is achieving that perfect, airy crumb.

A dense loaf can be disheartening after all the effort you put into nurturing your starter and shaping your dough. Understanding the factors that contribute to a dense crumb is the first step toward baking consistently beautiful loaves.
This guide will walk you through the common culprits behind a heavy, tight crumb in your sourdough bread, from issues with your starter’s activity to problems during the proofing stages. We’ll explore practical tips and insights to help you diagnose and correct these issues, ensuring your next sourdough loaf boasts an open, tender interior.
Table of Contents
- What You’ll Love About This Quick And Easy Recipe
- Everything You Need To Make This Recipe Without Stress
- Time Needed From Start To Finish
- How To Make It Step By Step With Visual Cues
- Easy Variations And Serving Ideas That Fit Real Life
- Common Slip-Ups And How To Avoid Them
- How To Store It And Make It Ahead Without Ruining Texture
- Questions People Always Ask Before Making This Recipe

Troubleshooting a Dense Sourdough Crumb
- Total Time: 24-48 hours
- Yield: 1 loaf
Description
This guide helps sourdough bakers diagnose and fix common issues that lead to a dense, heavy crumb, providing practical tips for achieving an open, airy interior.
Ingredients
Instructions
1. Assess Your Sourdough Starter’s Activity: Before you even mix your dough, ensure your starter is robust and active. It should double or triple in size within 4-8 hours after feeding, have many bubbles, and pass the float test (a small spoonful floats in water). A weak starter is a primary cause of dense bread because it lacks the power to create enough gas for a good rise.
2. Properly Mix and Develop Gluten: After combining your ingredients, focus on thorough mixing and gluten development. Techniques like stretch and folds or coil folds, performed over several hours during bulk fermentation, build strength in the dough. You want the dough to feel elastic and strong, able to hold its shape. A lack of gluten development means the dough can’t trap the gas produced by the yeast, leading to a tight crumb.
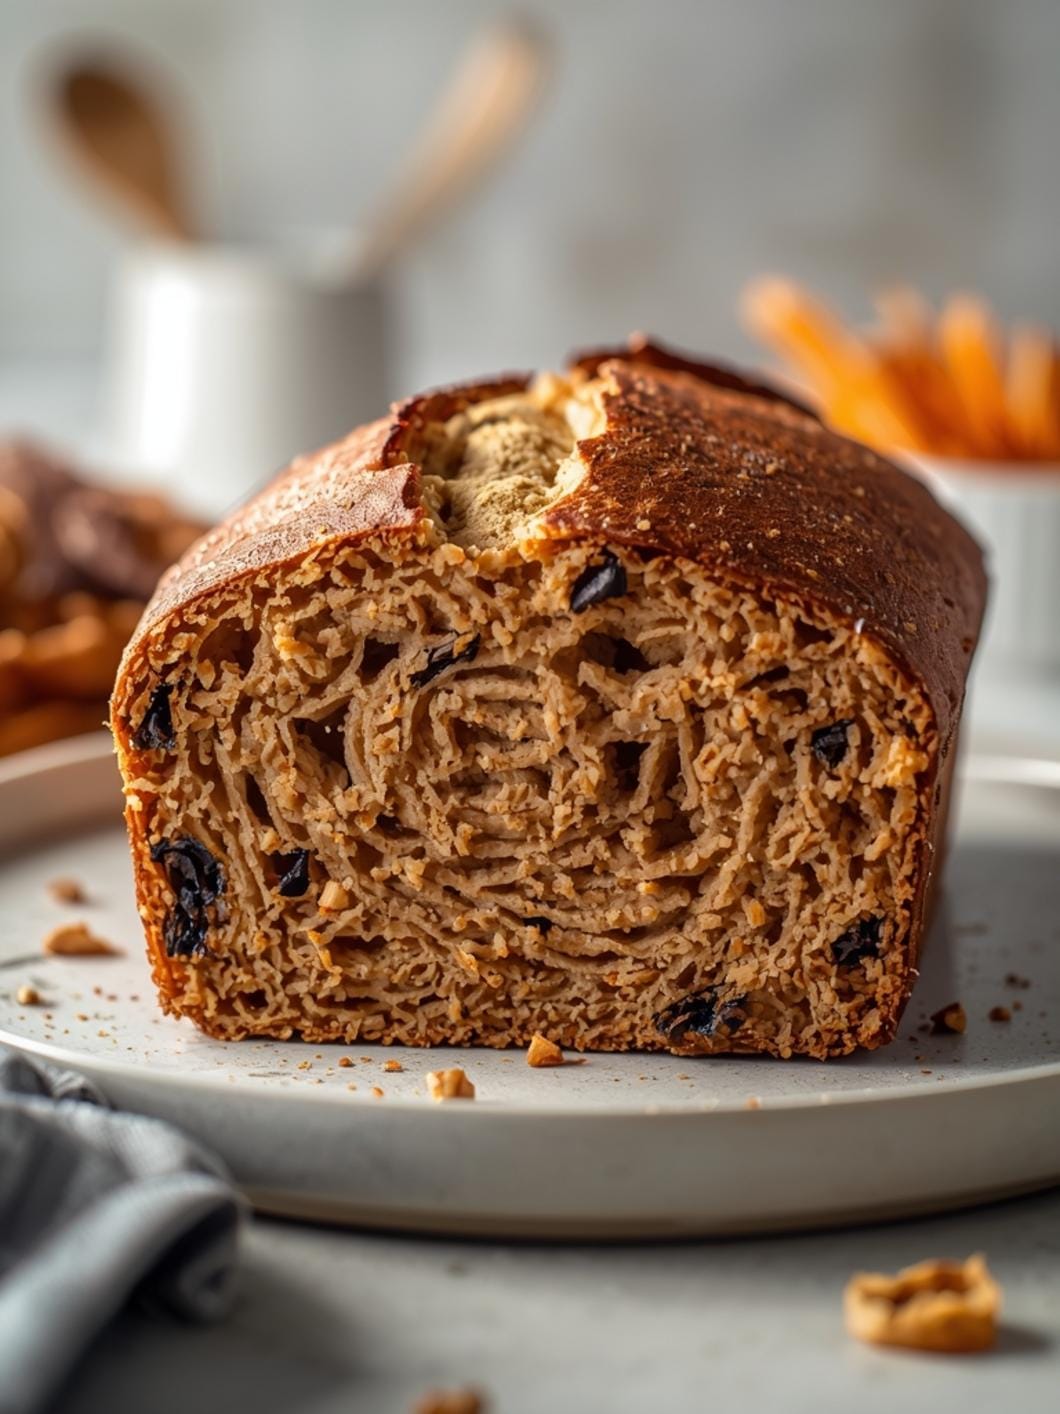
3. Control Bulk Fermentation (First Rise): This is arguably the most crucial stage. Under-fermented dough won’t have enough gas production, resulting in a dense, tight crumb. Over-fermented dough, on the other hand, will have exhausted its food supply, leading to a weak structure that collapses in the oven, also resulting in a dense crumb. Look for visual cues: the dough should increase in volume by 30-50% (depending on hydration and flour type), show bubbles on the surface, and feel jiggly.
4. Gentle Shaping and Handling: When shaping your dough, be firm but gentle. The goal is to create tension on the surface while preserving the gas bubbles developed during bulk fermentation. Over-handling or degassing the dough too much will expel precious gas, leading to a denser loaf.
5. Monitor Final Proofing (Second Rise): Similar to bulk fermentation, both under-proofing and over-proofing can cause a dense crumb. For under-proofed dough, there isn’t enough gas for expansion. For over-proofed dough, the gluten structure has weakened and can’t hold the gas, leading to collapse. The “poke test” is a good indicator: gently poke the dough with a floured finger; if it springs back slowly, it’s ready. If it springs back immediately, it’s under-proofed. If it doesn’t spring back at all, it’s over-proofed.
6. Ensure Adequate Oven Spring: Baking in a preheated Dutch oven or with steam creates a humid environment that allows the dough to expand rapidly before the crust sets. This “oven spring” is vital for an open crumb. If your oven isn’t hot enough or lacks steam, the crust can set too quickly, restricting expansion and leading to a denser interior.
- Prep Time: 24-48 hours (baking cycle)
- Cook Time: 1 hour
- Category: baking
- Method: baking
- Cuisine: european
Nutrition
- Serving Size: 1 slice
Keywords: sourdough, baking, crumb, troubleshooting, dense, starter, fermentation, gluten, proofing, bread
What You’ll Love About This Quick And Easy Recipe
This guide is designed for any sourdough baker, from enthusiastic beginners to those with a few loaves under their belt who are still striving for that ideal crumb. It’s for anyone who has pulled a loaf from the oven only to find it heavy and compact, rather than light and full of those coveted irregular holes. We focus on practical, actionable advice that you can implement immediately in your baking routine. This isn’t about complex theories, but rather understanding the fundamental principles that govern sourdough crumb development. It’s perfect for a weekend deep dive into your baking process or a quick reference when troubleshooting a current bake.
Everything You Need To Make This Recipe Without Stress
While this isn’t a traditional recipe with a list of ingredients in the culinary sense, understanding the “ingredients” for a good sourdough crumb involves recognizing the key elements of your baking process. These are the factors we’ll be examining to diagnose and fix a dense loaf.
INGREDIENTS:

- Active sourdough starter
- High-quality bread flour
- Water at the correct temperature
- Salt
- Time
- Proper fermentation environment
- Baking vessel (Dutch oven, baking stone, etc.)
For flour, using a good quality bread flour with a higher protein content (around 12-14%) can significantly impact gluten development and, consequently, your crumb structure. While all-purpose flour can work, bread flour provides the strength needed for a more open crumb. The type of salt also matters; fine sea salt or kosher salt are preferred as they dissolve easily and distribute evenly. Filtered water is often recommended to avoid any chlorine that might negatively affect your starter’s activity.
Time Needed From Start To Finish
Understanding the factors contributing to a dense crumb isn’t about a quick fix, but rather a process of observation and adjustment over several baking cycles. Diagnosing the issue might take a few minutes of reflection on your last bake, while implementing changes and seeing results will span the typical sourdough baking timeline, which can range from 24 to 48 hours per loaf, including bulk fermentation and proofing. The “time” here is more about the learning curve and iterative improvement rather than a single cooking duration.
How To Make It Step By Step With Visual Cues

Achieving an open, airy sourdough crumb involves several critical stages, and issues at any point can lead to density. Here’s a step-by-step guide to troubleshooting:
- Assess Your Sourdough Starter’s Activity: Before you even mix your dough, ensure your starter is robust and active. It should double or triple in size within 4-8 hours after feeding, have many bubbles, and pass the float test (a small spoonful floats in water). A weak starter is a primary cause of dense bread because it lacks the power to create enough gas for a good rise.
- Properly Mix and Develop Gluten: After combining your ingredients, focus on thorough mixing and gluten development. Techniques like stretch and folds or coil folds, performed over several hours during bulk fermentation, build strength in the dough. You want the dough to feel elastic and strong, able to hold its shape. A lack of gluten development means the dough can’t trap the gas produced by the yeast, leading to a tight crumb.
- Control Bulk Fermentation (First Rise): This is arguably the most crucial stage. Under-fermented dough won’t have enough gas production, resulting in a dense, tight crumb. Over-fermented dough, on the other hand, will have exhausted its food supply, leading to a weak structure that collapses in the oven, also resulting in a dense crumb. Look for visual cues: the dough should increase in volume by 30-50% (depending on hydration and flour type), show bubbles on the surface, and feel jiggly.
- Gentle Shaping and Handling: When shaping your dough, be firm but gentle. The goal is to create tension on the surface while preserving the gas bubbles developed during bulk fermentation. Over-handling or degassing the dough too much will expel precious gas, leading to a denser loaf.
- Monitor Final Proofing (Second Rise): Similar to bulk fermentation, both under-proofing and over-proofing can cause a dense crumb. For under-proofed dough, there isn’t enough gas for expansion. For over-proofed dough, the gluten structure has weakened and can’t hold the gas, leading to collapse. The “poke test” is a good indicator: gently poke the dough with a floured finger; if it springs back slowly, it’s ready. If it springs back immediately, it’s under-proofed. If it doesn’t spring back at all, it’s over-proofed.
- Ensure Adequate Oven Spring: Baking in a preheated Dutch oven or with steam creates a humid environment that allows the dough to expand rapidly before the crust sets. This “oven spring” is vital for an open crumb. If your oven isn’t hot enough or lacks steam, the crust can set too quickly, restricting expansion and leading to a denser interior.
Easy Variations And Serving Ideas That Fit Real Life
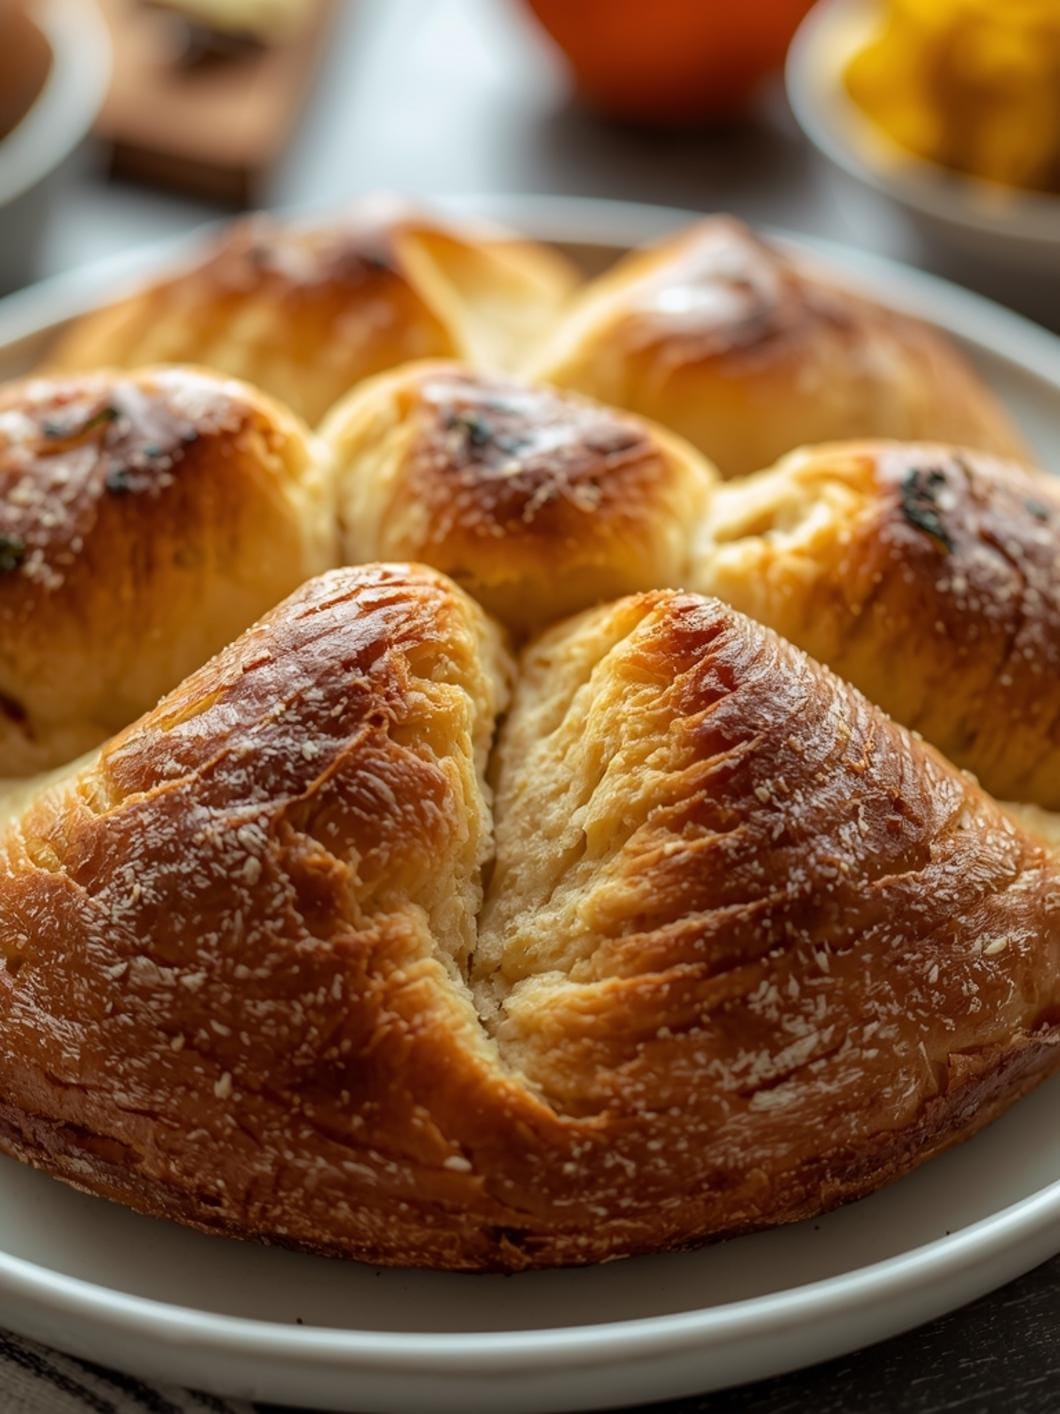
While this guide focuses on troubleshooting a dense crumb, once you achieve that perfect loaf, the serving possibilities are endless! A well-baked sourdough with an open crumb is fantastic simply sliced and served with good quality butter or olive oil. It’s also the ideal base for avocado toast, bruschetta, or hearty sandwiches. For a quick weeknight meal, use it to sop up sauces from stews or pasta dishes. Leftover sourdough can be transformed into croutons for salads or breadcrumbs for various recipes. The beauty of a great sourdough loaf is its versatility and ability to elevate almost any meal.
Common Slip-Ups And How To Avoid Them
One of the most common mistakes leading to a dense crumb is using a starter that isn’t fully active. Many beginners feed their starter and use it too soon, before it’s reached its peak activity. Always wait until your starter has visibly doubled or tripled and is full of bubbles. Another frequent error is misjudging bulk fermentation. It’s easy to under-ferment, especially in cooler kitchens, or over-ferment if the environment is too warm. Learning to read your dough’s cues (volume increase, bubbles, feel) rather than strictly adhering to a time limit is crucial. Finally, being too rough during shaping can deflate your dough, expelling the gas you worked so hard to create. Handle the dough gently but with purpose to build surface tension without sacrificing airiness.
How To Store It And Make It Ahead Without Ruining Texture
Once you’ve baked a beautiful sourdough loaf with an open crumb, proper storage is key to maintaining its texture. Store your cooled loaf at room temperature, cut-side down, on a cutting board, or in a bread box. Avoid refrigerating sourdough, as it can cause the bread to stale faster. For longer storage, slice the cooled bread and freeze it in an airtight bag. When ready to eat, you can toast slices directly from frozen or thaw them at room temperature. While you can’t “make ahead” the crumb itself, you can certainly prepare your dough through the final proofing stage and then bake it later. Many bakers will cold proof their shaped dough in the refrigerator for 12-24 hours. This slows down fermentation, allowing you to bake on your schedule and often contributing to a more complex flavor and better crumb structure.
Questions People Always Ask Before Making This Recipe
What does a “dense crumb” actually mean? A dense crumb refers to the internal structure of your bread being tight, compact, and heavy, with very few or very small air pockets, rather than being open, airy, and irregular.
How can I tell if my starter is active enough? An active starter will typically double or triple in size within 4-8 hours after feeding, be bubbly throughout, and pass the float test (a small spoonful floats in water).
Is it better to under-proof or over-proof? Neither is ideal, as both lead to a dense crumb. However, slightly under-proofed dough might still give you some oven spring, while significantly over-proofed dough often collapses completely. Aim for perfectly proofed!
Does the type of flour affect the crumb? Yes, absolutely. Bread flour with higher protein content (12-14%) provides more gluten, which is essential for trapping gas and creating an open, airy crumb. All-purpose flour can result in a denser loaf.
Why is my sourdough always gummy? Gummy sourdough often indicates underbaking or insufficient fermentation. Ensure your internal temperature reaches 200-210°F (93-99°C) and that your dough is properly fermented.
**Can I fix a dense

FAQs
- Can I make these ahead? Yes—prep ahead, refrigerate, then serve when ready.
- How long do leftovers last? Store covered in the fridge for 3–4 days for best texture.
- Can I adjust sweetness? Yes—add more or less sweetener to taste.
- Can I change the fruit? Yes—swap strawberries for blueberries, raspberries, or sliced banana.