Description
Elevate your homemade sourdough bread photos with these simple styling tips, perfect for showcasing your beautiful sourdough loaf. A well-styled photo can make all the difference in sharing your baking triumphs, inspiring others, and simply appreciating the art of a perfectly baked loaf. This guide isn’t about baking a sourdough loaf, but rather about presenting your already-baked masterpiece in the most appealing way possible. You’ll love these tips because they are incredibly easy to implement, require minimal extra effort, and use items you likely already have around your home.
Ingredients
Instructions
1. Choose Your Location Wisely: Find a spot in your home with abundant natural light. This is usually near a window, but avoid direct, harsh sunlight which can create overexposed areas and deep shadows. A soft, diffused light is ideal.
2. Set Up Your Background: Place your cutting board or chosen surface on a clean, uncluttered background. A plain wall, a wooden table, or even a simple linen tablecloth draped over a surface works perfectly. Avoid busy patterns or distracting elements.
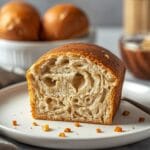
3. Position Your Sourdough Loaf: Place your whole, uncut sourdough loaf on the cutting board. Consider its best angle – perhaps where the scoring is most prominent or the crust has a beautiful color.
4. Introduce the Slice: Carefully slice a piece or two from your loaf using your bread knife. Arrange these slices slightly fanned out or leaning against the whole loaf to showcase the beautiful open crumb structure.
5. Add Simple Props: Drape a linen tea towel casually near the bread. Place small bowls with olive oil, butter, or flaky sea salt nearby. A sprig of fresh rosemary or thyme can add a touch of color and freshness. Remember, less is often more.
6. Adjust and Refine: Take a moment to look at your arrangement. Are there any distracting elements? Is the lighting even? Adjust the position of your loaf, slices, and props until everything looks balanced and appealing.
7. Capture Your Shots: Take multiple photos from different angles – overhead, eye-level, and close-ups. Experiment with slight adjustments to your props and lighting between shots.
- Prep Time: 5-10 minutes
- Cook Time: 0 minutes
- Category: food photography
- Method: styling
- Cuisine: styling
Nutrition
- Serving Size: 1 styled loaf
Keywords: sourdough, photography, food styling, bread, baking, tips, homemade, presentation, photo shoot, props