Baking homemade bread doesn’t have to be complicated, especially when you have a vibrant sourdough starter ready to go.

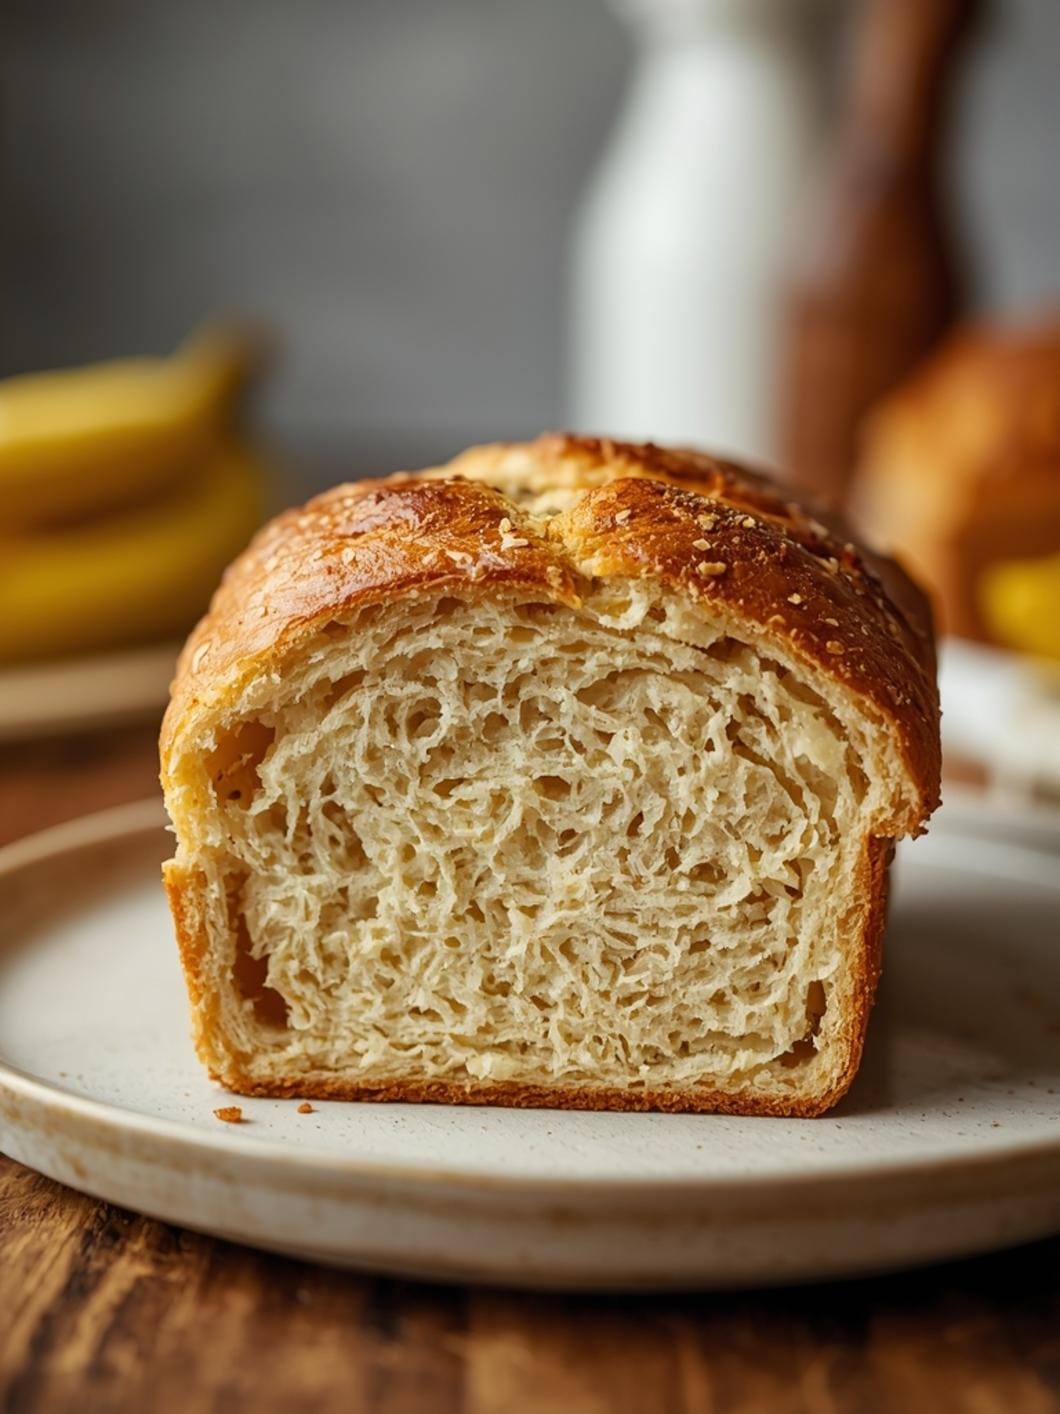
This recipe for sourdough sandwich bread is designed for busy home cooks who want to enjoy the wholesome goodness of freshly baked bread without spending all day in the kitchen. It’s perfect for everyday meals, offering a soft crumb and a delightful tang that elevates any sandwich.
Forget about complex techniques or long proofing times that stretch over days. This straightforward approach focuses on simplicity and reliability, ensuring you get a delicious loaf every time. Whether you’re new to sourdough or a seasoned baker looking for a quick win, this recipe will become a staple in your kitchen for breakfast toast, lunch sandwiches, or a simple side with dinner.
Table of Contents
- What You’ll Love About This Quick And Easy Recipe
- Everything You Need To Make This Recipe Without Stress
- Time Needed From Start To Finish
- How To Make It Step By Step With Visual Cues
- Easy Variations And Serving Ideas That Fit Real Life
- Common Slip-Ups And How To Avoid Them
- How To Store It And Make It Ahead Without Ruining Texture

Easy Sourdough Sandwich Bread
- Total Time: 6-8 hours
- Yield: 1 loaf 1x
Description
This recipe for sourdough sandwich bread is designed for busy home cooks who want to enjoy the wholesome goodness of freshly baked bread without spending all day in the kitchen. It’s perfect for everyday meals, offering a soft crumb and a delightful tang that elevates any sandwich. This straightforward approach focuses on simplicity and reliability, ensuring you get a delicious loaf every time.
Ingredients
Instructions
1. 1. Combine Wet Ingredients and Starter: In a large mixing bowl, whisk together the active sourdough starter, warm water, salt, sugar (or honey), and olive oil until well combined. The mixture should look milky and slightly bubbly from the starter.
2. 2. Add Flour and Mix Dough: Gradually add the all-purpose flour to the wet ingredients, mixing with a wooden spoon or your hands until a shaggy dough forms. It will be sticky at this stage, but make sure all the flour is incorporated.
3. 3. Knead the Dough: Turn the dough out onto a lightly floured surface. Knead for 8-10 minutes until the dough becomes smooth, elastic, and less sticky. It should pass the “windowpane test” – you should be able to stretch a small piece of dough thin enough to see light through it without tearing.
4. 4. First Rise (Bulk Fermentation): Lightly grease your mixing bowl with olive oil. Place the kneaded dough in the bowl, turning it once to coat. Cover the bowl with plastic wrap or a damp kitchen towel and let it rise in a warm spot for 4-6 hours, or until it has doubled in size. The dough should look puffy and have visible air bubbles.
5. 5. Shape the Loaf: Gently punch down the risen dough to release the air. Turn it out onto a lightly floured surface. Shape the dough into a tight rectangle or log that fits your loaf pan. To do this, flatten the dough, fold the top third down, then the bottom third up, pressing to seal. Roll it into a log and pinch the seam closed at the bottom.
6. 6. Second Rise (Proofing in Pan): Place the shaped dough seam-side down into a lightly greased 9×5-inch loaf pan. Cover the pan loosely with plastic wrap or a damp towel and let it rise again for 1-2 hours, or until it has nearly doubled in size and looks puffy. It should just crest over the top of the loaf pan.
7. 7. Preheat Oven and Bake: While the dough is on its second rise, preheat your oven to 375 F (190 C). Once the dough is ready, you can score the top with a sharp knife or razor blade if desired (a simple slash down the middle works well). Bake for 35-40 minutes, or until the crust is golden brown and the internal temperature reaches 200-210 F (93-99 C) with an instant-read thermometer.
8. 8. Cool Completely: Remove the loaf from the oven and immediately transfer it to a wire rack to cool completely. This is crucial for the texture; slicing it too soon will result in a gummy interior. Allow at least 1-2 hours for cooling before slicing and serving.
- Prep Time: 15-20 minutes
- Cook Time: 35-40 minutes
- Category: bread
- Method: baking
- Cuisine: american
Nutrition
- Serving Size: 1 slice
Keywords: sourdough, bread, sandwich, homemade, easy, baking, starter, yeast, tangy, soft
What You’ll Love About This Quick And Easy Recipe
This sourdough sandwich bread recipe is a true gem for several reasons. First, it’s incredibly forgiving, making it ideal for beginners who might be intimidated by sourdough baking. The steps are clear and concise, leading you to a beautiful, edible result without much fuss. Second, it’s perfect for using up that active sourdough starter you’ve been nurturing, transforming it into something truly delicious. This bread has a wonderfully soft texture and a mild sourdough flavor that isn’t overpowering, making it a hit with both adults and kids. It’s versatile enough for a classic grilled cheese, a hearty deli sandwich, or simply toasted with butter and jam. You can serve it at any meal, from a quick weekday breakfast to a casual family dinner.
Everything You Need To Make This Recipe Without Stress
Gathering your ingredients before you start is key to a smooth baking process. This recipe uses common pantry staples, so you likely have most of what you need already. The star, of course, is your active sourdough starter, which provides both the leavening and the signature tangy flavor.
INGREDIENTS:

- 1 cup active sourdough starter (fed and bubbly)
- 1 ½ cups warm water (around 95-105°F)
- 1 ½ teaspoons salt
- 1 tablespoon granulated sugar (or honey)
- 2 tablespoons olive oil (plus more for greasing)
- 4 ½ cups all-purpose flour (plus more for dusting)
For the flour, all-purpose works wonderfully for a soft sandwich loaf. If you prefer a slightly chewier texture, you can substitute up to half of the all-purpose flour with bread flour. The sugar or honey helps to feed the yeast in the starter and contributes to a lovely golden-brown crust. Olive oil adds tenderness to the crumb and a subtle richness. Make sure your salt is fine-grained, like table salt or fine sea salt, for even distribution.
Time Needed From Start To Finish
This recipe is designed to be relatively quick for a sourdough bread, focusing on efficiency without sacrificing flavor or texture. While sourdough inherently involves some waiting for fermentation, the active hands-on time is minimal.
- Prep Time: 15-20 minutes (mixing and initial kneading)
- Proofing Time: 4-6 hours (depending on your starter’s activity and room temperature)
- Bake Time: 35-40 minutes
- Cooling Time: 1-2 hours (essential for best texture)
Total Time: Approximately 6-8 hours, with most of that being inactive proofing time. This makes it a great project to start in the morning and have fresh bread ready for dinner.
How To Make It Step By Step With Visual Cues

Making this sourdough sandwich bread is a rewarding process, and these steps will guide you to a perfect loaf. Pay attention to the visual cues, as they’ll tell you when your dough is ready for the next stage.
- Combine Wet Ingredients and Starter: In a large mixing bowl, whisk together the active sourdough starter, warm water, salt, sugar (or honey), and olive oil until well combined. The mixture should look milky and slightly bubbly from the starter.
- Add Flour and Mix Dough: Gradually add the all-purpose flour to the wet ingredients, mixing with a wooden spoon or your hands until a shaggy dough forms. It will be sticky at this stage, but make sure all the flour is incorporated.
- Knead the Dough: Turn the dough out onto a lightly floured surface. Knead for 8-10 minutes until the dough becomes smooth, elastic, and less sticky. It should pass the “windowpane test” – you should be able to stretch a small piece of dough thin enough to see light through it without tearing.
- First Rise (Bulk Fermentation): Lightly grease your mixing bowl with olive oil. Place the kneaded dough in the bowl, turning it once to coat. Cover the bowl with plastic wrap or a damp kitchen towel and let it rise in a warm spot for 4-6 hours, or until it has doubled in size. The dough should look puffy and have visible air bubbles.
- Shape the Loaf: Gently punch down the risen dough to release the air. Turn it out onto a lightly floured surface. Shape the dough into a tight rectangle or log that fits your loaf pan. To do this, flatten the dough, fold the top third down, then the bottom third up, pressing to seal. Roll it into a log and pinch the seam closed at the bottom.
- Second Rise (Proofing in Pan): Place the shaped dough seam-side down into a lightly greased 9×5-inch loaf pan. Cover the pan loosely with plastic wrap or a damp towel and let it rise again for 1-2 hours, or until it has nearly doubled in size and looks puffy. It should just crest over the top of the loaf pan.
- Preheat Oven and Bake: While the dough is on its second rise, preheat your oven to 375°F (190°C). Once the dough is ready, you can score the top with a sharp knife or razor blade if desired (a simple slash down the middle works well). Bake for 35-40 minutes, or until the crust is golden brown and the internal temperature reaches 200-210°F (93-99°C) with an instant-read thermometer.
- Cool Completely: Remove the loaf from the oven and immediately transfer it to a wire rack to cool completely. This is crucial for the texture; slicing it too soon will result in a gummy interior. Allow at least 1-2 hours for cooling before slicing and serving.
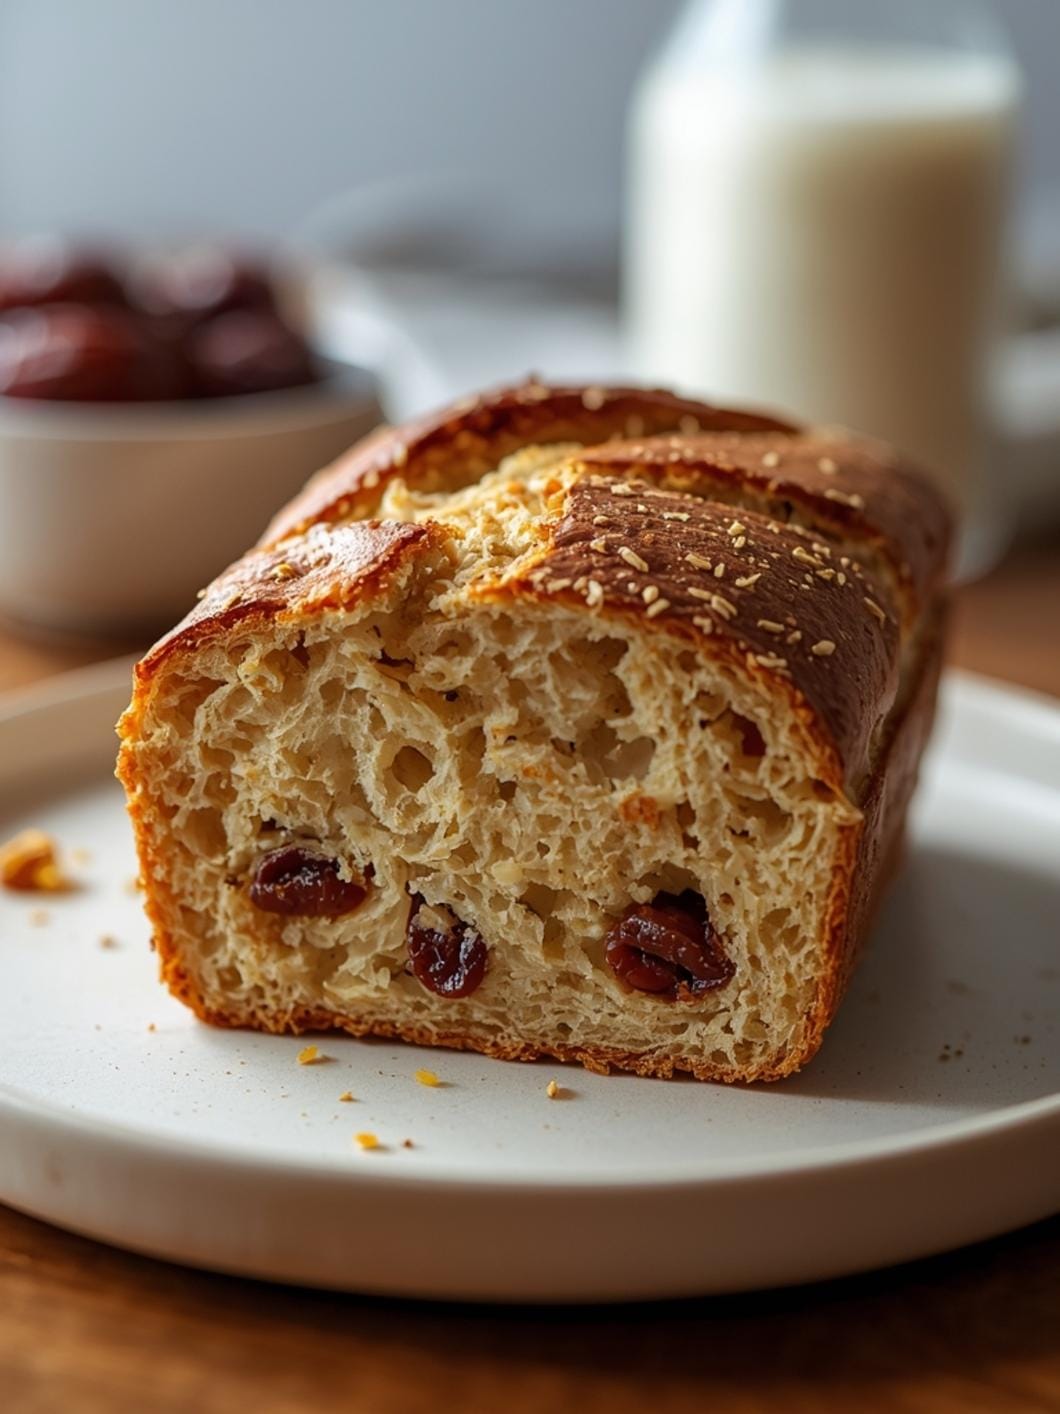
Easy Variations And Serving Ideas That Fit Real Life
This sourdough sandwich bread is fantastic on its own, but it’s also a wonderful canvas for creativity. For a kid-friendly twist, try adding a tablespoon of dried milk powder to the dough for an even softer crumb, or sprinkle sesame seeds on top before baking for a fun texture. You can also incorporate a handful of dried herbs like rosemary or thyme into the dough for an aromatic loaf that pairs well with savory meals.
For serving, think beyond just sandwiches. This bread makes incredible toast for breakfast, especially with avocado and a sprinkle of everything bagel seasoning. It’s perfect for dipping into olive oil and balsamic vinegar as an appetizer, or alongside a hearty soup or stew for dinner. You can even cube stale pieces and bake them into croutons for salads. For a touch of sweetness, spread a slice with cream cheese and a drizzle of honey.
Common Slip-Ups And How To Avoid Them
Even experienced bakers can encounter small issues, but knowing what to look for can prevent common mistakes.
- Dough Not Rising: If your dough isn’t rising, the most common culprit is an inactive sourdough starter. Make sure your starter is fed and bubbly before you begin. Also, ensure your water temperature is warm (not hot, which can kill the starter, or cold, which slows it down). A warm spot for proofing is also essential.
- Dense, Gummy Bread: Slicing the bread before it has fully cooled is the number one cause of a gummy texture. The internal cooking process continues even after it’s out of the oven, and cooling allows the starches to set properly. Be patient!
- Over-kneading or Under-kneading: Under-kneaded dough will be shaggy and won’t develop enough gluten, leading to a dense loaf. Over-kneaded dough can become tough. Aim for a smooth, elastic dough that passes the windowpane test.
- Crust Too Hard: If your crust is too hard, you might be overbaking, or your oven might be running hot. Try reducing the baking time slightly or lowering the oven temperature by 10-15 degrees. You can also add a small pan of water to the bottom rack of your oven during baking to create steam, which helps produce a softer crust.
- Loaf Spreading Instead of Rising: This can happen if your dough is too wet or if it’s over-proofed. If the dough feels overly sticky, add a little more flour during kneading. For over-proofing, the dough will look very bubbly and may collapse when touched. Adjust your proofing time based on your kitchen’s temperature.
How To Store It And Make It Ahead Without Ruining Texture
Proper storage is key to enjoying your homemade sourdough sandwich bread for as long as possible. Once completely cooled, store

FAQs
- Can I make these ahead? Yes—prep ahead, refrigerate, then serve when ready.
- How long do leftovers last? Store covered in the fridge for 3–4 days for best texture.
- Can I adjust sweetness? Yes—add more or less sweetener to taste.
- Can I change the fruit? Yes—swap strawberries for blueberries, raspberries, or sliced banana.