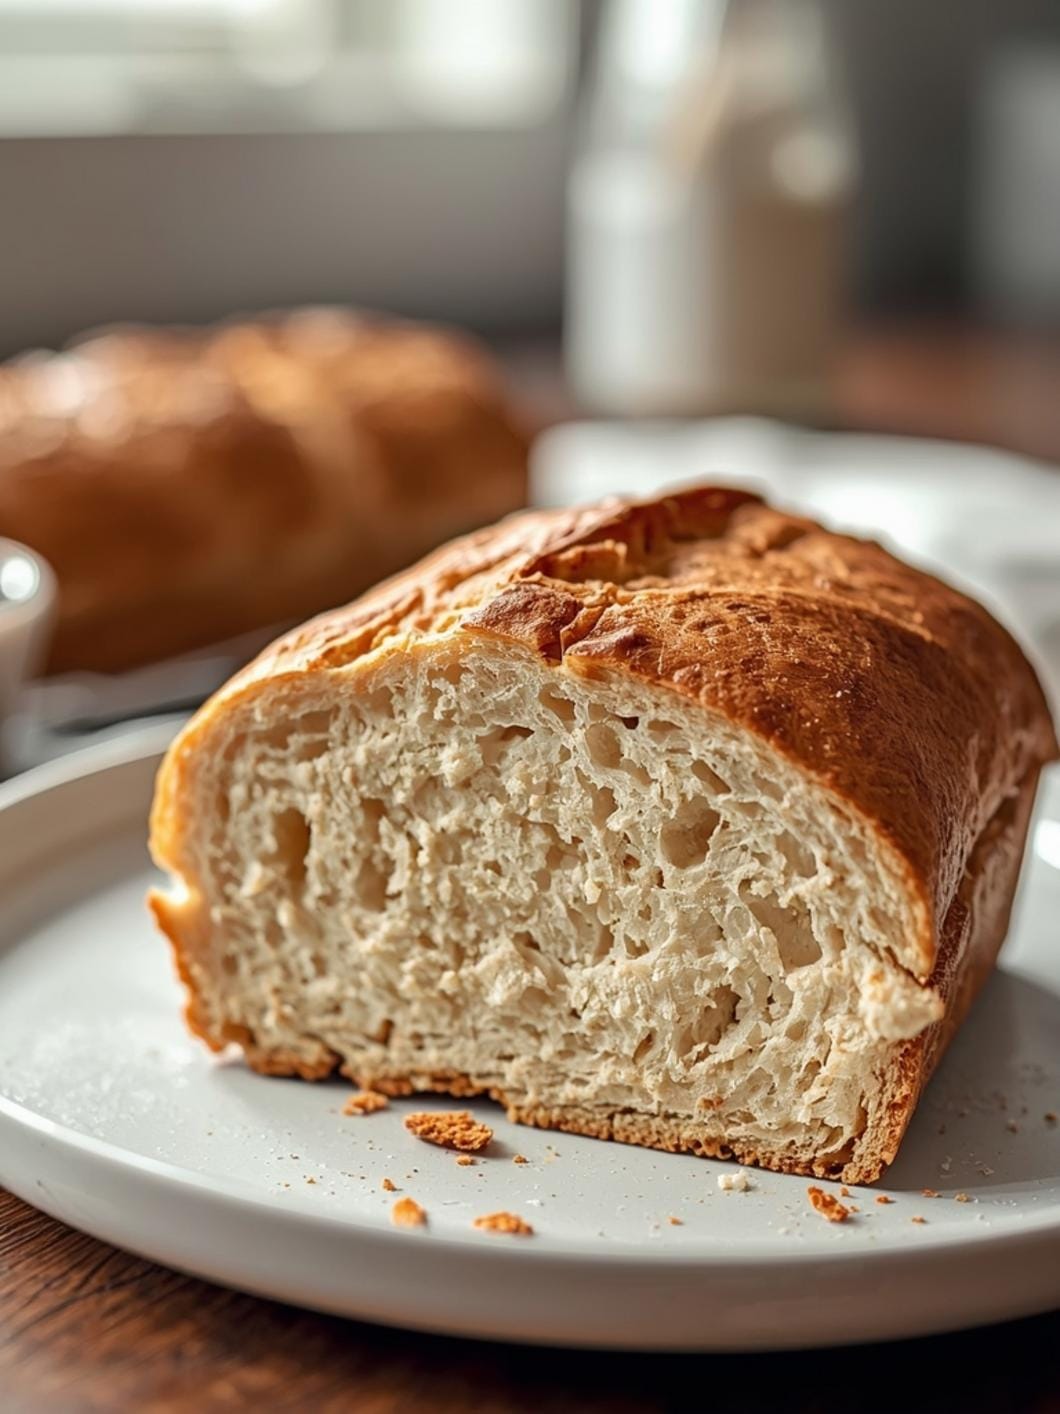
Achieving that perfect, airy sourdough loaf with a beautiful crumb and crust often comes down to mastering your shaping techniques.

Two of the most common and effective methods are the stretch and fold and the coil fold. While both serve to develop gluten and build structure in your dough, they each have distinct approaches and benefits.
Understanding when and how to apply each technique can significantly elevate your sourdough baking, transforming a good loaf into a truly exceptional one. Let’s dive into the specifics of these fundamental shaping methods to help you achieve consistent, professional-looking results every time you bake.
Table of Contents
- What You’ll Love About This Quick And Easy Recipe
- Everything You Need To Make This Recipe Without Stress
- Time Needed From Start To Finish
- How To Make It Step By Step With Visual Cues
- Easy Variations And Serving Ideas That Fit Real Life
- Common Slip-Ups And How To Avoid Them
- How To Store It And Make It Ahead Without Ruining Texture
- Questions People Always Ask Before Making This Recipe

Sourdough Shaping Techniques: Stretch and Fold vs. Coil Fold
- Total Time: 2-4 minutes per set of folds
- Yield: 1 loaf of sourdough bread
Description
Mastering sourdough shaping techniques like stretch and fold and coil fold is crucial for achieving an airy loaf with a beautiful crumb and crust. This guide demystifies these essential methods, explaining how to execute each effectively to build gluten, develop structure, and enhance any sourdough recipe for superior results.
Ingredients
Instructions
1. Prepare Your Surface: Lightly wet your hands or the countertop to prevent sticking. If working in a bowl, ensure the sides are clean.
2. Grab the Dough: Reach under one side of the dough in the bowl or on the counter.
3. Stretch Upwards: Gently lift and stretch the dough upwards, allowing it to extend without tearing. You’re aiming for a good amount of extension.
4. Fold Over: Once stretched, fold the lifted section of dough over onto itself, towards the center of the mass.
5. Rotate and Repeat: Rotate the bowl or dough 90 degrees and repeat steps 2-4 three more times, completing one full set of four folds.
6. Rest the Dough: Cover the dough and let it rest for 30-60 minutes before performing the next set of folds. Repeat this process for 3-5 sets, depending on your recipe and dough strength.
7. Prepare Your Dough: Ensure your dough is in a relatively flat, wide container or on a clean, lightly wet surface. This technique works best when the dough has some room to spread.
8. Wet Your Hands: Lightly wet both of your hands to avoid sticking.
9. Lift from the Center: Slide both hands, palms up, under the center of the dough mass.
10. Gently Lift and Fold: Slowly lift the dough upwards, allowing the sides to naturally fold under themselves as it stretches. The dough will resemble a “coil” as it lifts.
11. Place Back Down: Once lifted and folded, gently lower the dough back into the container or onto the surface, allowing it to settle and relax.
12. Rotate and Repeat: Rotate the container or dough 90 degrees and repeat steps 3-5, performing 2-4 coil folds per set.
13. Rest the Dough: Cover the dough and let the dough rest for 30-60 minutes before the next set. Perform 2-4 sets during bulk fermentation.
- Prep Time: 1-2 minutes per set of folds
- Category: baking
- Method: shaping
- Cuisine: european
Nutrition
- Serving Size: 1 slice
Keywords: sourdough, baking, bread, shaping, stretch and fold, coil fold, gluten development, dough handling, artisan bread, home baking
What You’ll Love About This Quick And Easy Recipe
This guide is perfect for any home baker looking to improve their sourdough game, whether you’re a complete beginner or have a few loaves under your belt. It’s designed to demystify two essential dough-handling techniques, making them accessible and easy to understand. You’ll love how these methods contribute to a stronger dough structure, leading to a better rise and a more open, airy crumb in your final bread. This isn’t about a specific recipe, but rather the foundational skills that will enhance *any* sourdough recipe you use. It’s for anyone who wants to move beyond just mixing ingredients and truly understand how to work with dough for superior results.
Everything You Need To Make This Recipe Without Stress
Since this article focuses on techniques rather than a specific baked good, the “ingredients” are more about the tools and the dough itself. You won’t be gathering specific food items, but rather ensuring you have the right setup for successful dough handling.
INGREDIENTS:

- Sourdough dough (prepared according to your favorite recipe)
- Large mixing bowl
- Clean kitchen counter or work surface
- A little water (for wetting hands, if needed)
For the sourdough dough, you should use a recipe you’re already familiar with or one that you’ve successfully made before. The quality of your dough will directly impact how well these techniques work. Ensure your dough has gone through its initial bulk fermentation and is ready for shaping. A small bowl of water nearby is helpful for wetting your hands slightly, which prevents the dough from sticking too much during the stretch and fold or coil fold process.
Time Needed From Start To Finish
The time investment for these techniques is quite minimal, as they are integrated into the bulk fermentation stage of your sourdough process.
Prep Time: 1-2 minutes per set of folds Active Folding Time: 1-2 minutes per set of folds Total Time (per set): Approximately 2-4 minutes
These times are for the actual hands-on work. The beauty of both stretch and fold and coil fold is that they are performed intermittently over a period of hours during bulk fermentation, allowing the dough to rest and develop between each set.
How To Make It Step By Step With Visual Cues

Mastering these techniques is all about gentle handling and understanding how the dough responds. Here’s how to execute both the stretch and fold and the coil fold effectively.
Executing the Stretch and Fold Technique
- Prepare Your Surface: Lightly wet your hands or the countertop to prevent sticking. If working in a bowl, ensure the sides are clean.
- Grab the Dough: Reach under one side of the dough in the bowl or on the counter.
- Stretch Upwards: Gently lift and stretch the dough upwards, allowing it to extend without tearing. You’re aiming for a good amount of extension.
- Fold Over: Once stretched, fold the lifted section of dough over onto itself, towards the center of the mass.
- Rotate and Repeat: Rotate the bowl or dough 90 degrees and repeat steps 2-4 three more times, completing one full set of four folds.
- Rest the Dough: Cover the dough and let it rest for 30-60 minutes before performing the next set of folds. Repeat this process for 3-5 sets, depending on your recipe and dough strength.
Executing the Coil Fold Technique
- Prepare Your Dough: Ensure your dough is in a relatively flat, wide container or on a clean, lightly wet surface. This technique works best when the dough has some room to spread.
- Wet Your Hands: Lightly wet both of your hands to avoid sticking.
- Lift from the Center: Slide both hands, palms up, under the center of the dough mass.
- Gently Lift and Fold: Slowly lift the dough upwards, allowing the sides to naturally fold under themselves as it stretches. The dough will resemble a “coil” as it lifts.
- Place Back Down: Once lifted and folded, gently lower the dough back into the container or onto the surface, allowing it to settle and relax.
- Rotate and Repeat: Rotate the container or dough 90 degrees and repeat steps 3-5, performing 2-4 coil folds per set.
- Rest the Dough: Cover the dough and let it rest for 30-60 minutes before the next set. Perform 2-4 sets during bulk fermentation.
Easy Variations And Serving Ideas That Fit Real Life
While these are shaping techniques for sourdough, their impact directly affects the final bread you bake. A well-shaped loaf with good structure will have a better rise (oven spring), a more open and airy crumb, and a more appealing crust. This means your homemade sourdough will be even more delicious for everyday enjoyment.
- Classic Sourdough Loaves: The most obvious application, resulting in beautiful sandwich bread or artisan loaves.
- Sourdough Focaccia: While focaccia doesn’t require as much shaping, strong gluten development from these folds contributes to its signature airy texture.
- Sourdough Pizza Dough: A well-developed pizza dough is easier to stretch and creates a better crust.
- Sourdough Dinner Rolls: These techniques ensure your rolls are soft, fluffy, and hold their shape well.
The “serving idea” here is simply to enjoy your perfectly baked sourdough with anything you love! Think fresh butter, olive oil and balsamic, avocado toast, or as a side to a hearty soup or stew.
Common Slip-Ups And How To Avoid Them
Even experienced bakers can make mistakes when it comes to dough handling. Here are some common pitfalls and how to steer clear of them.
- Tearing the Dough: The most frequent mistake is being too aggressive. Always stretch gently. If the dough resists or starts to tear, stop, let it rest for a few minutes, and then try again. Dough needs time to relax.
- Not Enough Folds: If your dough feels weak, slack, or doesn’t hold its shape, you might not be performing enough sets of folds. The goal is to build strength. Pay attention to how the dough feels – it should become progressively stronger and more elastic.
- Too Many Folds: Conversely, over-folding can make the dough too tight and difficult to work with. If your dough feels very stiff and resistant, you might be overdoing it. Listen to your dough; it will tell you when it has enough strength.
- Sticky Hands: Dough sticking to your hands can be frustrating. Always lightly wet your hands with water before handling the dough. Avoid using flour, as this can dry out the dough.
- Inconsistent Folding: Try to be consistent with your technique each time. This helps build even strength throughout the dough. Don’t just fold one side; work your way around the entire dough mass.
- Ignoring Dough Temperature: Dough temperature significantly impacts gluten development. If your kitchen is very warm, your dough might develop strength faster, requiring fewer folds. If it’s cold, it might need more. Adjust accordingly.
How To Store It And Make It Ahead Without Ruining Texture
These techniques are part of the active process of making sourdough bread, so “storing” them isn’t applicable in the traditional sense. However, the dough itself, once shaped using these methods, can be retarded (cold proofed) in the refrigerator.
Cold Proofing: After you’ve completed your final shaping and placed the dough in a banneton or proofing basket, you can transfer it to the refrigerator for 12-24 hours. This slows down fermentation, develops more flavor, and makes the dough easier to handle and score before baking.
Reheating Baked Bread: Once your sourdough loaf is baked, store it at room temperature in a bread bag or wrapped in a clean kitchen towel for up to 3-4 days. For longer storage, slice the bread and freeze the slices in an airtight bag. Reheat frozen slices directly in a toaster or oven for a fresh-baked taste. Do not refrigerate baked sourdough, as it tends to dry out quickly.
Questions People Always Ask Before Making This Recipe
What is the main difference between stretch and fold and coil fold?
Stretch and fold involves lifting and stretching a portion of the dough upwards before folding it over itself, often done in a bowl or on a surface. Coil fold involves sliding hands under the center of the dough and lifting it, allowing the sides to naturally fold under as it stretches, creating a “coil” effect. Coil folds are generally gentler and can be done later in bulk fermentation when the dough is more delicate.When should I use stretch

FAQs
- Can I make these ahead? Yes—prep ahead, refrigerate, then serve when ready.
- How long do leftovers last? Store covered in the fridge for 3–4 days for best texture.
- Can I adjust sweetness? Yes—add more or less sweetener to taste.
- Can I change the fruit? Yes—swap strawberries for blueberries, raspberries, or sliced banana.