Alright, sourdough enthusiasts (or soon-to-be ones), let’s talk hydration. If you’ve ever pulled up a sourdough recipe and felt personally victimized by phrases like “80% hydration dough” or thought, is this bread math homework?, you’re not alone. But trust me, hydration ratios aren’t as scary as they sound, and once you wrap your head around them, your sourdough baking will level up in ways you didn’t know were possible.

In this post, we’re diving headfirst into one of sourdough’s most critical concepts: Understanding sourdough hydration: A simple guide to mastering it all. From what hydration even means to how it impacts your dough (and bread!), I’ll walk you through everything step-by-step, with plenty of tips, tricks, and relatable examples to boot.
Let’s hydrate our minds (and dough!) and get this bread, shall we?
What Is Hydration in Sourdough?
The Quick Definition:
In sourdough terms, hydration refers to the ratio of water to flour in your dough. It’s usually expressed as a percentage. For example, if a dough has 500 grams of flour and 375 grams of water, the hydration is 75% (375 ÷ 500 × 100 = 75%).
Basically, the hydration percentage tells you how “wet” or “dry” your dough will be.
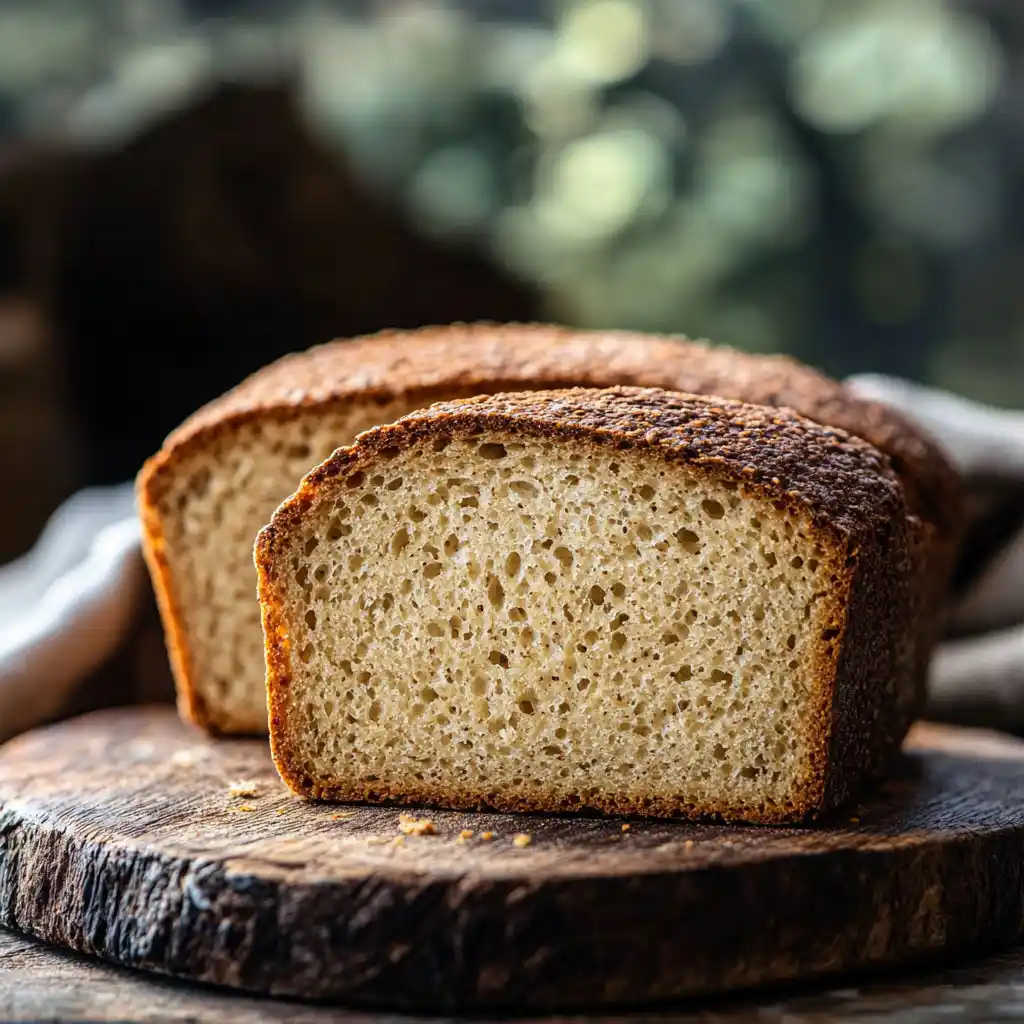
Higher hydration? Expect a sticky, elastic dough that bakes into bread with a chewy texture and crazy open crumb. Lower hydration? Easier handling but a tighter crumb structure (hello, sandwich bread).
Here’s where it gets fun: The seemingly small decision of how much water to use in your sourdough recipe can have a massive impact on your final loaf. Think texture, flavor, crumb, and even how easy (or frustrating) the dough is to work with.
Hydration Ranges Simplified
To make this as simple as possible, here’s how hydration levels typically break down:
- Low Hydration (50-60%): This makes a firm, easy-to-handle dough. Perfect for beginners, dense loaves (like rye bread), or when you’re not in the mood for messy fingers.
- Medium Hydration (60-70%): Consider this the “goldilocks zone.” The dough is workable, and your bread will have a soft crumb without too much fuss. Great for most classic sourdough styles.
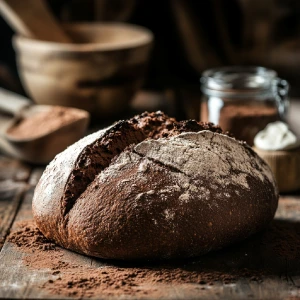
- High Hydration (70-80%+): This is where things start getting wild. High hydration doughs have a slack, sticky consistency, but they reward you with that Instagram-famous, holey crumb. It’s a challenge, but so worth it once you get the hang of it.

Pro Tip: As a sourdough newbie, starting with 65% to 70% hydration is smart. You can increase hydration as you gain more confidence and feel for the dough.
Why Does Sourdough Hydration Matter?
Understanding sourdough hydration isn’t just about mixing the “right” ratio of flour and water — it’s about taking control of the bread-baking process. Here’s a quick breakdown of why hydration is such a big deal:
1. Hydration Impacts Gluten Development
High hydration dough encourages the formation of long gluten strands, which creates the framework for those airy crumbs. And guess what? You don’t need to knead endlessly to achieve it. Hydration and time (thanks to techniques like autolyse) do a lot of that work for you. Not sure what autolyse is? Check out What Is Autolyse in Sourdough Baking? The Secret to Better Bread to learn all about this essential pre-mixing resting step.
2. Better Texture and Crumb
You know when people slice into sourdough, and the inside has those cavernous, irregular holes — almost like a chewy sponge? That’s largely thanks to higher hydration levels. The wetter the dough, the more steam is produced during baking, which creates those airy pockets.
3. Flavor Development
Moisture is a key player in how fermentation happens. A high-hydration dough gives your sourdough starter an ideal environment to thrive, resulting in richer, tangier flavors.
4. Easier Dough Handling (at Lower Hydration)
Lower hydration doughs may not give you those random, airy holes in the crumb, but they’re much easier to handle. Seriously, if you’re just starting out, the sanity you’ll save with a lower hydration dough is worth it. You can always aim for “holey” bread once you’re more comfortable working with stickier doughs.
How to Adjust Sourdough Hydration Like a Pro
Here’s a fun fact: You’re not locked into any hydration level, even if a recipe tells you to use 75%. You can always tweak based on what feels right for you (or based on what flour and tools you’re working with).
Start Low and Gradually Increase
If a recipe calls for 75% hydration but you’re nervous about handling sticky dough, don’t sweat it. Start with 65% or 70%, and once the dough feels manageable, work your way up in future bakes.
Take Climate Into Account
Different climates affect hydration. For example:
- Humid climates may require slightly less water since flour tends to absorb moisture from the air.
- Dry climates, on the other hand, might need extra hydration since flour dries out faster.
Hydration Adjustment Rule of Thumb

For every 100 grams of flour, adding 10 grams of water increases hydration by 10%. Keep this formula in your back pocket for easy adjustments.
How Flour Type Affects Hydration
Let’s not forget the star of our sourdough show: flour. The type of flour you use directly impacts how hydration behaves.
Common Flour Types and Their Hydration Characteristics
- Bread Flour: Absorbs water well due to its high protein (gluten) content. Great for handling higher hydrations.
- Whole Wheat Flour: Sucks up water faster because of its bran and germ. Higher hydration is often needed compared to bread flour.
- All-Purpose Flour: Lower protein content = less water absorption. Stick with lower or medium hydration when using AP flour.
- Rye Flour: Absorbs a ton of water but stays sticky. It’s unique, so don’t compare it to other flours!
Common Hydration Challenges (and How to Fix Them)
Let’s troubleshoot some hydration hiccups so you don’t feel like crying into your dough.
Problem 1: Sticky Dough You Can’t Handle
Solution: Use wet hands (or lightly oil your hands) when working with sticky doughs. And don’t forget the bench scraper — it’s a lifesaver.
Problem 2: Dense, Tight Crumb
Solution: Gradually increase hydration to give those gluten networks room to open up. Working with techniques like autolyse (yup, it’s key!) can also do wonders here.
FAQs
What Happens If My Dough Is Too Dry?
Dry dough is harder to work with, doesn’t ferment as well, and often results in bread that feels dense and crumbly. If your dough feels stiff, mist it with water and fold it in during bulk fermentation.
Can I Autolyse High-Hydration Dough?
Yes, and you should! Autolyse is a fantastic tool for taming sticky dough. For tips, head over to this guide: What Is Autolyse in Sourdough Baking? The Secret to Better Bread. The method works wonders.
Final Thoughts on Understanding Sourdough Hydration
Hydration may seem tricky at first, but once you play around with it, you’ll get the hang of it. Remember, every sourdough baker starts somewhere. Understanding sourdough hydration is about practice, patience, and experimenting until you find what works best for your flour, recipe, and skill level.
For a detailed explanation of hydration and its impact on sourdough, check out King Arthur Baking’s Guide to Dough Hydration.
What’s your favorite hydration level for sourdough? Or if this guide helped you tackle sticky dough woes, drop a comment below. Happy baking!