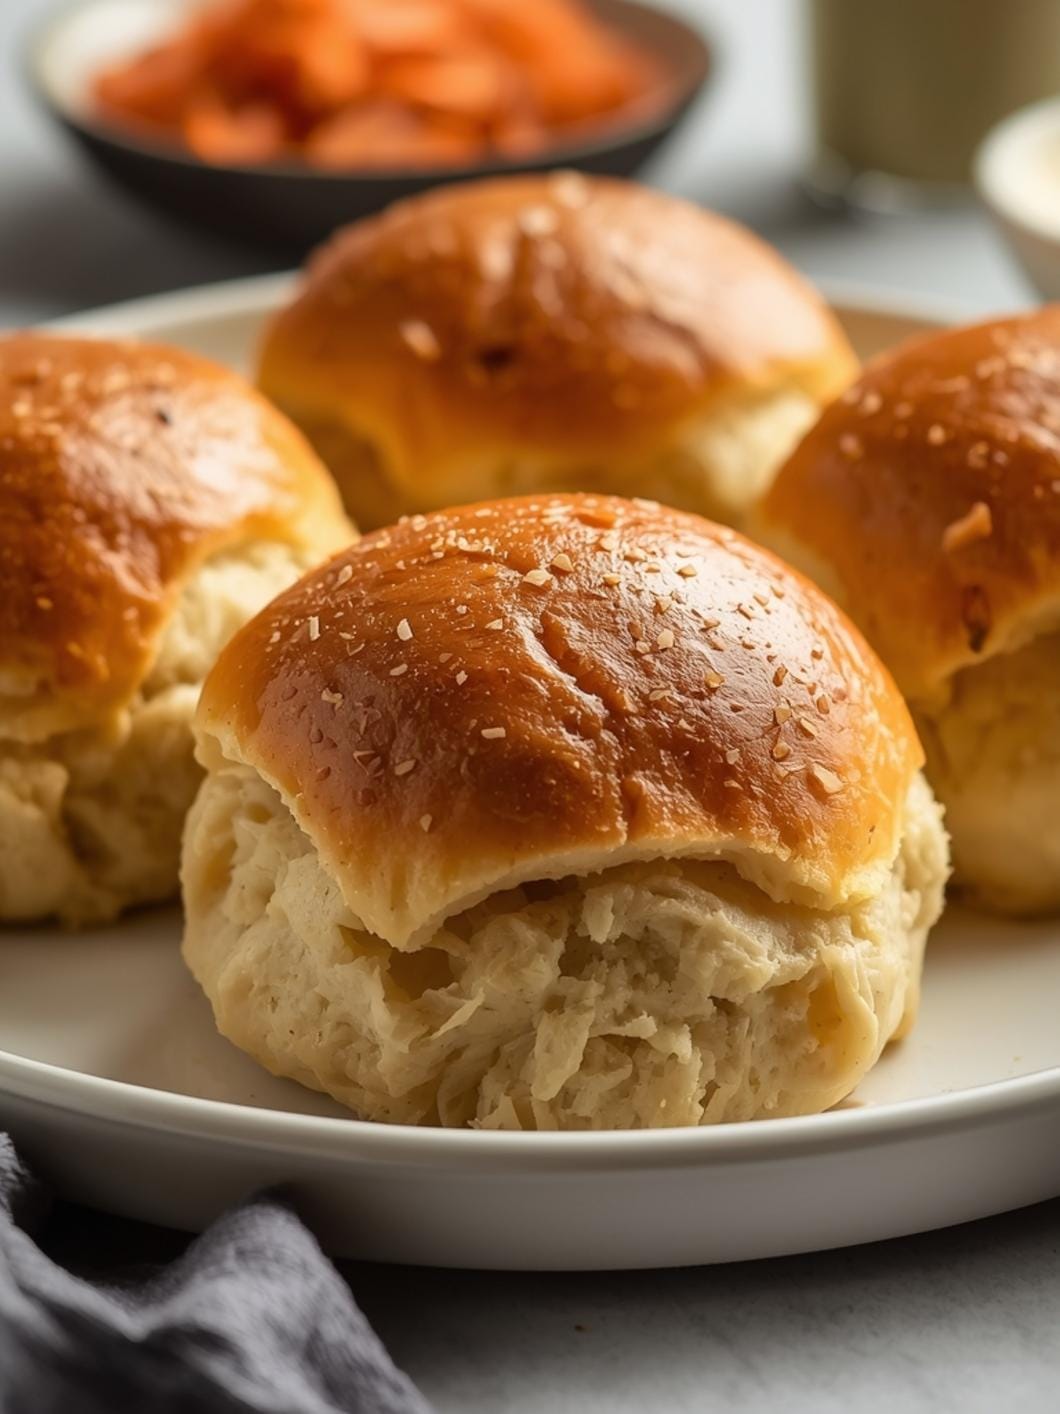
Baking delicious gluten-free bread at home just got a whole lot easier with these fantastic Gluten-Free Sourdough Sandwich Squares.
 11")
Perfect for busy weeknights, lunchboxes, or a quick snack, this recipe transforms your gluten-free sourdough starter into soft, flavorful squares that are ideal for sandwiches or simply slathering with your favorite spread.
Say goodbye to dense, crumbly gluten-free bread and hello to a homemade option that’s both satisfying and simple to prepare. We’re focusing on practicality and ease, ensuring that even beginner bakers can achieve wonderful results with their gluten-free sourdough.
Table of Contents
 12")
Gluten-Free Sourdough Sandwich Squares
- Total Time: 1 hour 5 minutes to 1 hour 40 minutes
- Yield: 1 (8x8 or 9x9 inch) pan 1x
Description
Baking delicious gluten-free bread at home just got a whole lot easier with these fantastic Gluten-Free Sourdough Sandwich Squares. Perfect for busy weeknights, lunchboxes, or a quick snack, this recipe transforms your gluten-free sourdough starter into soft, flavorful squares that are ideal for sandwiches or simply slathering with your favorite spread. Say goodbye to dense, crumbly gluten-free bread and hello to a homemade option that’s both satisfying and simple to prepare. We’re focusing on practicality and ease, ensuring that even beginner bakers can achieve wonderful results with their gluten-free sourdough.
Ingredients
Instructions
1. Activate Your Starter: In a large mixing bowl, combine the active gluten-free sourdough starter, warm water, olive oil, and honey (or maple syrup). Whisk these wet ingredients together until they are well combined and the starter is mostly dissolved. The mixture should look slightly milky and bubbly.
2. Combine Dry Ingredients: In a separate medium bowl, whisk together the gluten-free all-purpose flour blend, salt, baking powder, and baking soda. Ensure there are no lumps and all ingredients are evenly distributed. This helps prevent pockets of unmixed leavening agents.
3. Mix Wet and Dry: Gradually add the dry ingredient mixture to the wet ingredient mixture in the large bowl, stirring with a sturdy spoon or spatula until a shaggy dough forms. Continue mixing until all the flour is incorporated and you have a thick, sticky dough. It won’t be like traditional wheat dough; it will be more like a thick batter.
4. Prepare for Proofing: Lightly grease an 8×8-inch or 9×9-inch baking pan with olive oil. Transfer the dough into the prepared pan, using a wet spatula or wet hands to gently spread it evenly into the corners. The dough will be quite sticky, so wetting your tools helps prevent sticking.
5. Proof the Dough: Cover the baking pan loosely with plastic wrap or a clean kitchen towel. Place the pan in a warm spot in your kitchen for 30 to 60 minutes. The dough should visibly puff up and look slightly aerated. If your kitchen is cool, this might take a bit longer.
6. Preheat and Bake: While the dough is proofing, preheat your oven to 375 F (190 C). Once the dough has proofed, remove the cover and place the pan in the preheated oven. Bake for 20-25 minutes, or until the top is golden brown and a wooden skewer inserted into the center comes out clean.
7. Cool and Slice: Once baked, remove the pan from the oven and let the bread cool in the pan for about 10-15 minutes. This allows it to set properly. Then, carefully invert the bread onto a wire rack to cool completely before slicing into squares. Cooling completely ensures a clean cut and better texture.
- Prep Time: 15 minutes
- Cook Time: 20-25 minutes
- Category: bread
- Method: baking
- Cuisine: american
Nutrition
- Serving Size: 1 square
Keywords: gluten-free, sourdough, sandwich, bread, squares, easy, homemade, baking, quick
What You’ll Love About This Quick And Easy Recipe
This recipe is a game-changer for anyone navigating a gluten-free diet, especially those who love the tang and texture of sourdough. It’s designed for simplicity and speed, making it perfect for families who need reliable, delicious gluten-free bread without a lot of fuss. You’ll appreciate how quickly these squares come together, allowing you to enjoy fresh, homemade bread with minimal effort. It’s an excellent choice for everyday meals, from packing school lunches to creating a hearty breakfast toast or a light dinner side. The individual square format is incredibly convenient, eliminating the need for slicing and making portion control a breeze. This recipe is also a fantastic way to utilize your active gluten-free sourdough starter, preventing waste and ensuring you always have a fresh supply of delicious bread.
Everything You Need To Make This Recipe Without Stress
Gathering your ingredients before you begin will make the baking process smooth and enjoyable. These are common gluten-free pantry staples, and the quantities are designed for a manageable batch of sandwich squares.
INGREDIENTS:
 13")
- 1 cup active gluten-free sourdough starter (fed and bubbly)
- 1 cup warm water (105-115°F)
- 2 tablespoons olive oil, plus extra for greasing
- 1 tablespoon honey or maple syrup
- 1 teaspoon salt
- 2 cups gluten-free all-purpose flour blend (with xanthan gum)
- 1 teaspoon baking powder
- 1/2 teaspoon baking soda
For the gluten-free all-purpose flour blend, ensure it contains xanthan gum, as this is crucial for the structure of gluten-free baked goods. If your blend does not include it, add 1/2 teaspoon of xanthan gum separately to the dry ingredients. You can use any brand of gluten-free all-purpose flour that you typically enjoy for baking. For the sweetener, either honey or maple syrup works perfectly, adding a touch of flavor and helping with browning. Olive oil can be substituted with another mild-flavored oil like avocado oil or melted coconut oil if preferred.
Time Needed From Start To Finish
This recipe is designed for efficiency, allowing you to enjoy fresh bread without a long wait.
- Prep Time: 15 minutes
- Proofing Time: 30-60 minutes (depending on warmth)
- Bake Time: 20-25 minutes
- Total Time: Approximately 1 hour 5 minutes to 1 hour 40 minutes
How To Make It Step By Step With Visual Cues
 14")
Follow these straightforward steps to create your delicious gluten-free sourdough sandwich squares.
- Activate Your Starter: In a large mixing bowl, combine the active gluten-free sourdough starter, warm water, olive oil, and honey (or maple syrup). Whisk these wet ingredients together until they are well combined and the starter is mostly dissolved. The mixture should look slightly milky and bubbly.
- Combine Dry Ingredients: In a separate medium bowl, whisk together the gluten-free all-purpose flour blend, salt, baking powder, and baking soda. Ensure there are no lumps and all ingredients are evenly distributed. This helps prevent pockets of unmixed leavening agents.
- Mix Wet and Dry: Gradually add the dry ingredient mixture to the wet ingredient mixture in the large bowl, stirring with a sturdy spoon or spatula until a shaggy dough forms. Continue mixing until all the flour is incorporated and you have a thick, sticky dough. It won’t be like traditional wheat dough; it will be more like a thick batter.
- Prepare for Proofing: Lightly grease an 8×8-inch or 9×9-inch baking pan with olive oil. Transfer the dough into the prepared pan, using a wet spatula or wet hands to gently spread it evenly into the corners. The dough will be quite sticky, so wetting your tools helps prevent sticking.
- Proof the Dough: Cover the baking pan loosely with plastic wrap or a clean kitchen towel. Place the pan in a warm spot in your kitchen for 30 to 60 minutes. The dough should visibly puff up and look slightly aerated. If your kitchen is cool, this might take a bit longer.
- Preheat and Bake: While the dough is proofing, preheat your oven to 375°F (190°C). Once the dough has proofed, remove the cover and place the pan in the preheated oven. Bake for 20-25 minutes, or until the top is golden brown and a wooden skewer inserted into the center comes out clean.
- Cool and Slice: Once baked, remove the pan from the oven and let the bread cool in the pan for about 10-15 minutes. This allows it to set properly. Then, carefully invert the bread onto a wire rack to cool completely before slicing into squares. Cooling completely ensures a clean cut and better texture.
Easy Variations And Serving Ideas That Fit Real Life
These gluten-free sourdough sandwich squares are incredibly versatile and can be adapted to suit various tastes and occasions.
- Herb-Infused Squares: Before baking, sprinkle the top of the dough with dried herbs like Italian seasoning, rosemary, or thyme for an aromatic twist. This is great for serving with savory meals.
- Cheesy Goodness: For a cheesy version, fold in 1/2 cup of shredded dairy-free or regular cheddar cheese into the dough before spreading it into the pan. You can also sprinkle a little extra on top before baking. Kids especially love this variation!
- Garlic Bread Squares: After baking, brush the warm squares with melted garlic butter (dairy-free or regular) and a sprinkle of fresh parsley. Serve warm alongside pasta dishes or soup.
- Sweet Breakfast Squares: For a slightly sweeter option, add 1/4 cup of dried cranberries or raisins to the dough. Serve toasted with a dollop of jam or nut butter for breakfast.
- Party Appetizer: Cut the cooled squares into smaller bite-sized pieces. Top with a spread like hummus, avocado, or a dairy-free cream cheese and garnish with fresh herbs or cherry tomato halves for an easy party appetizer.
- Sandwich Perfection: These squares are perfectly sized for sandwiches. Fill them with your favorite deli meats, cheeses, lettuce, and tomatoes for a satisfying lunch. They also make excellent open-faced sandwiches.
- Soup Dippers: Serve these warm squares alongside a hearty bowl of soup or chili. Their soft texture and sourdough tang make them ideal for soaking up flavorful broths.
Common Slip-Ups And How To Avoid Them
Even experienced bakers can encounter small challenges, especially with gluten-free recipes. Here are some common pitfalls and how to steer clear of them for perfect sourdough squares every time.
- Using Inactive Starter: The most common mistake is using a sourdough starter that isn’t active and bubbly. An inactive starter won’t provide the necessary lift, resulting in dense bread. Always feed your starter 4-12 hours before you plan to bake and ensure it’s visibly bubbly and has nearly doubled in size.
- Over-Mixing the Dough: While gluten-free dough doesn’t develop gluten like wheat dough, over-mixing can still negatively impact the texture. Mix just until the ingredients are combined and no dry streaks of flour remain. The dough will be sticky, not smooth.
- Not Proofing Long Enough: Rushing the proofing stage can lead to a denser crumb. Give your dough adequate time in a warm spot to rise. Look for a noticeable increase in volume and a slightly aerated appearance. If your kitchen is cold, find a warmer spot, like near a sunny window or in a slightly warmed (but turned off) oven.
- Baking at the Wrong Temperature: An oven that’s too hot can burn the outside before the inside is cooked, while one that’s too cool can result in a pale, underbaked product. Use an oven thermometer to ensure your oven is accurately preheated to 375°F (190°C).
- Slicing Before Cooling: It’s tempting to cut into warm bread, but gluten-free bread needs time to set its structure as it cools. Slicing too early can lead to a gummy texture and crumbly squares. Be patient and allow the bread to cool completely on a wire rack.
- Forgetting Xanthan Gum: If your gluten-free flour blend doesn’t contain xanthan gum, you must add it separately. Xanthan gum acts as a binder in gluten-free baking, providing elasticity and structure that gluten would normally offer. Without it, your bread might be too crumbly.
How To Store It
 15")
FAQs
- Can I make these ahead? Yes—prep ahead, refrigerate, then serve when ready.
- How long do leftovers last? Store covered in the fridge for 3–4 days for best texture.
- Can I adjust sweetness? Yes—add more or less sweetener to taste.
- Can I change the fruit? Yes—swap strawberries for blueberries, raspberries, or sliced banana.