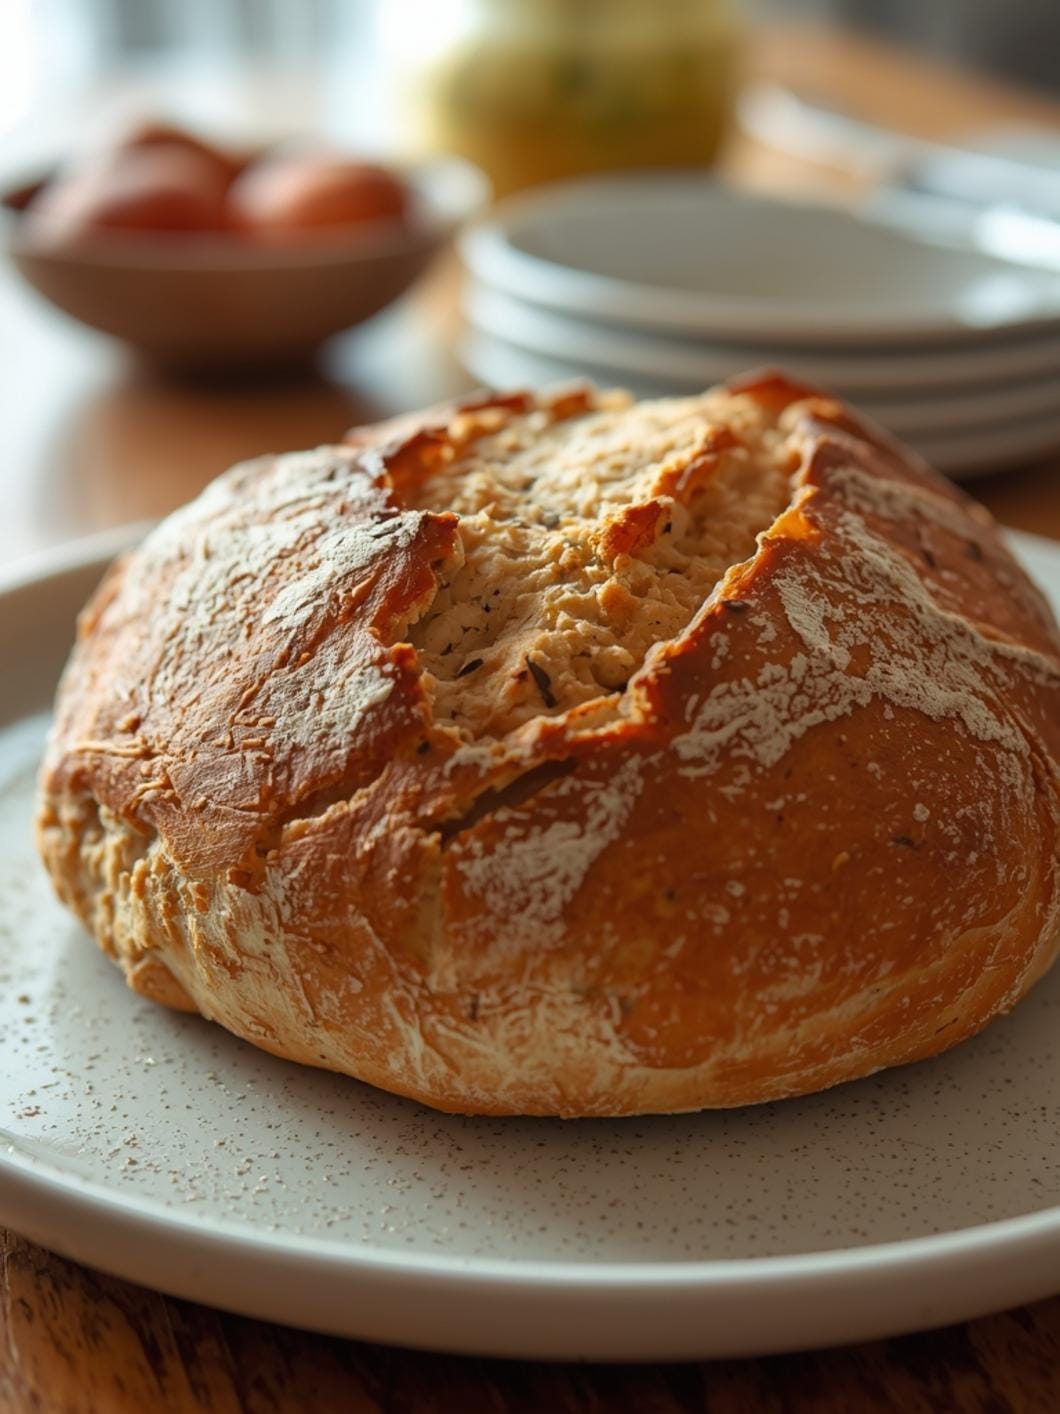
There’s nothing quite like the smell of freshly baked bread filling your kitchen, especially when it’s a wholesome loaf of honey oat bread.

This recipe is designed for comfort, delivering a soft, slightly sweet, and incredibly satisfying bread that’s perfect for any time of day. It’s a simple pleasure that brings a touch of homemade warmth to your table.
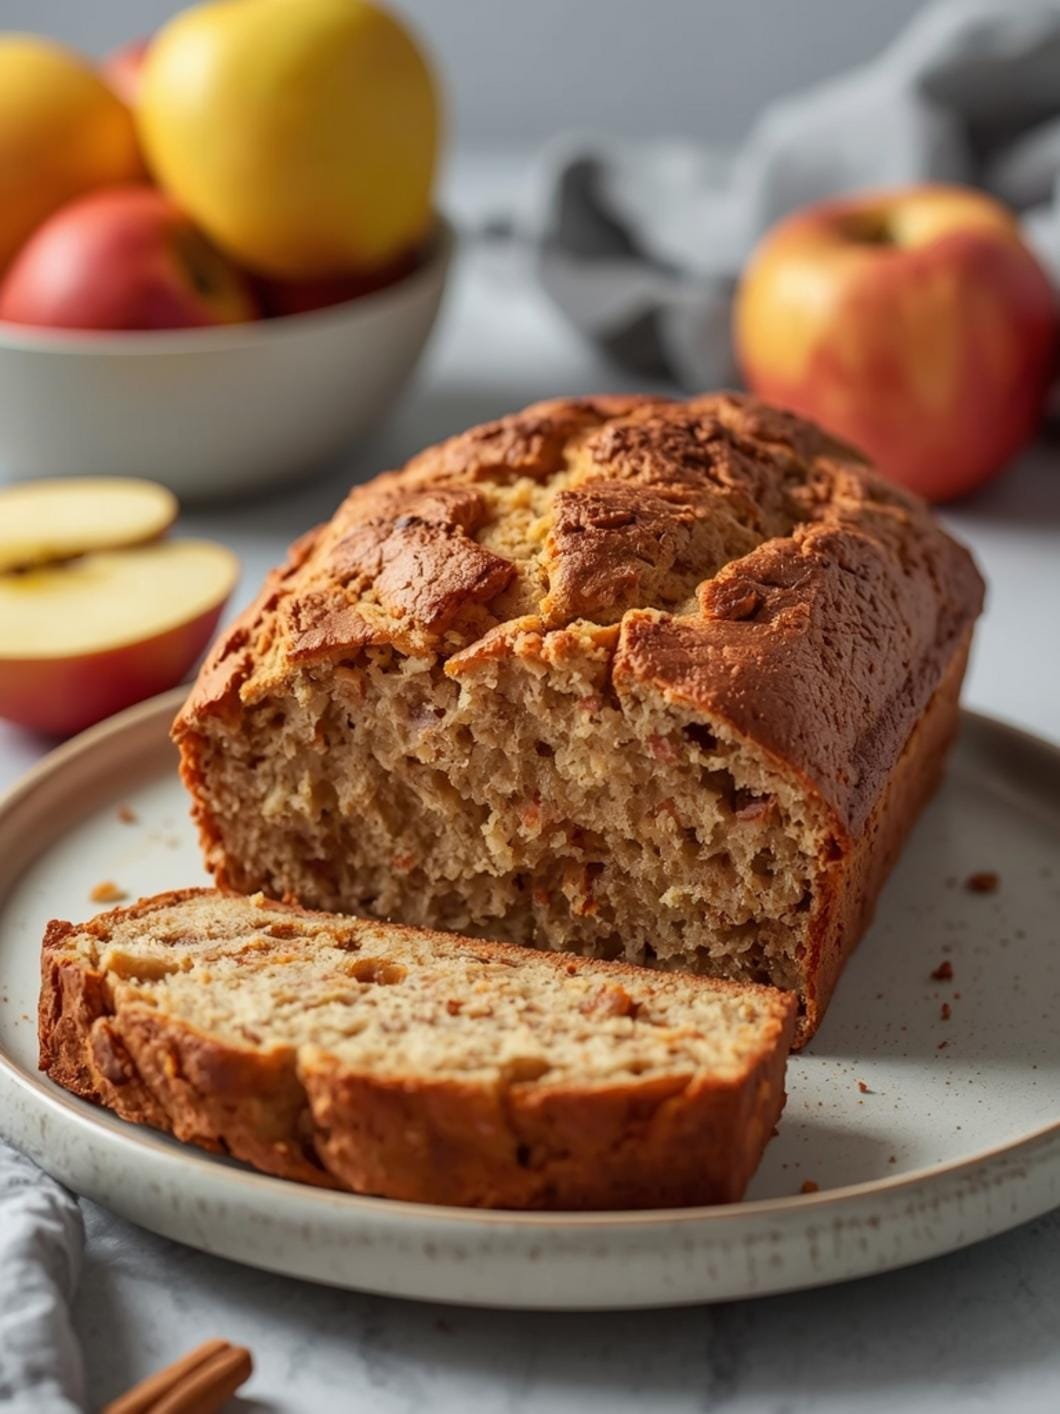
This honey oat bread loaf isn’t just delicious; it’s also incredibly versatile. Whether you’re looking for the ideal base for your favorite sandwich, a hearty slice to toast with butter and jam, or just a comforting snack, this recipe has you covered. It’s a healthy treat that’s easy to bake and even easier to enjoy with your family.

Honey Oat Bread Loaf
- Total Time: 2 hours 25 minutes to 2 hours 55 minutes
- Yield: 1 loaf 1x
Description
This honey oat bread loaf is a soft, slightly sweet, and incredibly satisfying bread that’s perfect for any time of day. It’s a simple pleasure that brings a touch of homemade warmth to your table, ideal for sandwiches, toast, or a comforting snack. This recipe is easy to bake and a great way to enjoy a wholesome treat.
Ingredients
Instructions
1. 1. Prepare the Oat Mixture: In a large mixing bowl, combine the rolled oats and warm water. Let this mixture sit for 5-10 minutes. This allows the oats to soften and absorb some of the water, contributing to the bread’s moist texture. The mixture should look slightly thickened.
2. 2. Activate the Yeast and Combine Wet Ingredients: To the oat mixture, add the honey, olive oil (or melted butter), and egg. Stir well to combine. Sprinkle the active dry yeast over the top of this mixture. Let it sit for another 5 minutes until the yeast becomes foamy, indicating it’s active and ready to work.
3. 3. Mix in Dry Ingredients: Add the salt and 3 1/2 cups of the all-purpose flour to the wet ingredients. Using a sturdy spoon or a stand mixer with a dough hook, mix until a shaggy dough forms. If the dough is too sticky, add the remaining 1/2 cup of flour, a little at a time, until the dough comes together and is manageable, but still slightly tacky. Avoid adding too much flour, as this can result in a dry loaf.
4. 4. Knead the Dough: Turn the dough out onto a lightly floured surface. Knead for 6-8 minutes until the dough is smooth and elastic. If using a stand mixer, knead with the dough hook for 5-7 minutes. The dough should spring back when lightly poked.
5. 5. First Rise (Bulk Fermentation): Lightly grease a clean large bowl with a little oil. Place the kneaded dough in the bowl, turning it once to coat the top. Cover the bowl with plastic wrap or a clean kitchen towel. Let it rise in a warm, draft-free place for 1 to 1 1/2 hours, or until it has doubled in size. This is a crucial step for developing flavor and texture.
6. 6. Shape and Second Rise: Gently punch down the risen dough to release the air. Turn it out onto a lightly floured surface and shape it into a loaf. Place the loaf into a lightly greased 9×5-inch loaf pan. Cover the pan loosely with plastic wrap or a kitchen towel and let it rise again in a warm place for 30-45 minutes, or until it has nearly doubled in size and looks puffy.
7. 7. Bake the Loaf: Preheat your oven to 375 F (190 C) during the last 15 minutes of the second rise. Once preheated, bake the bread for 35-40 minutes, or until the crust is golden brown and the internal temperature reaches 200-210 F (93-99 C) when checked with an instant-read thermometer. If the top is browning too quickly, you can loosely tent it with aluminum foil.
8. 8. Cool Completely: Once baked, immediately remove the loaf from the pan and place it on a wire rack to cool completely before slicing. Slicing warm bread can make it gummy and difficult to cut cleanly. Patience here will be rewarded!
- Prep Time: 20 minutes
- Cook Time: 35-40 minutes
- Category: bread
- Method: baking
- Cuisine: american
Nutrition
- Serving Size: 1 slice
Keywords: honey oat bread, homemade bread, oat bread, sweet bread, sandwich bread, easy bread, comfort food, baking, whole grain, breakfast bread
What You’ll Love About This Quick And Easy Recipe
This honey oat bread loaf recipe is a true gem for anyone who appreciates homemade goodness without the fuss. It’s perfect for busy parents, beginner bakers, or anyone craving a wholesome, comforting treat. The beauty of this recipe lies in its simplicity and the delicious results it delivers every time. You’ll love how quickly it comes together, making it an ideal choice for a weekend baking project or even a weeknight endeavor if you have a little extra time. It’s a fantastic way to introduce more oats into your diet, and the touch of honey adds a natural sweetness that appeals to everyone, even picky eaters. Serve it for breakfast alongside eggs, as part of a packed lunch, or as a delightful side with dinner. It’s a bread that truly tastes like a hug in every slice, providing that comforting, home-baked feeling that store-bought bread just can’t replicate.
Everything You Need To Make This Recipe Without Stress
Gathering your ingredients before you start baking is key to a smooth and enjoyable process. This recipe uses common pantry staples, so you likely have most of what you need already. The star ingredients are, of course, the oats and honey, which give this bread its signature flavor and texture. Don’t worry about needing any fancy equipment; a mixing bowl, a loaf pan, and an oven are all you’ll require.
INGREDIENTS:

- 1 cup rolled oats (old-fashioned oats)
- 1 3/4 cups warm water (105-115°F)
- 1/2 cup honey
- 1/4 cup olive oil or melted unsalted butter
- 1 large egg
- 2 1/2 teaspoons active dry yeast
- 1 teaspoon salt
- 3 1/2 to 4 cups all-purpose flour, plus more for dusting
For the rolled oats, make sure you’re using old-fashioned oats, not instant or steel-cut, as they absorb liquid differently and contribute to the bread’s texture. The warm water is crucial for activating the yeast, so ensure it’s not too hot (which can kill the yeast) or too cold (which won’t activate it). You can use either olive oil for a slightly more savory loaf or melted unsalted butter for a richer flavor; both work wonderfully. When it comes to flour, all-purpose flour is perfect here. If you prefer, you can substitute up to half of the all-purpose flour with whole wheat flour for an even heartier, nuttier loaf, though this might make the bread a bit denser. Always measure your flour by spooning it into the measuring cup and then leveling it off, rather than scooping directly from the bag, to avoid adding too much.
Time Needed From Start To Finish
Baking this honey oat bread loaf is a rewarding process that doesn’t demand an entire day in the kitchen. It’s designed to fit into a busy schedule, offering a homemade treat without the extensive time commitment often associated with bread making.
- Preparation Time: 20 minutes
- Rise Time: 1 hour to 1 hour 30 minutes (first rise) + 30-45 minutes (second rise)
- Baking Time: 35-40 minutes
- Total Time: Approximately 2 hours 25 minutes to 2 hours 55 minutes
This timeline includes the crucial rising periods, which are mostly hands-off. The active preparation time is quite minimal, allowing you to get the dough ready and then let it do its thing while you attend to other tasks. The baking time is also relatively short, meaning you’ll have a warm, fragrant loaf ready to enjoy in just a few hours.
How To Make It Step By Step With Visual Cues

Making this honey oat bread is a straightforward process, even for novice bakers. Follow these steps carefully, and you’ll have a beautiful, comforting loaf in no time.
- Prepare the Oat Mixture: In a large mixing bowl, combine the rolled oats and warm water. Let this mixture sit for 5-10 minutes. This allows the oats to soften and absorb some of the water, contributing to the bread’s moist texture. The mixture should look slightly thickened.
- Activate the Yeast and Combine Wet Ingredients: To the oat mixture, add the honey, olive oil (or melted butter), and egg. Stir well to combine. Sprinkle the active dry yeast over the top of this mixture. Let it sit for another 5 minutes until the yeast becomes foamy, indicating it’s active and ready to work.
- Mix in Dry Ingredients: Add the salt and 3 1/2 cups of the all-purpose flour to the wet ingredients. Using a sturdy spoon or a stand mixer with a dough hook, mix until a shaggy dough forms. If the dough is too sticky, add the remaining 1/2 cup of flour, a little at a time, until the dough comes together and is manageable, but still slightly tacky. Avoid adding too much flour, as this can result in a dry loaf.
- Knead the Dough: Turn the dough out onto a lightly floured surface. Knead for 6-8 minutes until the dough is smooth and elastic. If using a stand mixer, knead with the dough hook for 5-7 minutes. The dough should spring back when lightly poked.
- First Rise (Bulk Fermentation): Lightly grease a clean large bowl with a little oil. Place the kneaded dough in the bowl, turning it once to coat the top. Cover the bowl with plastic wrap or a clean kitchen towel. Let it rise in a warm, draft-free place for 1 to 1 1/2 hours, or until it has doubled in size. This is a crucial step for developing flavor and texture.
- Shape and Second Rise: Gently punch down the risen dough to release the air. Turn it out onto a lightly floured surface and shape it into a loaf. Place the loaf into a lightly greased 9×5-inch loaf pan. Cover the pan loosely with plastic wrap or a kitchen towel and let it rise again in a warm place for 30-45 minutes, or until it has nearly doubled in size and looks puffy.
- Bake the Loaf: Preheat your oven to 375°F (190°C) during the last 15 minutes of the second rise. Once preheated, bake the bread for 35-40 minutes, or until the crust is golden brown and the internal temperature reaches 200-210°F (93-99°C) when checked with an instant-read thermometer. If the top is browning too quickly, you can loosely tent it with aluminum foil.
- Cool Completely: Once baked, immediately remove the loaf from the pan and place it on a wire rack to cool completely before slicing. Slicing warm bread can make it gummy and difficult to cut cleanly. Patience here will be rewarded!
Easy Variations And Serving Ideas That Fit Real Life
This honey oat bread loaf is fantastic on its own, but it also lends itself beautifully to various simple variations and serving ideas that can make it even more enjoyable for your family.
For a little extra texture and flavor, consider sprinkling a tablespoon of rolled oats on top of the loaf before the second rise. This adds a rustic look and a delightful chewiness to the crust. If you’re a fan of nuts, you could fold in 1/2 cup of chopped walnuts or pecans during the kneading stage for a nutty crunch. For a slightly sweeter, fruitier twist, dried cranberries or raisins (1/2 cup) can be added at the same stage.
This bread is incredibly versatile for serving. For breakfast, toast a slice and spread it with cream cheese, almond butter, or a dollop of your favorite fruit jam. It also makes an excellent base for a hearty breakfast sandwich with eggs and bacon. For lunch, skip the plain white bread and use this honey oat loaf for your favorite sandwiches – turkey and provolone, ham and swiss, or even a simple peanut butter and jelly get an upgrade. Kids especially love it with a smear of honey butter or a drizzle of extra honey.
At dinner, serve warm slices alongside a comforting bowl of soup or a hearty stew. It’s also wonderful as a side with a simple salad. For an afternoon snack, a slice with a cup of tea or coffee is pure comfort. You can even make mini open-faced appetizers by toasting small rounds, spreading with goat cheese, and topping with a fig jam or a sprinkle of fresh herbs

FAQs
- Can I make these ahead? Yes—prep ahead, refrigerate, then serve when ready.
- How long do leftovers last? Store covered in the fridge for 3–4 days for best texture.
- Can I adjust sweetness? Yes—add more or less sweetener to taste.
- Can I change the fruit? Yes—swap strawberries for blueberries, raspberries, or sliced banana.