There’s something incredibly satisfying about the aroma of freshly baked bread filling your kitchen, especially when it’s a wholesome loaf you’ve made yourself.

This honey whole grain sourdough bread recipe brings that comforting experience right to your home, offering a delicious and nutritious option for sandwiches, toast, or simply enjoyed with a pat of butter.
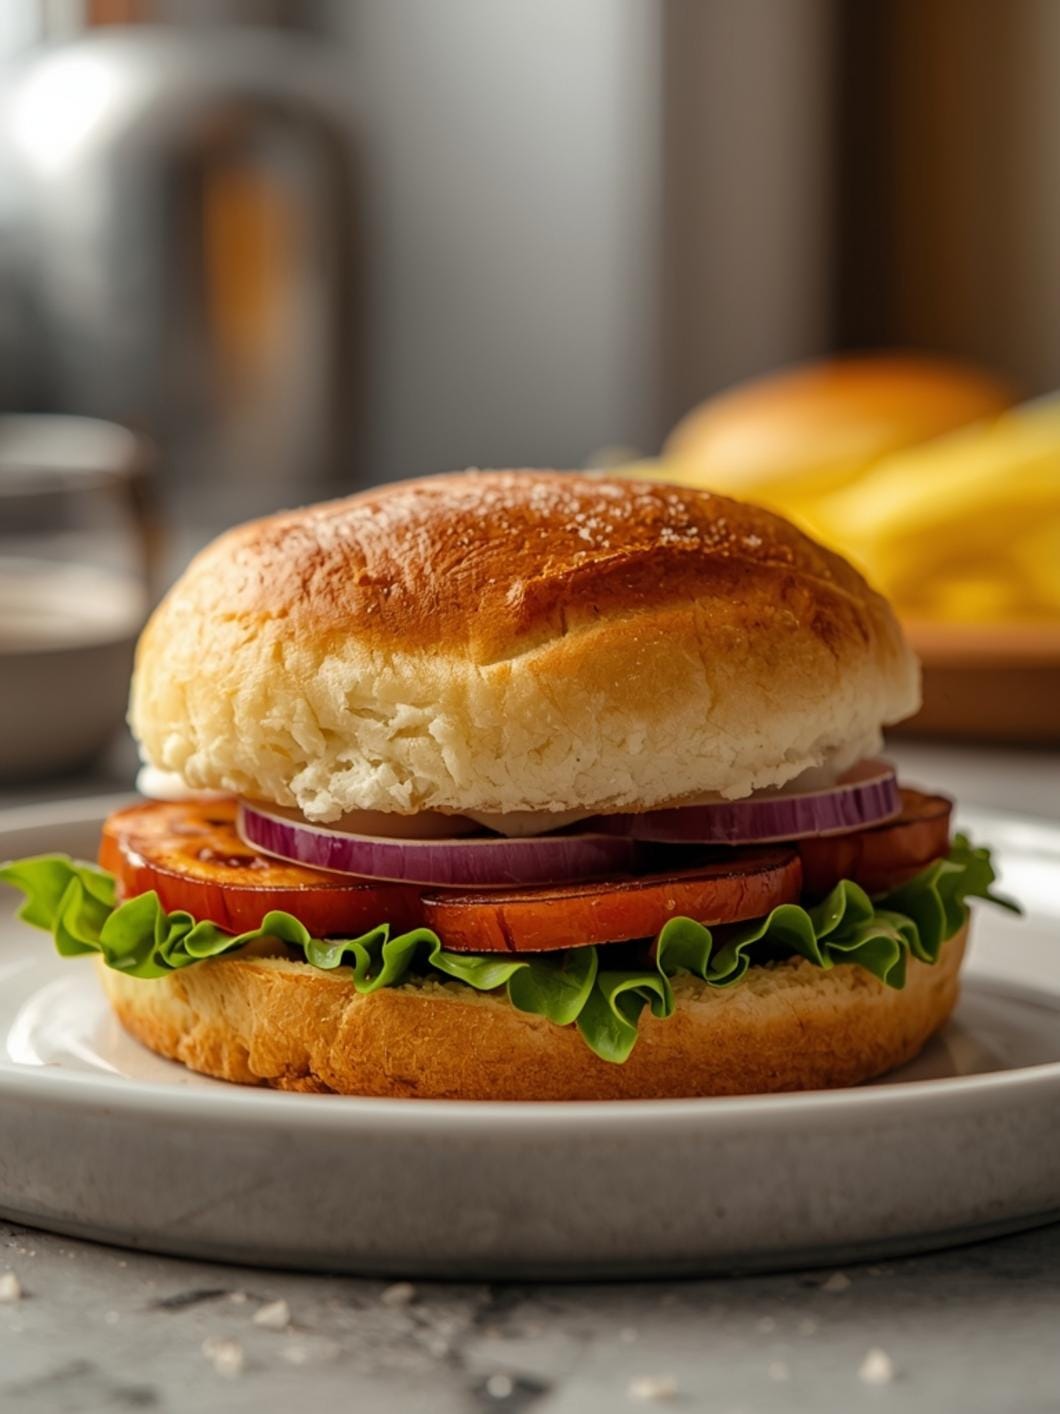
This recipe focuses on creating a beautifully balanced loaf with the earthy goodness of whole wheat and a subtle sweetness from honey, all while harnessing the unique tang and texture that only sourdough can provide. It’s a truly rewarding bake that delivers on flavor and satisfaction.

Honey Whole Grain Sourdough Bread
- Total Time: 16-24 hours
- Yield: 1 loaf 1x
Description
This honey whole grain sourdough bread recipe offers a delicious and nutritious option for sandwiches, toast, or simply enjoyed with a pat of butter. It’s a beautifully balanced loaf with the earthy goodness of whole wheat and a subtle sweetness from honey, all while harnessing the unique tang and texture that only sourdough can provide. It’s designed to be approachable for beginners, yet yields a loaf that even experienced bakers will appreciate.
Ingredients
Instructions
1. 1. Combine Starter, Water, and Honey: In a large mixing bowl, gently whisk together the active sourdough starter, warm water, and honey until the honey is fully dissolved and the mixture is well combined. This initial step ensures an even distribution of sweetness and activates your starter.
2. 2. Mix in Flours and Salt: Add the whole wheat flour, bread flour, and fine sea salt to the wet ingredients. Use a sturdy spoon or your hands to mix until no dry flour remains and a shaggy dough forms. It will be sticky at this stage. Cover the bowl with a damp cloth or plastic wrap and let it rest for 30 minutes. This “autolyse” period allows the flour to fully hydrate.
3. 3. Perform Stretch and Folds: After the rest, begin the first set of stretch and folds. With wet hands, gently grab a portion of the dough from one side, stretch it upwards, and fold it over to the opposite side of the bowl. Rotate the bowl a quarter turn and repeat this process 3-4 more times, until you’ve worked your way around the dough. Cover and rest for 30 minutes. Repeat this stretch and fold process 3-4 more times over the next 2-3 hours, allowing 30 minutes of rest between each set. The dough will become smoother and more elastic with each set.
4. 4. Bulk Fermentation: After the last set of stretch and folds, cover the bowl and let the dough bulk ferment at room temperature (around 70-75 F / 21-24 C) for 6-8 hours, or until it has visibly increased in size by about 50-75% and appears bubbly. If your kitchen is cooler, this may take longer. Alternatively, you can place it in the refrigerator overnight for a slower, longer fermentation.
5. 5. Shape the Dough: Gently turn the dough out onto a lightly floured surface. Avoid deflating it too much. Gently pre-shape the dough into a round or oval, then let it rest for 20-30 minutes, uncovered. After resting, perform the final shaping. For a round loaf, gently pull the edges of the dough to the center, creating tension on the surface. For an oval, roll it gently into a log. Place the shaped dough seam-side up into a floured banneton (or a bowl lined with a floured tea towel).
6. 6. Cold Proofing: Cover the banneton with plastic wrap or a shower cap and place it in the refrigerator for 8-12 hours, or up to 24 hours. This cold proofing develops flavor and makes the dough easier to score.
7. 7. Baking the Bread: Preheat your oven to 450 F (232 C) with a Dutch oven inside for at least 30 minutes. Carefully remove the hot Dutch oven. Gently invert the cold dough into the Dutch oven. Score the top of the dough with a sharp knife or razor blade (a simple cross or a single slash works well). Cover the Dutch oven and bake for 30 minutes.
8. 8. Final Bake and Cool: Remove the lid from the Dutch oven and continue baking for another 10-15 minutes, or until the crust is a deep golden brown and the internal temperature reaches 200-210 F (93-99 C). Carefully remove the bread from the Dutch oven and transfer it to a wire rack to cool completely for at least 1-2 hours before slicing. Slicing too early can result in a gummy texture.
- Prep Time: 25 minutes
- Cook Time: 45 minutes
- Category: bread
- Method: baking
- Cuisine: american
Nutrition
- Serving Size: 1 slice
Keywords: sourdough, bread, whole grain, honey, homemade, baking, sandwich, toast, easy, nutritious
What You’ll Love About This Quick And Easy Recipe
This honey whole grain sourdough bread recipe is perfect for anyone looking to dive into the world of sourdough baking without feeling overwhelmed. It’s designed to be approachable for beginners, yet yields a loaf that even experienced bakers will appreciate. You’ll love the soft, tender crumb and the slightly chewy crust, a delightful contrast that makes every bite a pleasure. The addition of honey not only contributes a lovely sweetness but also helps to keep the bread moist and extends its shelf life naturally. This bread is fantastic for everyday meals, whether you’re making hearty sandwiches for school lunches, serving it alongside a warm bowl of soup for dinner, or toasting it up for a wholesome breakfast. It’s a versatile loaf that fits seamlessly into a busy family’s routine, proving that delicious, homemade whole grain bread is entirely achievable.
Everything You Need To Make This Recipe Without Stress
Gathering your ingredients before you begin is a great way to ensure a smooth baking process. This recipe uses common pantry staples, making it easy to whip up a delicious loaf without a special trip to the store. The quality of your ingredients, especially your sourdough starter, will significantly impact the final taste and texture of your bread, so choose wisely.
INGREDIENTS:

- 150 grams active sourdough starter (fed and bubbly)
- 350 grams warm water (around 90-95°F / 32-35°C)
- 50 grams honey
- 300 grams whole wheat flour
- 200 grams bread flour
- 10 grams fine sea salt
For the flours, using a good quality whole wheat flour will provide the best flavor and nutritional benefits. Bread flour is included to give the dough structure and a good chew, balancing the whole wheat. If you don’t have bread flour, you can use all-purpose flour, but your loaf might be slightly less chewy. For the honey, any local, good-quality honey will work beautifully, adding a natural sweetness and helping with the browning of the crust. Ensure your sourdough starter is active and bubbly; this is crucial for a good rise. If your starter isn’t quite ready, give it a few more hours after feeding until it’s at its peak.
Time Needed From Start To Finish
Understanding the timeline for sourdough baking is key to fitting it into your schedule. While the active hands-on time for this honey whole grain sourdough bread is quite minimal, the fermentation process requires patience.
- Active Preparation Time: 20-25 minutes (mixing, initial folds)
- Bulk Fermentation Time: 6-8 hours (or overnight in a cooler spot)
- Proofing Time (Cold Fermentation): 8-12 hours (or up to 24 hours in the refrigerator)
- Baking Time: 40-45 minutes
- Cooling Time: At least 1-2 hours (crucial for texture)
The total process, including the extended fermentation and proofing, spans roughly 16-24 hours, much of which is inactive waiting time. This makes it a perfect recipe to start in the evening and bake the next morning, or begin in the morning for an evening bake.
How To Make It Step By Step With Visual Cues

Creating a beautiful loaf of honey whole grain sourdough bread is a journey of simple steps, each contributing to the final delicious result. Follow these instructions carefully, paying attention to the feel of the dough.
- Combine Starter, Water, and Honey: In a large mixing bowl, gently whisk together the active sourdough starter, warm water, and honey until the honey is fully dissolved and the mixture is well combined. This initial step ensures an even distribution of sweetness and activates your starter.
- Mix in Flours and Salt: Add the whole wheat flour, bread flour, and fine sea salt to the wet ingredients. Use a sturdy spoon or your hands to mix until no dry flour remains and a shaggy dough forms. It will be sticky at this stage. Cover the bowl with a damp cloth or plastic wrap and let it rest for 30 minutes. This “autolyse” period allows the flour to fully hydrate.
- Perform Stretch and Folds: After the rest, begin the first set of stretch and folds. With wet hands, gently grab a portion of the dough from one side, stretch it upwards, and fold it over to the opposite side of the bowl. Rotate the bowl a quarter turn and repeat this process 3-4 more times, until you’ve worked your way around the dough. Cover and rest for 30 minutes. Repeat this stretch and fold process 3-4 more times over the next 2-3 hours, allowing 30 minutes of rest between each set. The dough will become smoother and more elastic with each set.
- Bulk Fermentation: After the last set of stretch and folds, cover the bowl and let the dough bulk ferment at room temperature (around 70-75°F / 21-24°C) for 6-8 hours, or until it has visibly increased in size by about 50-75% and appears bubbly. If your kitchen is cooler, this may take longer. Alternatively, you can place it in the refrigerator overnight for a slower, longer fermentation.
- Shape the Dough: Gently turn the dough out onto a lightly floured surface. Avoid deflating it too much. Gently pre-shape the dough into a round or oval, then let it rest for 20-30 minutes, uncovered. After resting, perform the final shaping. For a round loaf, gently pull the edges of the dough to the center, creating tension on the surface. For an oval, roll it gently into a log. Place the shaped dough seam-side up into a floured banneton (or a bowl lined with a floured tea towel).
- Cold Proofing: Cover the banneton with plastic wrap or a shower cap and place it in the refrigerator for 8-12 hours, or up to 24 hours. This cold proofing develops flavor and makes the dough easier to score.
- Baking the Bread: Preheat your oven to 450°F (232°C) with a Dutch oven inside for at least 30 minutes. Carefully remove the hot Dutch oven. Gently invert the cold dough into the Dutch oven. Score the top of the dough with a sharp knife or razor blade (a simple cross or a single slash works well). Cover the Dutch oven and bake for 30 minutes.
- Final Bake and Cool: Remove the lid from the Dutch oven and continue baking for another 10-15 minutes, or until the crust is a deep golden brown and the internal temperature reaches 200-210°F (93-99°C). Carefully remove the bread from the Dutch oven and transfer it to a wire rack to cool completely for at least 1-2 hours before slicing. Slicing too early can result in a gummy texture.
Easy Variations And Serving Ideas That Fit Real Life
This honey whole grain sourdough bread is wonderfully versatile, making it easy to adapt for different tastes and occasions. For a heartier texture, you can add 1/4 cup of mixed seeds (like sunflower, pumpkin, or flax) during the initial mixing stage. If you prefer a slightly sweeter loaf, increase the honey by another 10-15 grams. For a subtle nutty flavor, replace 50 grams of the whole wheat flour with rye flour.
This bread is fantastic for everyday meals. Serve thick slices alongside a hearty bowl of chili or lentil soup. It makes incredible grilled cheese sandwiches, especially with a sharp cheddar. For breakfast, toast it and spread with avocado, a fried egg, or your favorite jam. It’s also perfect for a simple snack with just a smear of butter. For a more elegant presentation, slice it thinly and serve with a cheese board, offering a balance to richer cheeses. Kids often love this bread toasted with a little butter and a drizzle of extra honey, or as the base for mini pizzas with tomato sauce and mozzarella.
Common Slip-Ups And How To Avoid Them
Even experienced bakers encounter challenges, and sourdough can sometimes feel a bit finicky. Knowing common pitfalls can help you avoid them and achieve a successful loaf.
- Inactive Starter: The most common issue is using a starter that isn’t active enough. An active starter should be fed 4-12 hours before use, doubling in size, and showing lots of bubbles. If it’s sluggish, feed it again and wait. An inactive starter will lead to a dense, flat loaf.
- Under-Proofed Dough: If your dough hasn’t risen enough

FAQs
- Can I make these ahead? Yes—prep ahead, refrigerate, then serve when ready.
- How long do leftovers last? Store covered in the fridge for 3–4 days for best texture.
- Can I adjust sweetness? Yes—add more or less sweetener to taste.
- Can I change the fruit? Yes—swap strawberries for blueberries, raspberries, or sliced banana.