Get ready to bake up something truly special with this low-sugar cinnamon pear sourdough bread recipe.
 11")
It’s a delightful twist on classic sourdough, infusing warm maple and cinnamon flavors with the subtle sweetness of pear. This recipe is designed to be approachable and rewarding, even if you’re new to sourdough baking.
Perfect for a cozy morning breakfast or an afternoon treat with your favorite hot beverage, this bread offers a comforting aroma and a taste that will make your kitchen feel like home. We’ll guide you through each step to ensure a delicious loaf every time.
 12")
Low-Sugar Cinnamon Pear Sourdough Bread
- Total Time: 8 hours
- Yield: 1 loaf 1x
Description
Bake a delightful low-sugar cinnamon pear sourdough bread, a comforting twist on classic sourdough with warm maple and cinnamon flavors and the subtle sweetness of pear. This approachable recipe is perfect for a cozy breakfast or afternoon treat, guiding you to a delicious loaf every time.
Ingredients
Instructions
1. Combine Wet Ingredients: In a large mixing bowl, gently whisk together the active sourdough starter, warm water, and maple syrup until well combined. The mixture should look milky and slightly frothy.
2. Add Dry Ingredients: To the wet mixture, add the bread flour, sea salt, ground cinnamon, and ground nutmeg. Use a sturdy spoon or your hands to mix until all the flour is hydrated and a shaggy dough forms. There’s no need to knead extensively at this stage; just ensure no dry pockets of flour remain.
3. First Fermentation (Bulk Rise): Cover the bowl with a damp cloth or plastic wrap and let it rest at room temperature for 30 minutes. After this rest, perform your first set of “stretch and folds.” To do this, grab a portion of the dough from one side, stretch it upwards, and fold it over itself towards the center. Rotate the bowl a quarter turn and repeat this process 3-4 more times until you’ve worked your way around the dough. Repeat these stretch and folds every 30 minutes for the first 2 hours of the bulk fermentation. After the initial 2 hours, let the dough continue to ferment undisturbed for another 2-4 hours, or until it has increased in volume by about 30-50% and appears bubbly and alive. The exact time will depend on your kitchen’s temperature and your starter’s strength.
4. Incorporate Pear and Pecans: Gently turn the dough out onto a lightly floured surface. Flatten it slightly into a rough rectangle. Evenly sprinkle the diced pear and chopped pecans over the surface of the dough. Gently fold the dough over itself a few times to incorporate the additions without overworking it.
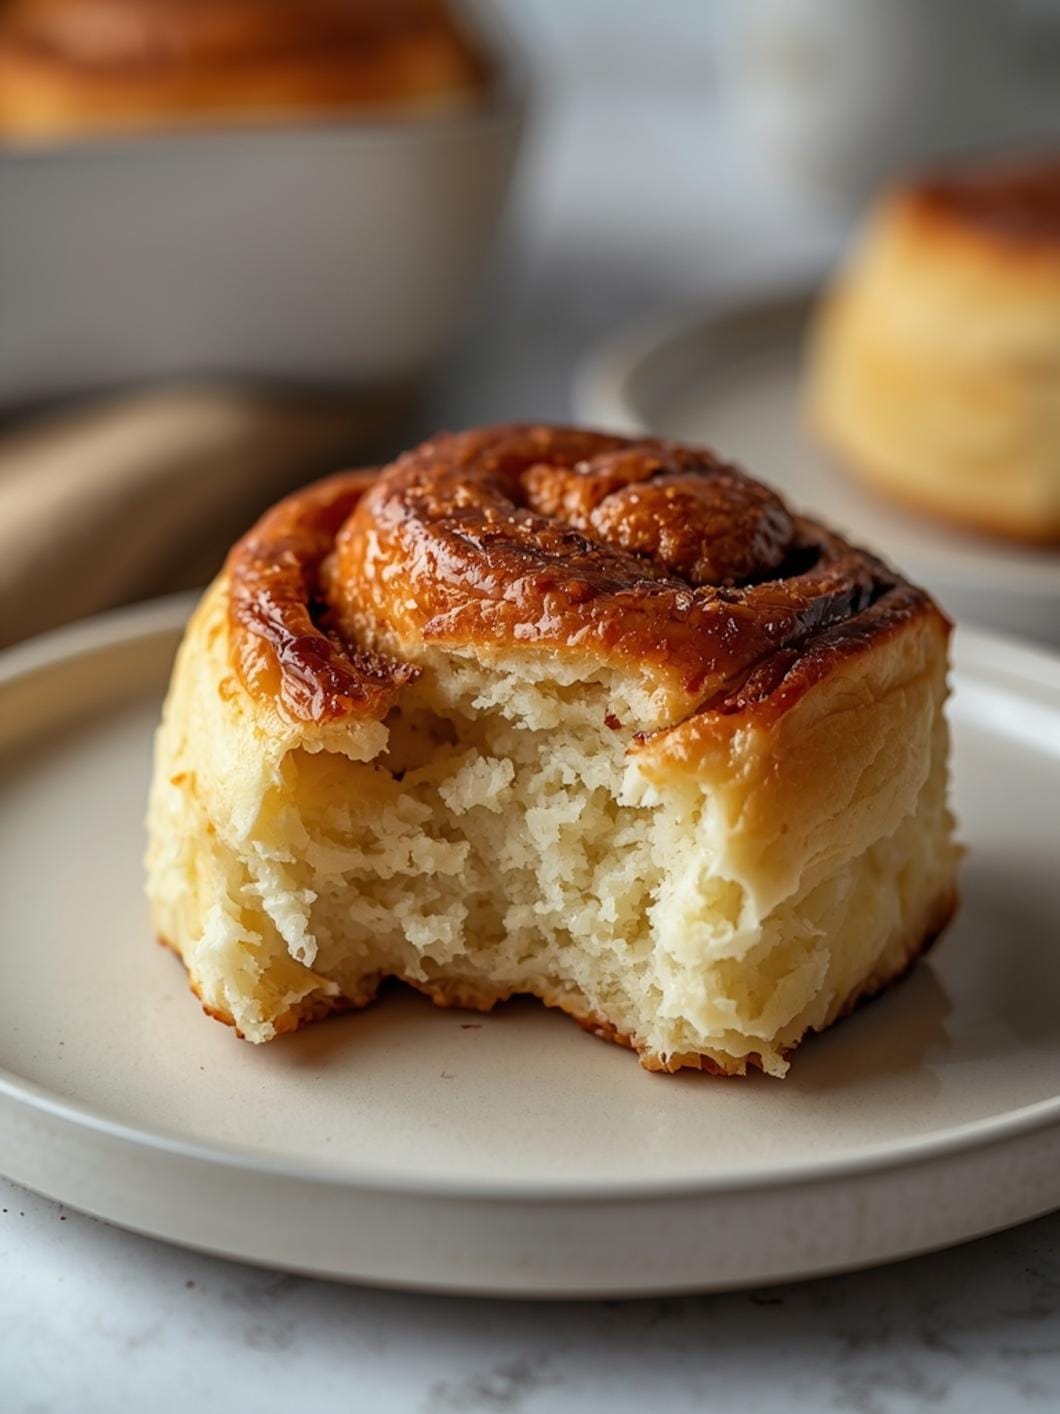
5. Shape the Loaf: Lightly flour your hands and gently shape the dough into a round or oval loaf. Try to create some surface tension by pulling the edges of the dough underneath itself to form a taut skin on top.
6. Second Fermentation (Proofing): Place the shaped dough seam-side up into a floured banneton basket or a bowl lined with a floured kitchen towel. Cover it and let it proof at room temperature for 1-2 hours, or until it feels light and slightly puffy to the touch. Alternatively, you can cold proof it in the refrigerator overnight for a deeper flavor development, which can extend the total recipe time but is worth it for convenience and taste.
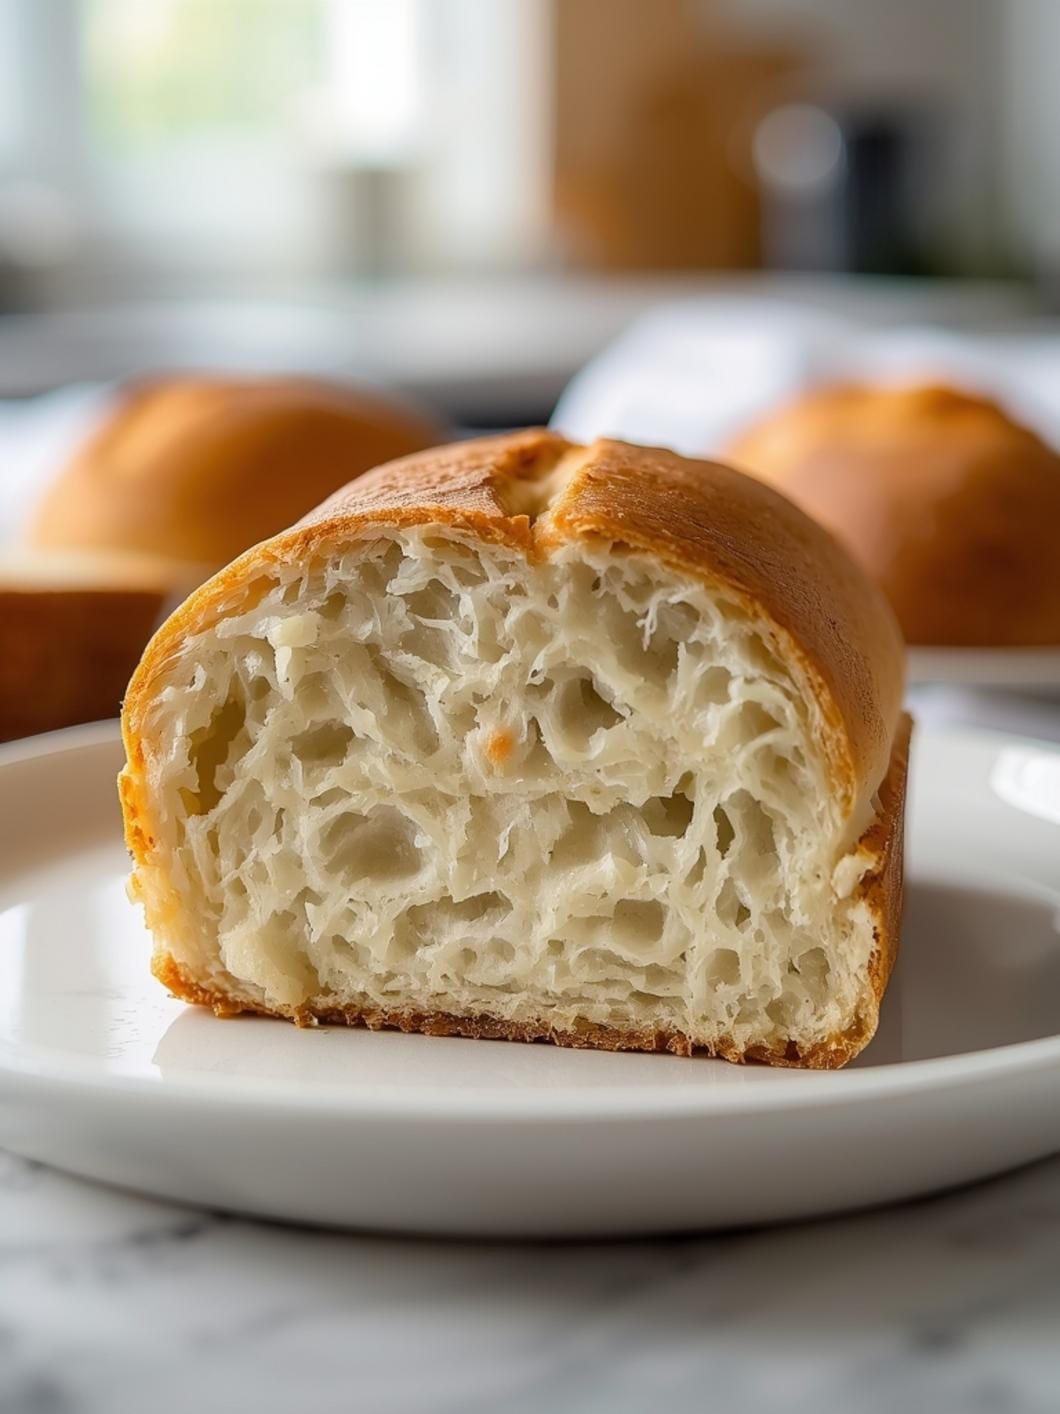
7. Preheat Oven and Bake: About 30 minutes before baking, preheat your oven to 450 F (232 C) with a Dutch oven or heavy lidded pot inside. Carefully remove the hot Dutch oven from the oven. Gently invert the dough from the banneton into the hot Dutch oven. Score the top of the dough with a sharp knife or razor blade (a simple cross or a single slash works well). Cover the Dutch oven and bake for 30 minutes.
8. Final Baking: Remove the lid from the Dutch oven and continue to bake for another 10-15 minutes, or until the crust is deeply golden brown and the internal temperature reaches 200-210 F (93-99 C).
9. Cool Completely: Carefully remove the bread from the Dutch oven and transfer it to a wire rack to cool completely for at least 1 hour before slicing. This step is crucial for the internal structure and flavor to set properly.
- Prep Time: 20 minutes
- Cook Time: 40-45 minutes
- Category: bread
- Method: baking
- Cuisine: american
Nutrition
- Serving Size: 1 slice
Keywords: sourdough, bread, cinnamon, pear, low sugar, homemade, baking, comfort food, breakfast, snack
What You’ll Love About This Quick And Easy Recipe
This recipe is a true gem for anyone looking to enjoy the rich flavors of sourdough without an overly complicated process. It’s perfect for busy individuals and families who appreciate homemade baked goods but don’t have days to dedicate to complex bread making. The 8-hour timeline makes it manageable to fit into a weekend schedule, allowing you to start in the morning and have a freshly baked loaf by evening. The combination of maple, cinnamon, and pear creates a unique flavor profile that is both comforting and sophisticated, making it ideal for serving at brunch, alongside coffee, or as a delightful snack. It’s a wonderful way to introduce natural sweetness and a touch of fruit into your sourdough, appealing to those who prefer a lower sugar option.
Everything You Need To Make This Recipe Without Stress
Gathering your ingredients before you begin is the first step to a smooth baking experience. This list focuses on readily available items that will help you create a flavorful and tender loaf.
INGREDIENTS:
 13")
- 300 grams active sourdough starter
- 300 grams warm water (around 90-95°F)
- 10 grams maple syrup
- 500 grams bread flour
- 10 grams fine sea salt
- 2 teaspoons ground cinnamon
- 1/2 teaspoon ground nutmeg
- 1 medium pear, peeled, cored, and diced into small pieces
- 1/2 cup chopped pecans (optional, for added crunch)
- Olive oil or non-stick spray for the bowl
For the sourdough starter, ensure it’s active and bubbly. If you don’t have an active starter, you’ll need to feed it 4-6 hours before you plan to mix your dough. For the maple syrup, a good quality pure maple syrup will provide the best flavor. When selecting your pear, a firm but ripe variety like Bosc or Anjou works well, as they hold their shape during baking. If you prefer, you can omit the pecans or substitute them with walnuts for a different nutty flavor. For the flour, bread flour is recommended for its higher protein content, which contributes to a chewier crumb, but all-purpose flour can be used in a pinch, though the texture may be slightly different.
Time Needed From Start To Finish
This recipe is designed to be achievable within a single day, making it a great option for weekend baking. The active hands-on time is relatively short, with most of the duration dedicated to the natural fermentation process.
Preparation Time: 20 minutes (includes mixing dough, dicing pear, and chopping pecans) Bulk Fermentation Time: 4-6 hours (depending on ambient temperature and starter activity) Shaping and Proofing Time: 1-2 hours Baking Time: 40-45 minutes Cooling Time: 1 hour Total Estimated Time: 8 hours
How To Make It Step By Step With Visual Cues
 14")
Following these steps will guide you to a perfectly baked loaf of low-sugar cinnamon pear sourdough bread. Pay attention to the visual cues to ensure success.
- Combine Wet Ingredients: In a large mixing bowl, gently whisk together the active sourdough starter, warm water, and maple syrup until well combined. The mixture should look milky and slightly frothy.
- Add Dry Ingredients: To the wet mixture, add the bread flour, sea salt, ground cinnamon, and ground nutmeg. Use a sturdy spoon or your hands to mix until all the flour is hydrated and a shaggy dough forms. There’s no need to knead extensively at this stage; just ensure no dry pockets of flour remain.
- First Fermentation (Bulk Rise): Cover the bowl with a damp cloth or plastic wrap and let it rest at room temperature for 30 minutes. After this rest, perform your first set of “stretch and folds.” To do this, grab a portion of the dough from one side, stretch it upwards, and fold it over itself towards the center. Rotate the bowl a quarter turn and repeat this process 3-4 more times until you’ve worked your way around the dough. Repeat these stretch and folds every 30 minutes for the first 2 hours of the bulk fermentation. After the initial 2 hours, let the dough continue to ferment undisturbed for another 2-4 hours, or until it has increased in volume by about 30-50% and appears bubbly and alive. The exact time will depend on your kitchen’s temperature and your starter’s strength.
- Incorporate Pear and Pecans: Gently turn the dough out onto a lightly floured surface. Flatten it slightly into a rough rectangle. Evenly sprinkle the diced pear and chopped pecans over the surface of the dough. Gently fold the dough over itself a few times to incorporate the additions without overworking it.
- Shape the Loaf: Lightly flour your hands and gently shape the dough into a round or oval loaf. Try to create some surface tension by pulling the edges of the dough underneath itself to form a taut skin on top.
- Second Fermentation (Proofing): Place the shaped dough seam-side up into a floured banneton basket or a bowl lined with a floured kitchen towel. Cover it and let it proof at room temperature for 1-2 hours, or until it feels light and slightly puffy to the touch. Alternatively, you can cold proof it in the refrigerator overnight for a deeper flavor development, which can extend the total recipe time but is worth it for convenience and taste.
- Preheat Oven and Bake: About 30 minutes before baking, preheat your oven to 450°F (232°C) with a Dutch oven or heavy lidded pot inside. Carefully remove the hot Dutch oven from the oven. Gently invert the dough from the banneton into the hot Dutch oven. Score the top of the dough with a sharp knife or razor blade (a simple cross or a single slash works well). Cover the Dutch oven and bake for 30 minutes.
- Final Baking: Remove the lid from the Dutch oven and continue to bake for another 10-15 minutes, or until the crust is deeply golden brown and the internal temperature reaches 200-210°F (93-99°C).
- Cool Completely: Carefully remove the bread from the Dutch oven and transfer it to a wire rack to cool completely for at least 1 hour before slicing. This step is crucial for the internal structure and flavor to set properly.
Easy Variations And Serving Ideas That Fit Real Life
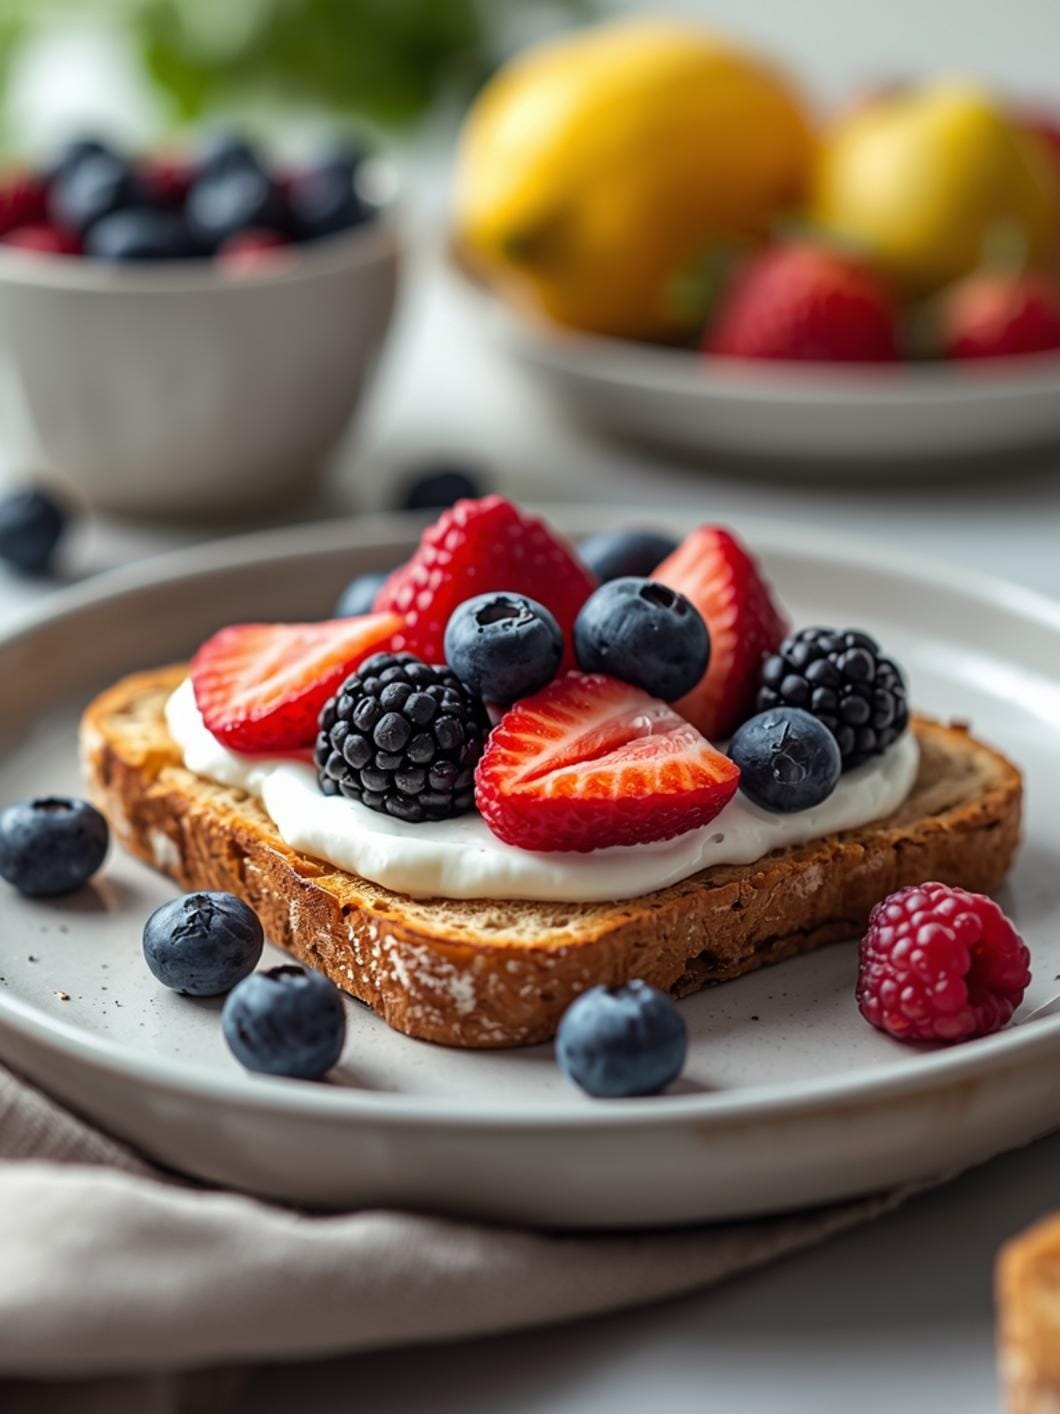
This cinnamon pear sourdough bread is wonderfully versatile and can be enjoyed in many ways. For a simple breakfast, slice it thick and toast it lightly, then spread with a touch of butter or cream cheese. It also makes a fantastic base for an open-faced sandwich with a smear of ricotta and a drizzle of honey.
To make it even more kid-friendly, you can reduce the amount of cinnamon slightly and ensure the pear pieces are very small. Kids often enjoy it simply toasted with a little jam. For a delightful dessert, serve warm slices with a scoop of vanilla bean ice cream or a dollop of whipped cream.
Consider swapping the pear for diced apple in the fall, or even dried cranberries for a festive touch. If you’re not a fan of pecans, walnuts or even a mix of seeds like sunflower or pumpkin seeds can add a different texture. This bread is also excellent for a brunch buffet; slice it and arrange it on a platter with various spreads like apple butter, nut butter, or a simple fruit compote.
Common Slip-Ups And How To Avoid Them
Even experienced bakers can encounter minor issues, but knowing how to prevent them can save your loaf. One common mistake is not using an active enough sourdough starter. If your starter isn’t bubbly and doubling in size after feeding, it won’t have the strength to properly leaven your bread, resulting in a dense loaf. Always check your starter’s activity before beginning.
Another frequent error is under-proofing or over-proofing the dough. Under-proofed dough will be dense and have a tight crumb, while over-proofed dough might collapse in the oven and have a very open, irregular structure. Pay attention to the visual cues: the dough should look noticeably increased in volume and feel light and airy. If you gently poke it with a floured finger, it should spring back slowly but not completely.
Not allowing the bread to cool completely before slicing is another common slip-up. While it’s tempting to cut into a warm loaf, cooling allows the internal starches to set, resulting in a better texture and flavor. Slicing too early can lead to a gummy interior. Patience is key for the best results!
Finally, ensure your oven is properly preheated, especially the Dutch oven. A hot Dutch oven
 15")
FAQs
- Can I make these ahead? Yes—prep ahead, refrigerate, then serve when ready.
- How long do leftovers last? Store covered in the fridge for 3–4 days for best texture.
- Can I adjust sweetness? Yes—add more or less sweetener to taste.
- Can I change the fruit? Yes—swap strawberries for blueberries, raspberries, or sliced banana.