Achieving a strong gluten structure in einkorn sourdough can feel like a delicate dance, but it’s entirely within reach with the right approach.

Unlike modern wheat, einkorn has a different gluten composition, which means traditional kneading methods don’t always yield the desired results. This guide focuses on practical techniques to help you coax the best out of your einkorn flour, leading to a beautifully risen loaf with an open, airy crumb.
We’ll explore gentle handling, strategic folds, and proper hydration to ensure your einkorn sourdough develops that robust structure necessary for a perfect bake. Get ready to transform your einkorn baking experience and enjoy consistently excellent loaves.

Einkorn Sourdough with Strong Gluten Structure
- Total Time: 16-24 hours
- Yield: 1 loaf 1x
Description
This guide focuses on practical techniques to help you coax the best out of your einkorn flour, leading to a beautifully risen loaf with an open, airy crumb. We’ll explore gentle handling, strategic folds, and proper hydration to ensure your einkorn sourdough develops that robust structure necessary for a perfect bake. Get ready to transform your einkorn baking experience and enjoy consistently excellent loaves.
Ingredients
Instructions
1. Combine Ingredients for Autolyse: In a large mixing bowl, combine the 350g einkorn flour with 280g warm water. Mix with your hands or a Danish dough whisk until no dry spots remain and a shaggy dough forms. Cover the bowl with a damp cloth or plastic wrap and let it rest for 30 minutes to 1 hour. This “autolyse” step allows the flour to fully hydrate, beginning the gluten development process. The dough will look somewhat rough and sticky at this stage.
2. Incorporate Starter and Salt: After the autolyse, add the 100g active einkorn sourdough starter and 7g fine sea salt to the dough. Using wet hands, gently squeeze and fold the starter and salt into the dough until fully incorporated. This might take a few minutes, and the dough will feel a bit messy. Continue until the salt is dissolved and the starter is evenly distributed.
3. Perform Initial Stretch and Folds (First Set): Let the dough rest for 30 minutes. Then, with wet hands, gently grab a portion of the dough from one side, stretch it upwards, and fold it over itself towards the center. Rotate the bowl a quarter turn and repeat this stretch and fold action three more times, completing one full round. The dough will start to feel slightly more cohesive.
4. Continue Stretch and Folds (Subsequent Sets): Cover the bowl and let the dough rest for another 30 minutes. Repeat the stretch and fold process (Step 3). Perform a total of 4-6 sets of stretch and folds, spaced 30-45 minutes apart, over the next 2-3 hours. As you progress, you’ll notice the dough becoming smoother, more elastic, and holding its shape better, indicating gluten development. It will feel less sticky and more manageable.
5. Bulk Fermentation: After the final set of folds, cover the bowl and let the dough continue to bulk ferment at room temperature (around 70-75 F) for an additional 3-5 hours, or until it has increased in volume by about 30-50% and shows signs of activity (small bubbles on the surface, jiggles when the bowl is gently shaken). The exact time will depend on your starter’s strength and ambient temperature.
6. Shape the Dough: Gently turn the dough out onto a lightly floured surface. Avoid deflating it too much. Perform a pre-shape by gently folding the edges towards the center to form a round or oval. Let it rest, uncovered, for 20-30 minutes. Then, perform the final shaping into your desired loaf shape (boule or batard). Place the shaped dough seam-side up into a floured banneton or a bowl lined with a floured cloth.
7. Cold Proofing: Cover the banneton with plastic wrap or a shower cap and refrigerate for 8-12 hours, or up to 24 hours. This cold proofing slows down fermentation, develops flavor, and makes the dough easier to handle for scoring.
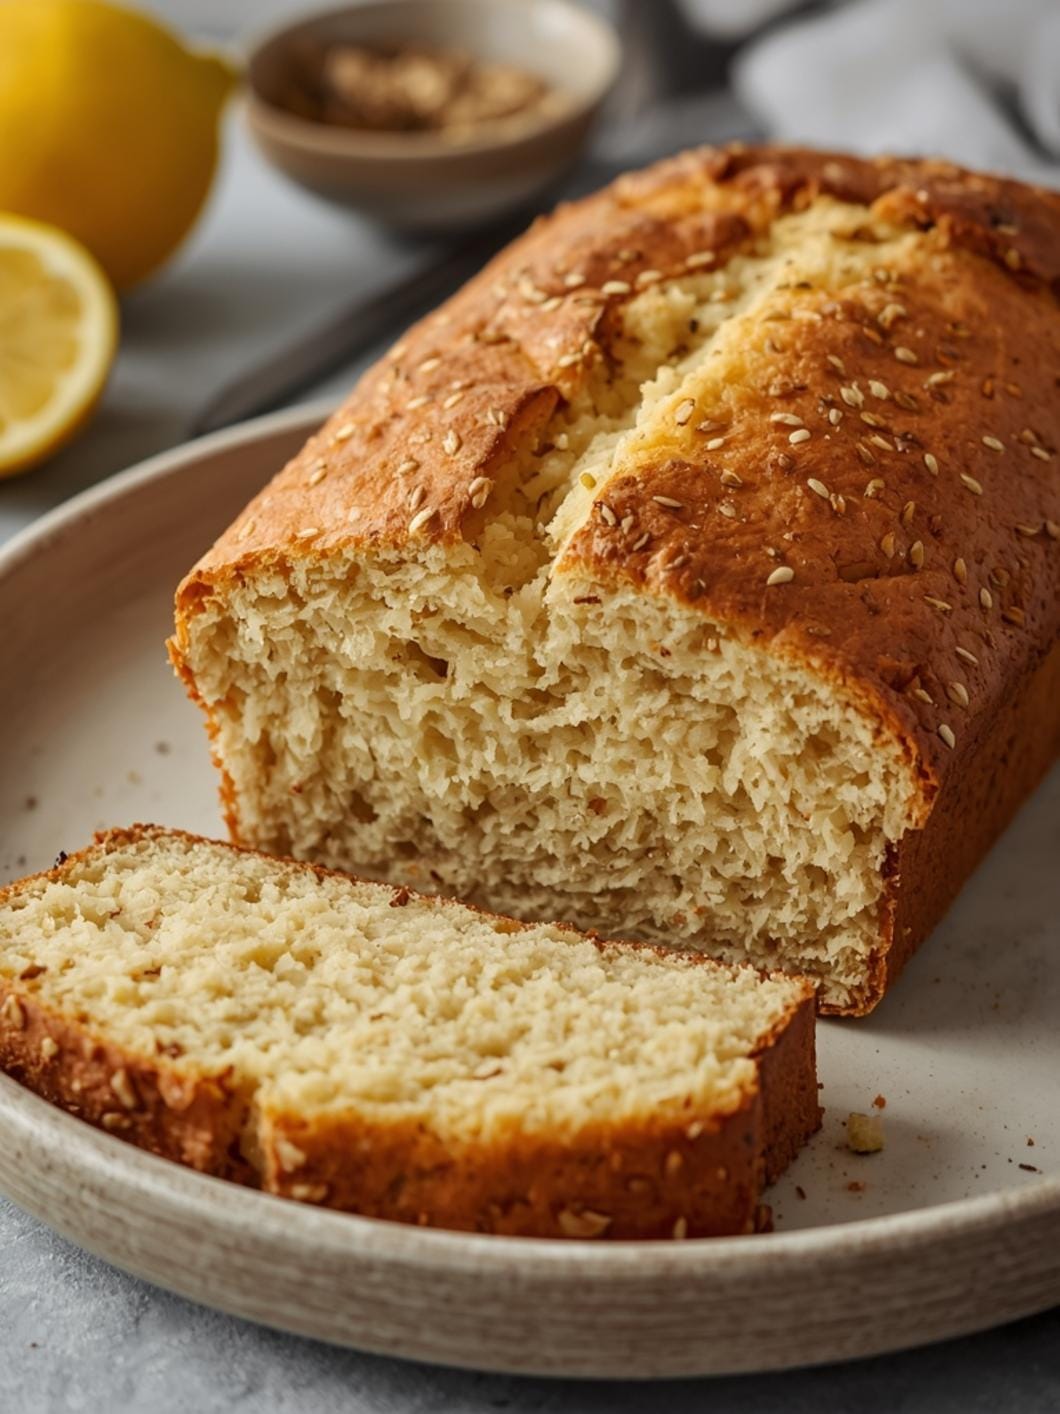
8. Bake the Loaf: Preheat your oven to 450 F (232 C) with a Dutch oven inside for at least 30 minutes. Carefully remove the hot Dutch oven, invert the cold dough into it, score the top with a sharp blade, and bake covered for 20 minutes. Then, remove the lid and continue baking for another 20-25 minutes, or until the crust is deeply golden brown and the internal temperature reaches 200-210 F (93-99 C). Allow the bread to cool completely on a wire rack for 1-2 hours before slicing to ensure the crumb fully sets.
- Prep Time: 15-20 minutes active
- Cook Time: 40-45 minutes
- Category: bread
- Method: baking
- Cuisine: european
Nutrition
- Serving Size: 1 slice
Keywords: einkorn, sourdough, bread, baking, gluten, fermentation, whole grain, homemade, artisan, ancient grain
What You’ll Love About This Quick And Easy Recipe
This recipe is designed for anyone who has struggled with einkorn sourdough or wants to improve their current results. You’ll love how it demystifies the process of building gluten in this ancient grain, making it accessible even for those new to einkorn baking. It’s perfect for home bakers looking to elevate their sourdough game, providing clear, actionable steps that lead to a more open crumb and better oven spring. This method is ideal for your regular baking routine, ensuring a delicious, wholesome loaf for sandwiches, toast, or alongside your favorite meals. It’s particularly satisfying when you want to impress with a homemade bread that boasts both incredible flavor and texture.
Everything You Need To Make This Recipe Without Stress
The key to developing strong gluten in einkorn sourdough lies in understanding its unique properties. You won’t find yourself needing any specialized equipment beyond your standard sourdough tools. The magic happens through technique and patience, not expensive gadgets.
INGREDIENTS:

- 100g active einkorn sourdough starter (fed and bubbly)
- 350g whole grain einkorn flour
- 280g warm water (around 90-95°F)
- 7g fine sea salt
For the einkorn flour, using a high-quality, fresh-milled variety can make a significant difference in both flavor and gluten development. While this recipe specifies whole grain einkorn, you can experiment with a blend of whole grain and sifted einkorn once you’re comfortable with the basic technique, adjusting hydration slightly as needed. Always use an active starter; a weak starter will hinder gluten development and rise. Fine sea salt is preferred for even distribution and flavor.
Time Needed From Start To Finish
The beauty of sourdough is that much of the time is hands-off, allowing the natural fermentation process to do its work. However, understanding the active time versus the waiting time is crucial for planning.
- Active Prep Time: 15-20 minutes (mixing, initial folds)
- Bulk Fermentation (including folds): 6-8 hours (depending on ambient temperature and starter activity)
- Cold Proofing: 8-12 hours (or up to 24 hours)
- Baking Time: 40-45 minutes
- Cooling Time: 1-2 hours (essential for final texture)
Total Time (Hands-on & Waiting): Approximately 16-24 hours, spread over two days.
How To Make It Step By Step With Visual Cues

Developing gluten in einkorn is about gentle handling and consistent folding rather than aggressive kneading. Follow these steps for a well-structured loaf.
- Combine Ingredients for Autolyse: In a large mixing bowl, combine the 350g einkorn flour with 280g warm water. Mix with your hands or a Danish dough whisk until no dry spots remain and a shaggy dough forms. Cover the bowl with a damp cloth or plastic wrap and let it rest for 30 minutes to 1 hour. This “autolyse” step allows the flour to fully hydrate, beginning the gluten development process. The dough will look somewhat rough and sticky at this stage.
- Incorporate Starter and Salt: After the autolyse, add the 100g active einkorn sourdough starter and 7g fine sea salt to the dough. Using wet hands, gently squeeze and fold the starter and salt into the dough until fully incorporated. This might take a few minutes, and the dough will feel a bit messy. Continue until the salt is dissolved and the starter is evenly distributed.
- Perform Initial Stretch and Folds (First Set): Let the dough rest for 30 minutes. Then, with wet hands, gently grab a portion of the dough from one side, stretch it upwards, and fold it over itself towards the center. Rotate the bowl a quarter turn and repeat this stretch and fold action three more times, completing one full round. The dough will start to feel slightly more cohesive.
- Continue Stretch and Folds (Subsequent Sets): Cover the bowl and let the dough rest for another 30 minutes. Repeat the stretch and fold process (Step 3). Perform a total of 4-6 sets of stretch and folds, spaced 30-45 minutes apart, over the next 2-3 hours. As you progress, you’ll notice the dough becoming smoother, more elastic, and holding its shape better, indicating gluten development. It will feel less sticky and more manageable.
- Bulk Fermentation: After the final set of folds, cover the bowl and let the dough continue to bulk ferment at room temperature (around 70-75°F) for an additional 3-5 hours, or until it has increased in volume by about 30-50% and shows signs of activity (small bubbles on the surface, jiggles when the bowl is gently shaken). The exact time will depend on your starter’s strength and ambient temperature.
- Shape the Dough: Gently turn the dough out onto a lightly floured surface. Avoid deflating it too much. Perform a pre-shape by gently folding the edges towards the center to form a round or oval. Let it rest, uncovered, for 20-30 minutes. Then, perform the final shaping into your desired loaf shape (boule or batard). Place the shaped dough seam-side up into a floured banneton or a bowl lined with a floured cloth.
- Cold Proofing: Cover the banneton with plastic wrap or a shower cap and refrigerate for 8-12 hours, or up to 24 hours. This cold proofing slows down fermentation, develops flavor, and makes the dough easier to handle for scoring.
- Bake the Loaf: Preheat your oven to 450°F (232°C) with a Dutch oven inside for at least 30 minutes. Carefully remove the hot Dutch oven, invert the cold dough into it, score the top with a sharp blade, and bake covered for 20 minutes. Then, remove the lid and continue baking for another 20-25 minutes, or until the crust is deeply golden brown and the internal temperature reaches 200-210°F (93-99°C). Allow the bread to cool completely on a wire rack for 1-2 hours before slicing to ensure the crumb fully sets.
Easy Variations And Serving Ideas That Fit Real Life
Once you master the basic einkorn sourdough, the possibilities for variations are endless. For a subtle flavor enhancement, try adding 1-2 tablespoons of sesame seeds or poppy seeds to the dough during the initial mixing stage. You could also incorporate dried herbs like rosemary or thyme for an aromatic loaf that pairs wonderfully with savory dishes. For a touch of sweetness, a handful of dried cranberries or chopped walnuts can be added during the shaping phase, creating a delicious breakfast or snack bread.
This einkorn sourdough is incredibly versatile. Serve it simply with good quality olive oil and balsamic vinegar for dipping, or as the foundation for gourmet sandwiches. It makes exceptional toast, especially when topped with avocado, a fried egg, or your favorite jam. For a hearty meal, use thick slices to sop up stews or soups. It’s also fantastic when served alongside a cheese board, complementing both mild and strong cheeses beautifully.
Common Slip-Ups And How To Avoid Them
Even experienced bakers can encounter challenges with einkorn due to its unique gluten structure. Here are some common pitfalls and how to steer clear of them:
- Over-kneading or Aggressive Handling: Unlike modern wheat, einkorn gluten is more delicate. Over-kneading can actually break down the gluten instead of building it, leading to a dense, gummy crumb. The solution is to rely on gentle stretch and folds, allowing time and hydration to do the work. Always use wet hands to prevent sticking and minimize tearing the dough.
- Insufficient Hydration: Einkorn flour can be quite thirsty. If your dough feels too stiff or doesn’t develop elasticity, it might be under-hydrated. Ensure you’re using the specified water amount, and don’t be afraid to add a tiny bit more (a tablespoon at a time) if your flour seems particularly dry. A well-hydrated dough is crucial for good gluten development.
- Weak Starter: An inactive or weak starter won’t provide the necessary lift or fermentation power, resulting in a flat, dense loaf. Always use a starter that has been fed recently and is visibly bubbly and active, ideally doubling in size

FAQs
- Can I make these ahead? Yes—prep ahead, refrigerate, then serve when ready.
- How long do leftovers last? Store covered in the fridge for 3–4 days for best texture.
- Can I adjust sweetness? Yes—add more or less sweetener to taste.
- Can I change the fruit? Yes—swap strawberries for blueberries, raspberries, or sliced banana.